 Every smartphone has built in map software, and designers are sure to need GPS map vector icons. So, In this beginner/intermediate Illustrator tutorial, I will show you how to create a stylized GPS icon using simple shapes and gradients. Using these basic techniques, you can easily create other icons, logos, and illustrations.
Final Image: GPS Map Vector
Check out the final image below. This will give you an idea of what we will be working towards.
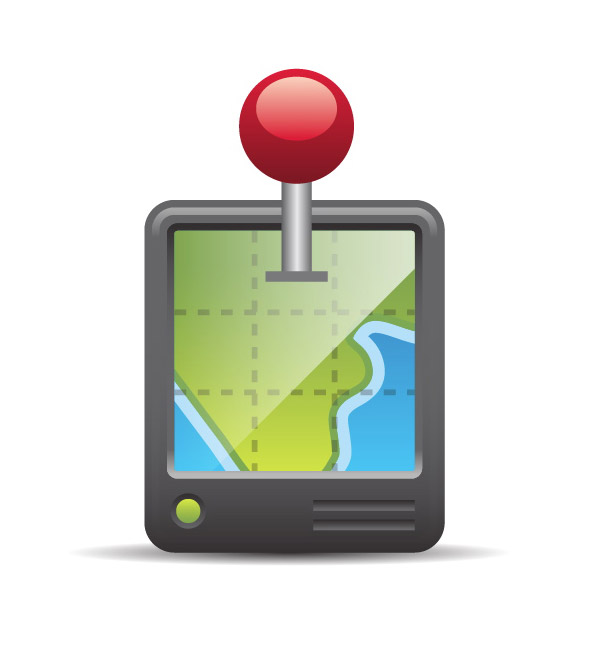
Tutorial Details: GPS Map Vector
- Program: Adobe Illustrator CS4
- Difficulty: Beginner / Intermediate
- Estimated Completion Time: 30 minutes
Step 1: GPS Map Vector
To begin this GPS map vector tutorial, in a new document, create a 200 px wide by 235 px tall rectangle with the Rectangle tool (M).
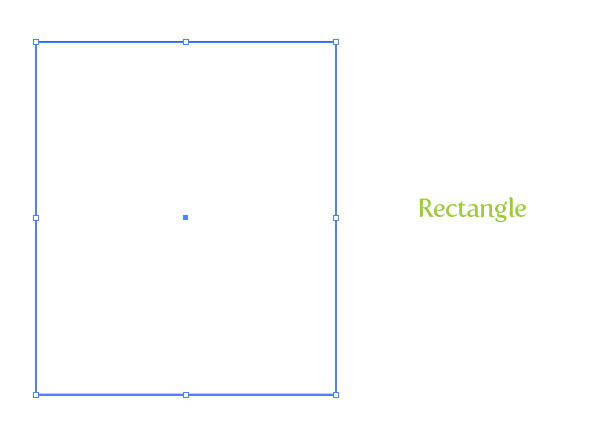
Step 2
With the rectangle selected, go Effect > Stylize > Round Corners. In the Round Corners dialog, change the Radius to 20 px.
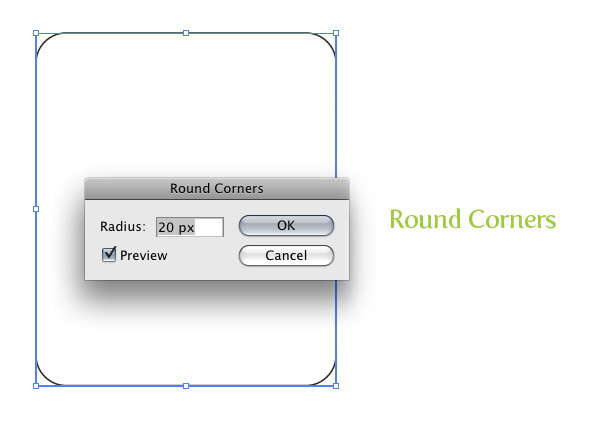
Step 3
Fill the rectangle with a linear gradient from the Gradient panel. Change the first Color Stop in the gradient to a grey color and change the second Color Stop to a dark grey color. Change the Location of the gradient to 85 by selecting the middle location point on the Gradient Slider and typing 85 in the Location field. Adjust the gradient with the Gradient tool (G) by clicking from the top of the rectangle to the bottom, making the lighter part of the gradient at the top of the rectangle.

Step 4
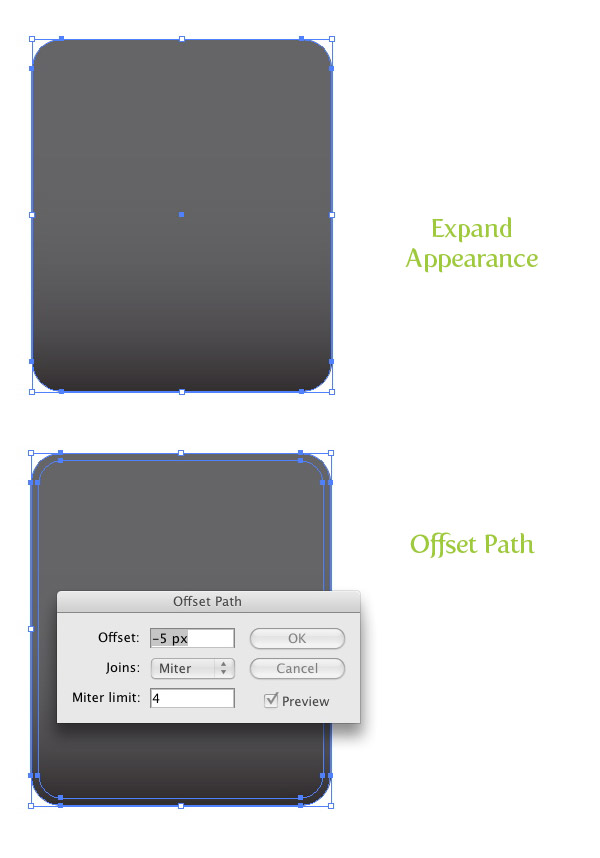
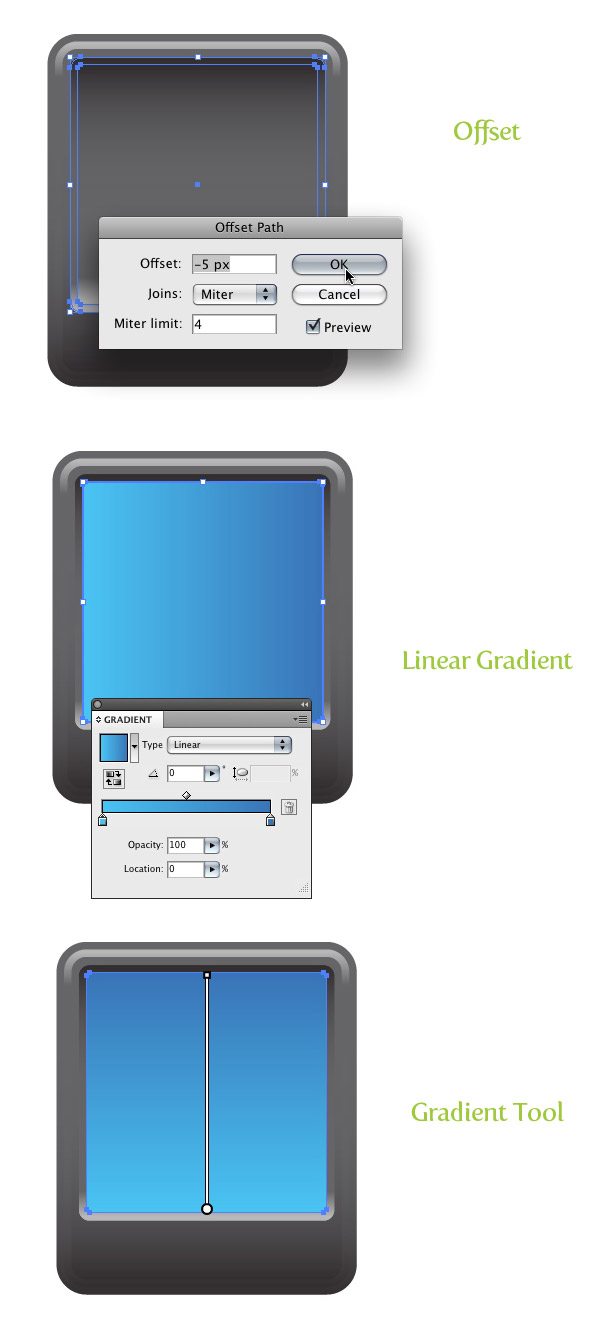
With the rectangle selected, go Object > Expand Appearance. Next, go Object > Path > Offset Path. With the Offset Path dialog open, change the offset to -5 px.
Step 5
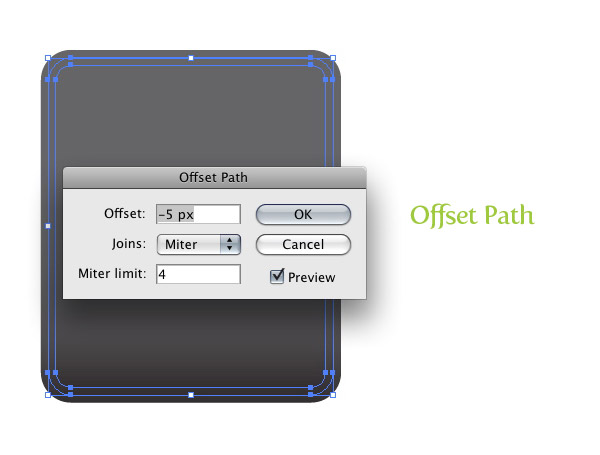
With the Offset shape selected, go Object > Path > Offset Path. In the Offset Path dialog, change the Offset to -5 px.
Step 6
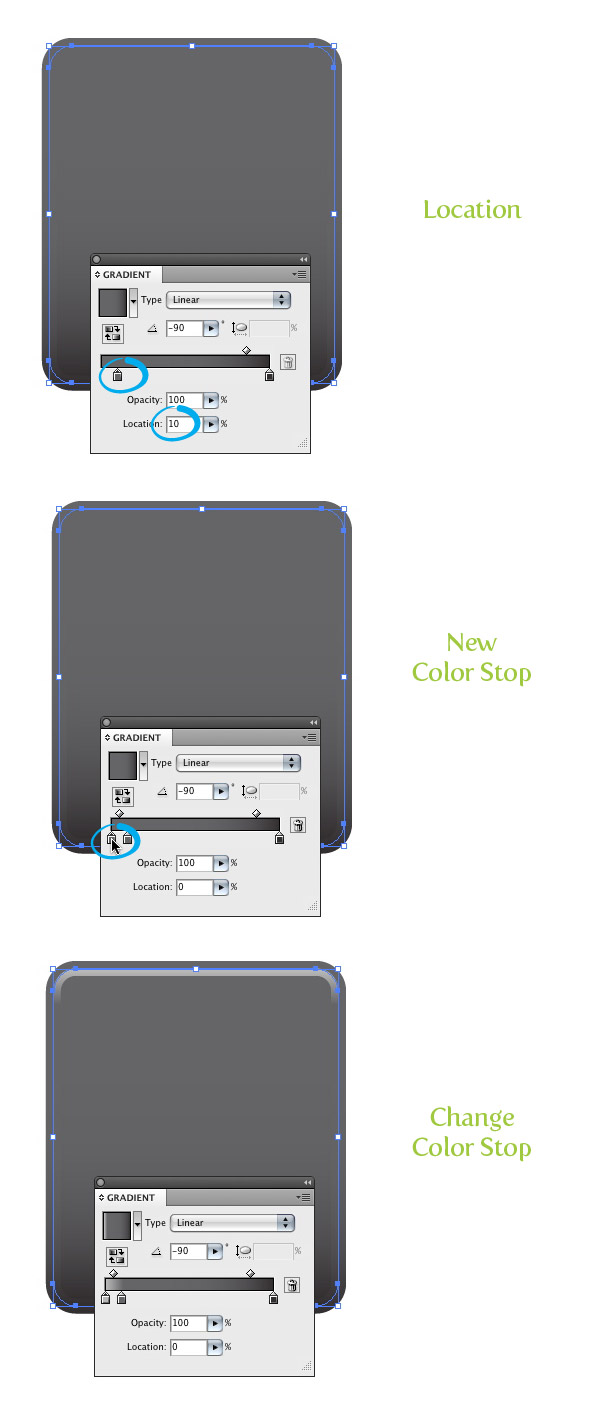
Select the first offset rectangle and select the first Color Stop. Once selected, change the Location by typing in 10 in the Location filed in the Gradient panel. Add another Color Stop to the left of the first Color Stop by clicking right below the Gradient Slider. Change the color of the New Color Stop to a light grey color.
Step 7
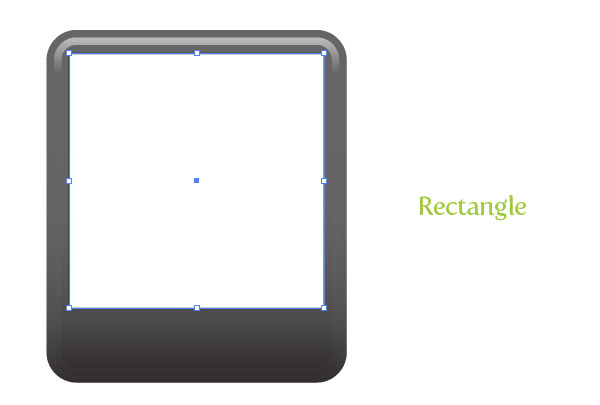
Create a 170 px by 170 px rectangle with the Rectangle tool (M) and place it below the second offset shape in the middle of all the rectangles.
Step 8
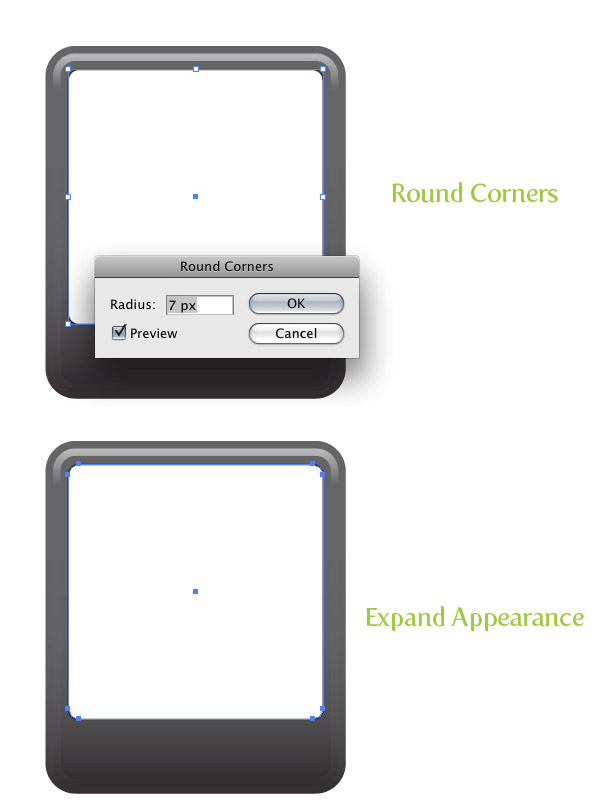
With the new rectangle selected, go Effect > Stylize > Round Corners. In the dialog, change the Radius to 7 px. Next, go Object > Expand Appearance.
Step 9
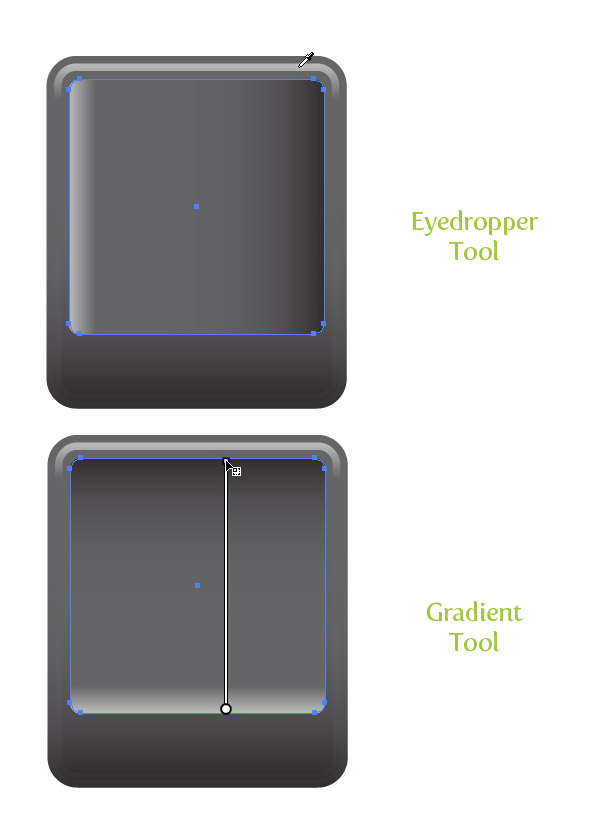
With the rectangles still selected, use the Eyedropper tool (I) and sample the gradient of the second offset rectangle (the one with the lightest grey included). Adjust the gradient with the Gradient tool (G) from bottom to top, so the darker part of the gradient is at the top of the rectangle.
Step 10
With the latest rectangle still selected, go Object > Path > Offset Path and change the Radius to -5 px. Fill the offset shape with a linear gradient with the first Color Stop a cyan color and the second a darker cyan color. Adjust the gradient from bottom to top.
Step 11
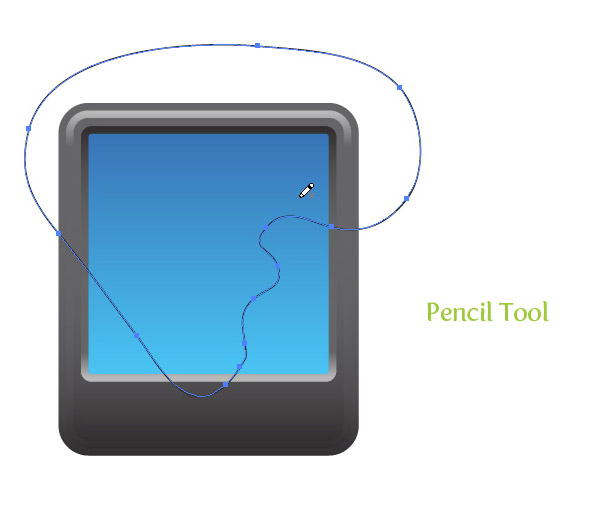
With the Pencil tool (N), draw a land mass over the blue rectangle. The part of the land mass on the GPS map vector that you want to go to the edge of the blue screen, just draw outside the bounds of the blue screen shape. You can also use the Pen tool (P) to draw the land shape, but I find the Pencil tool (N) works great for creating natural shapes.
Step 12
Fill the land shape with a linear gradient with the first Color Stop green and the second a darker green. Adjust the gradient form top to bottom.
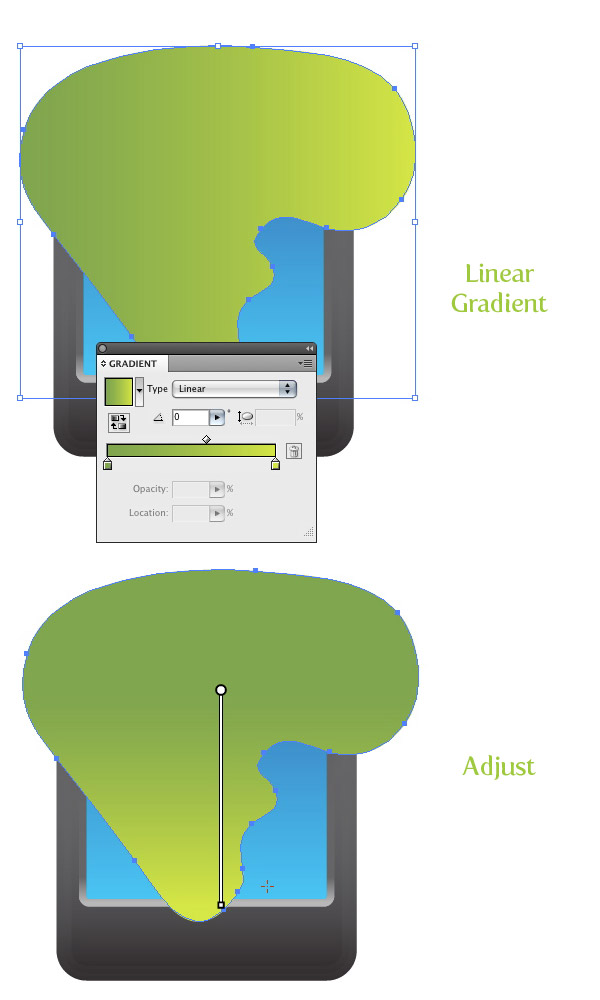
Step 13
Offset the land shape by 5 px. Change the fill of the offset to a dark green color.
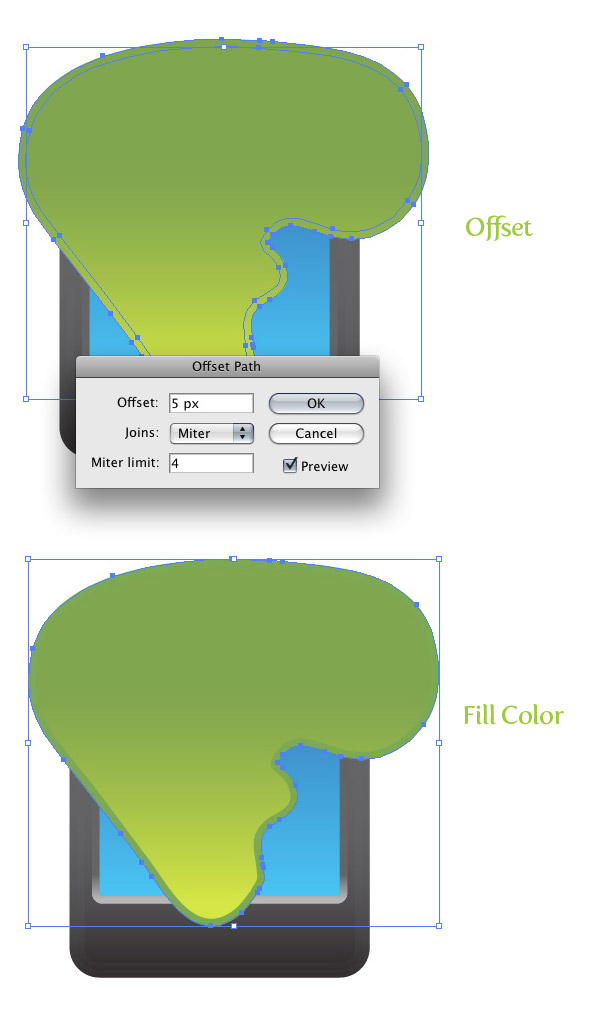
Step 14
Select the land offset and offset it by 8 px. Change the fill to a light blue color.
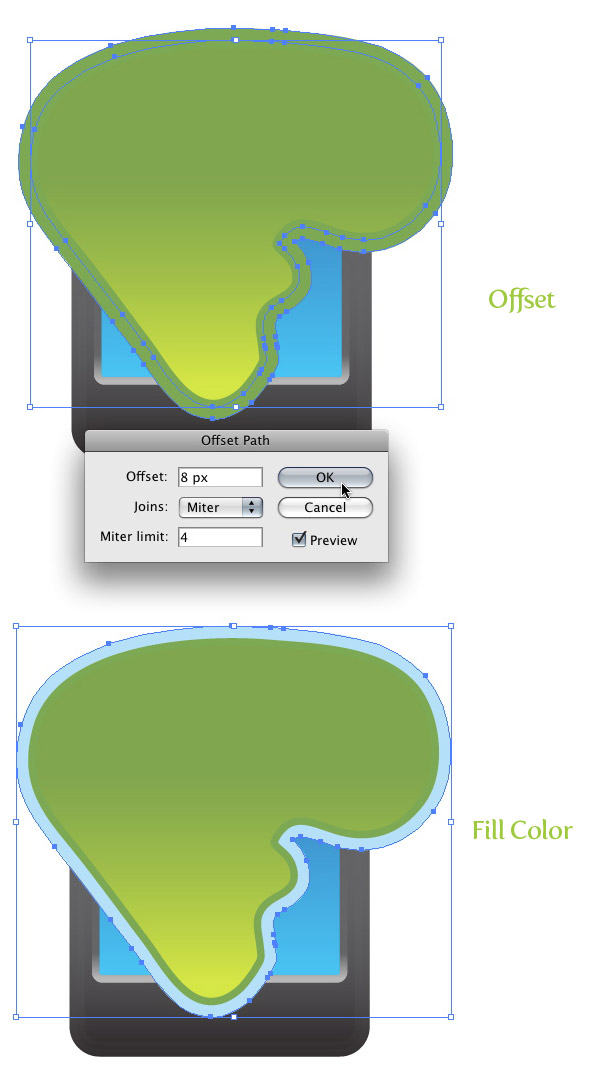
Step 15
Select the blue screen shape, Copy (Command + C), and Paste in Front (Command + F). Select all the Land shapes and the screen copy and press the Divide button in the Pathfinder panel. With the Direct Selection tool (A), select and delete all shape that go outside the blue screen shape border.

Step 16
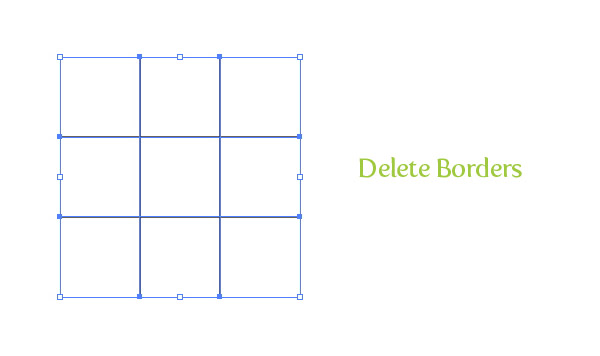
With the Rectangular Grid tool (located under the Line Segment tool in the Tools Panel), click on the artborad to bring up the Rectangle Grid Tool Options. In the dialog, change the width to 160 px, the Height to 160 px, the Number of Horizontal Dividers to 2, the Number of Vertical Dividers to 2, and press OK.
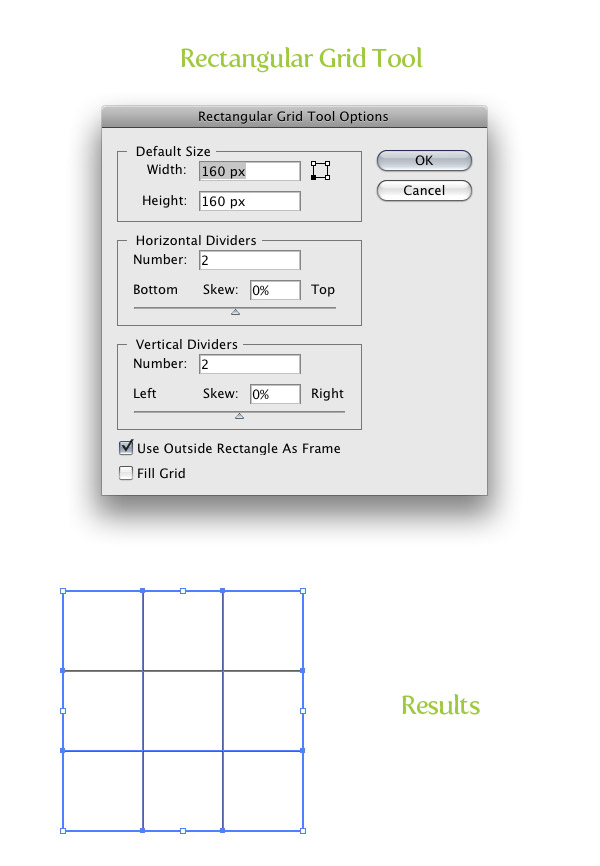
Step 17
With the Direct Selection tool (A) select the borders of the new grid and delete them.
Step 18
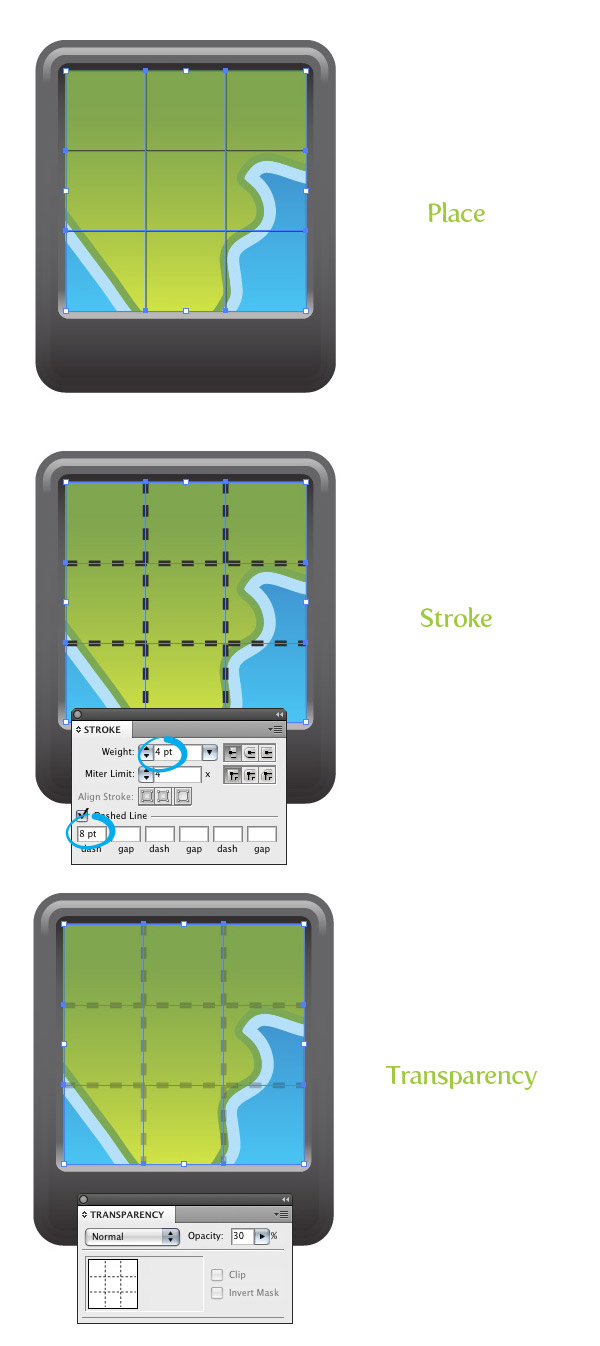
Place the grid over icon so it is centered on the screen. In the Stroke panel, change the font weight to 4, check the Dashed Line check box, and type 8 for the first Dash input field. Next, change the Opacity to 30 from the Transparency panel.
Step 19
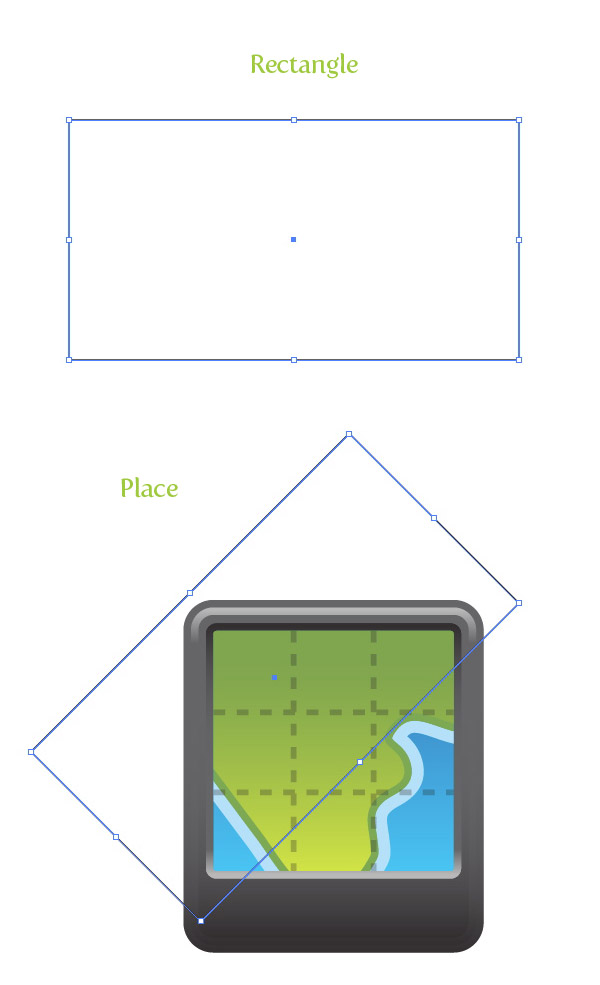
Create a rectangle at least 300 px wide by 160 px tall. Rotate the rectangle 45 degrees with the Selection tool (V) and place over the screen just below the top right side.
Step 20
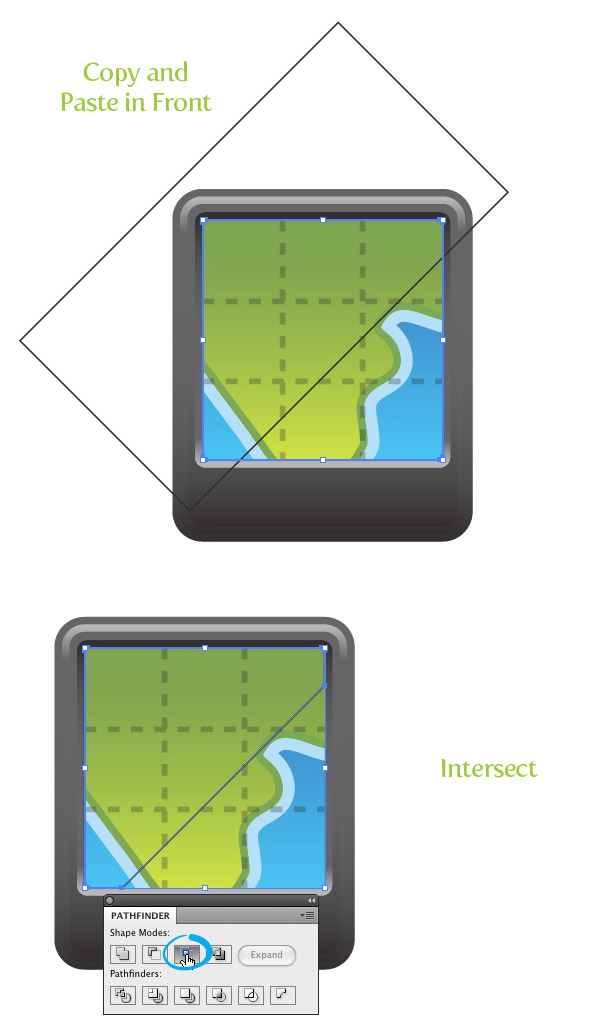
Select the blue screen shape, Copy (Command + C) and Paste in Front (Command + F). Select the rectangle and screen copy and press the Intersect button in the Pathfinder panel.
Step 21
Fill the new shape with a linear gradient with both Color Stops white. Change the first Color Stop’s Opacity to 0, change the location of the middle point to 40, and change the Opacity of the second Color Stop to 60.

Step 22
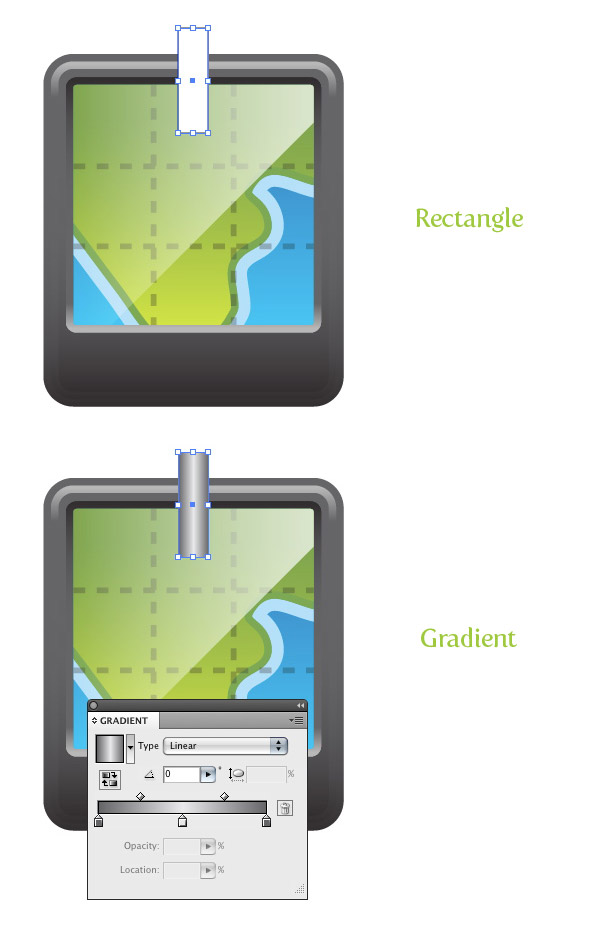
Create a 20 px by 70 px wide rectangle and place it over the top part of the icon, so about a third of it is hanging off. Fill the rectangle with a three Color Stop linear gradient. Change the first Color Stop to a dark grey, the second to a light grey, and the third to a dark grey.
Step 23
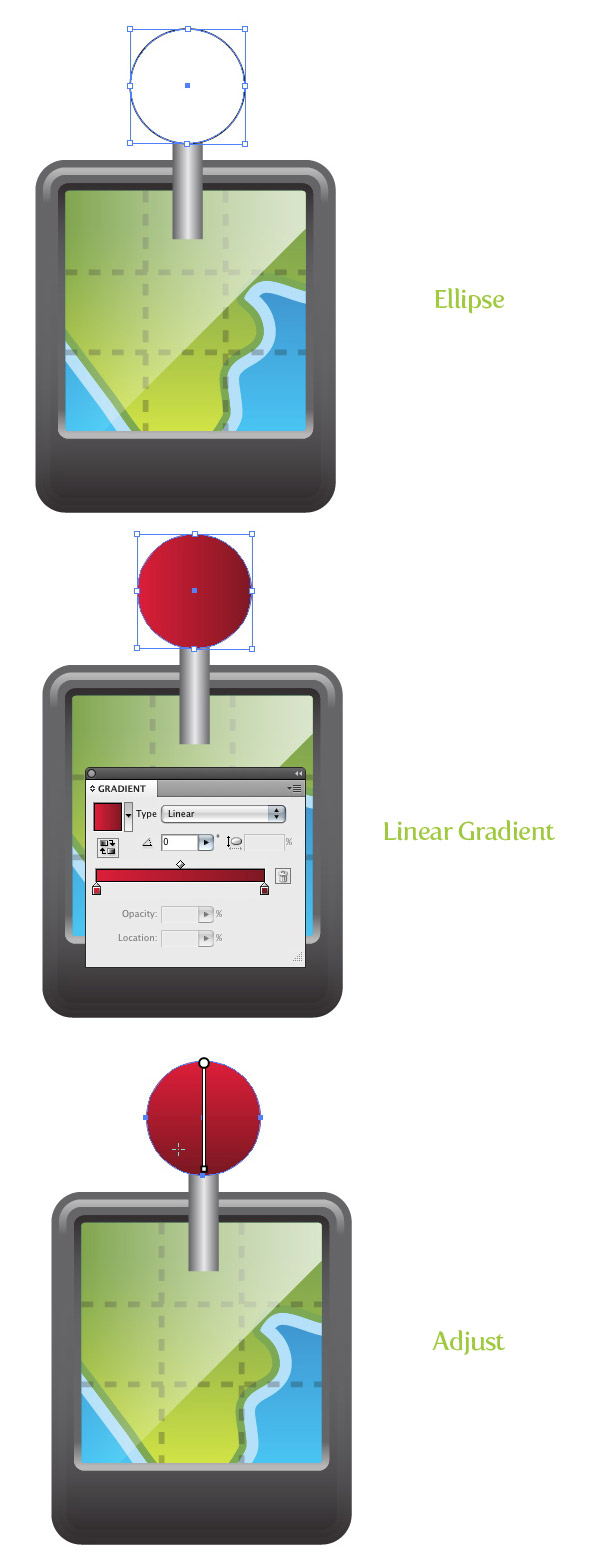
Create a 76 px by 76 px ellipse with the Ellipse tool (L) and place it on top of the previous rectangle. Fill the ellipse with a linear gradient with the first Color Stop red, and the second a dark red. Adjust the gradient from top to bottom, making the lighter part of the gradient at the top of the ellipse.
Step 24
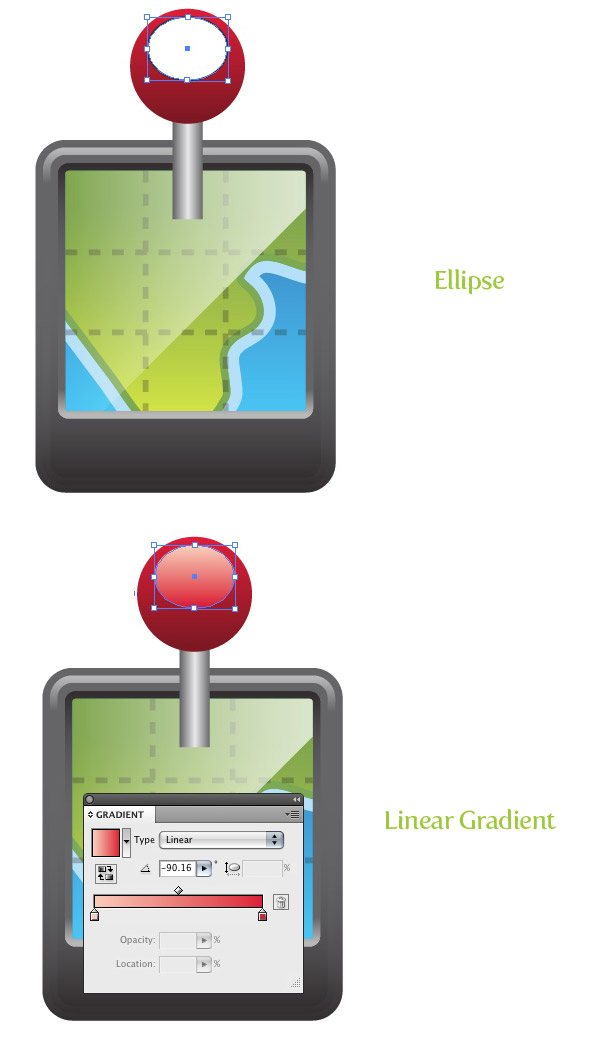
Create a 53 px wide by 42 px tall ellipse and place it toward the top of the previous ellipse. Fill the ellipse with a lighter red linear gradient than the previous and adjust the gradient from top to bottom.
Step 25
Create a 7 pt dark grey line with the Line tool (\) over the bottom part of the pin shape.
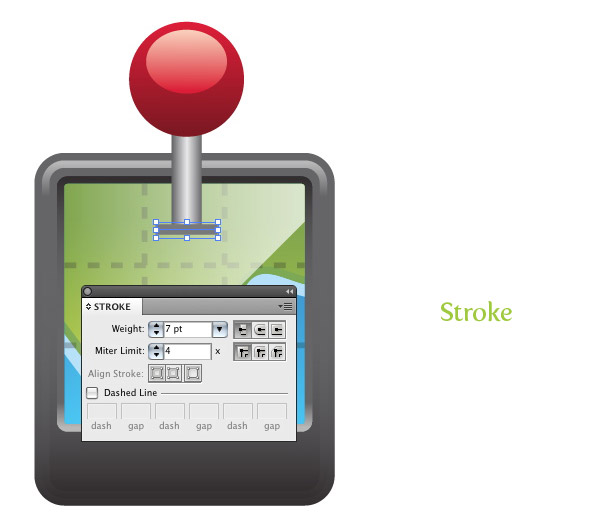
And now we have a pin on our GPS map vector!
Step 26
Create a 23 px by 23 px ellipse over the bottom left part of the icon. With the Eyedropper tool (I), fill the ellipse with the gradient from the first main body shape. Change the Location of the middle point to 50 and adjust the gradient from bottom to top so the darker part of the gradient is at the top of the ellipse.
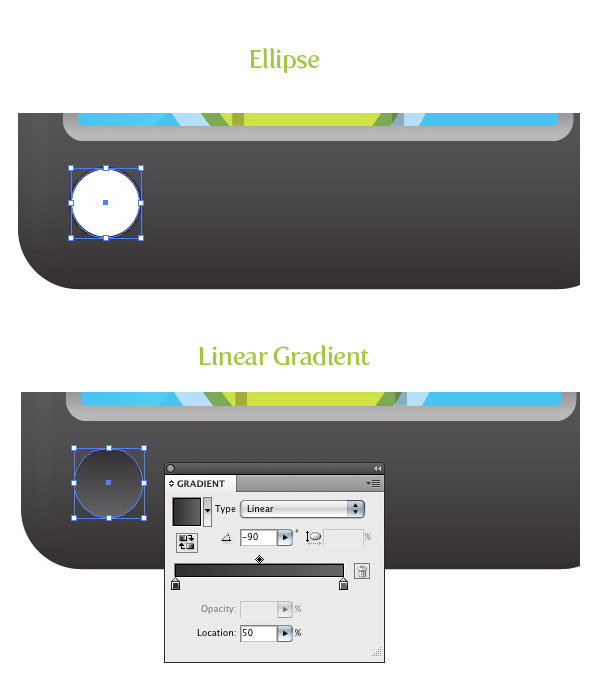
Step 27
Copy (Command + C) and Paste in the Front (Command + F) the ellipse. With the Selection tool (V), scale down the copy slightly. Fill the ellipse with the same green gradient used for the land shape and adjust the gradient so the lighter part of the gradient is at the top of the ellipse.
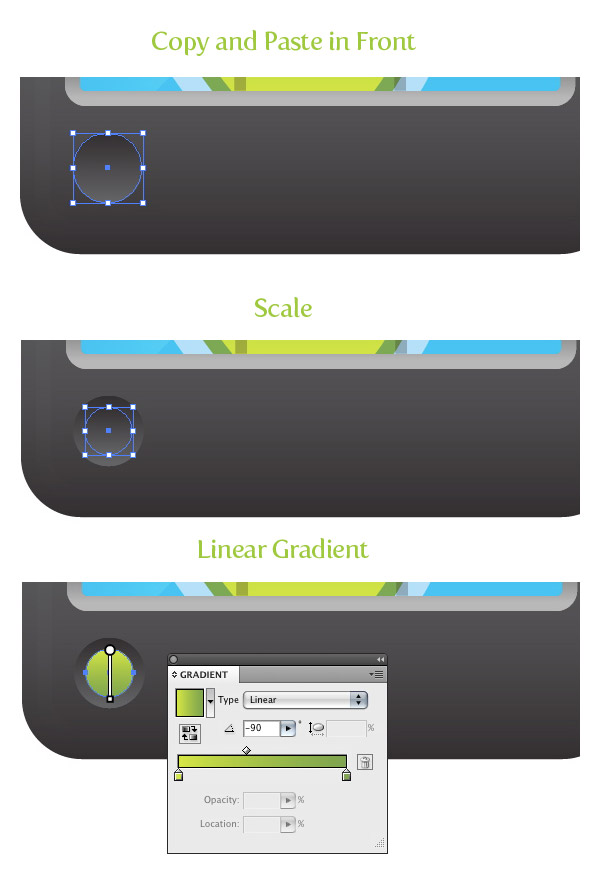
Step 28
Create a 67 px wide by 7 px tall rectangle and place it on the right bottom side of the icon. FIll the rectangle with the same gradient as the bigger ellipse created in the previous steps. With the Selection tool (V), hold down Command (Ctrl for Windows) and Shift, and drag a copy of the rectangle below the first.
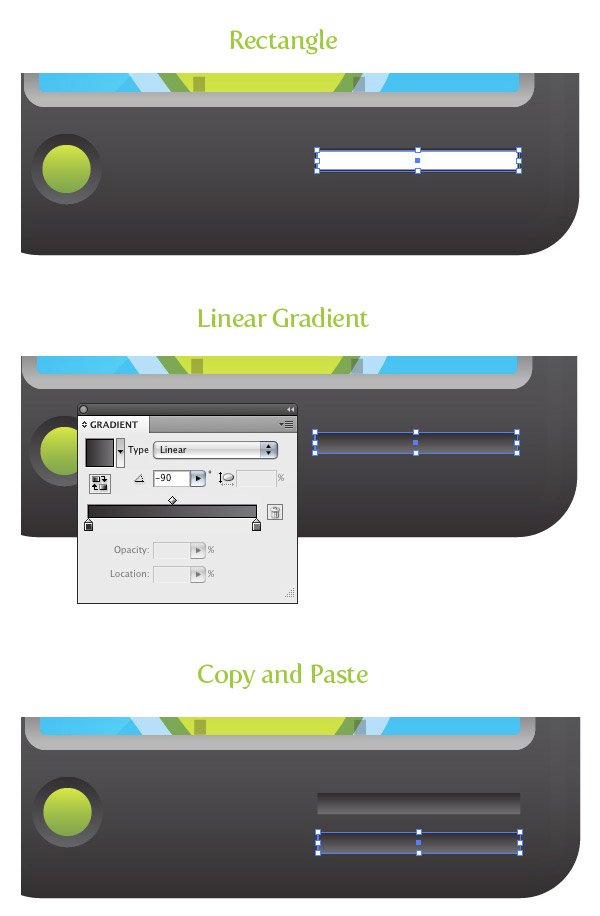
Step 29
Create a 300 px by 300 px ellipse and fill it in with a radial gradient from the Gradient panel. Make the first Color Stop black and the second white. Squish the ellipse with the Selection tool (V) to a tenth of the ellipse original size. Go Object > Arrange > Send to Back (Command + Shift + [) and place the center of the ellipse by the bottom edge of the icon. All done!
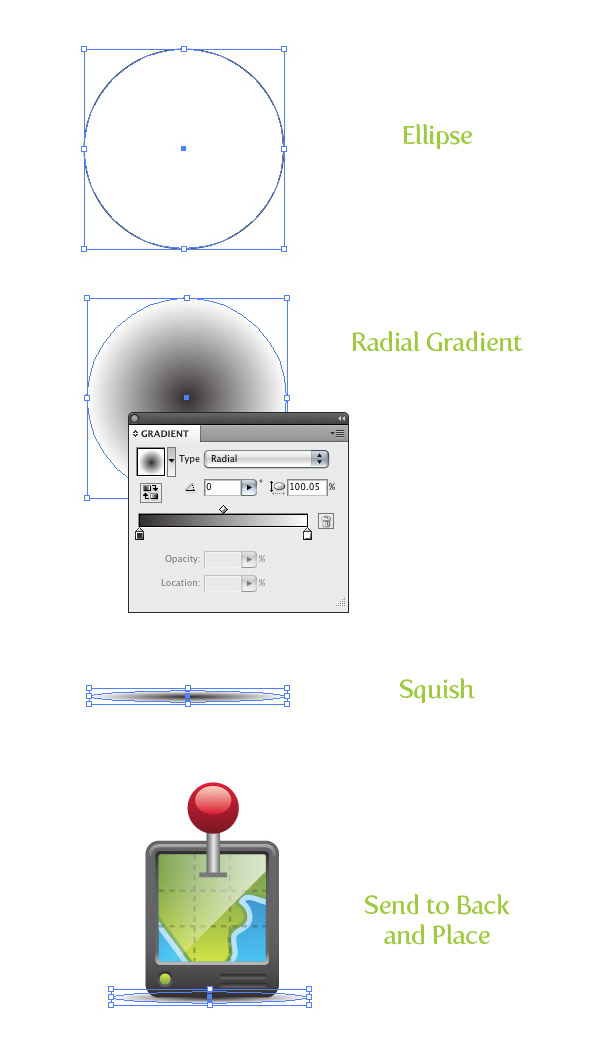
Final Image: GPS Map Vector
Below is the final image again.

Hope you can use these techniques in your app design or icon work! Enjoy!


One thought on “Create Your Own Modern GPS Map Vector!”