
In today’s tutorial you will learn how to draw rather complex three-dimensional isometric icon vectors, specifically an isometric bank icon. This tutorial contains a description of the preparatory phase, which I hope will simplify your workflow and detailed guide for designing elements of the building. It is likely that isometric icon vectors will become a design trend in 2015, so it’s time to master this style!
Tutorial Details: Isometric Icon Vectors
- Program: Adobe Illustrator CS – CC
- Difficulty: Beginner-Intermediate
- Topics Covered: Basic Tools and Transform techniques
- Estimated Completion Time: 60 minutes
Final Image: Isometric Icon Vectors

Step 1: Isometric Icon Vectors
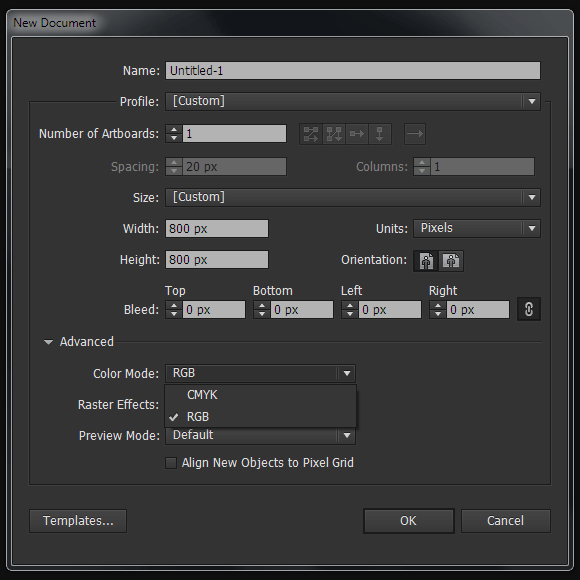
To begin this bank isometric icon vectors tutorial, open Adobe Illustrator and create a new document (Cmd / Ctrl + N). Your artboard can be of any size. The isometric icon vectors that we’ll create will work equally well in the RGB and in the CMYK color modes.
Step 2
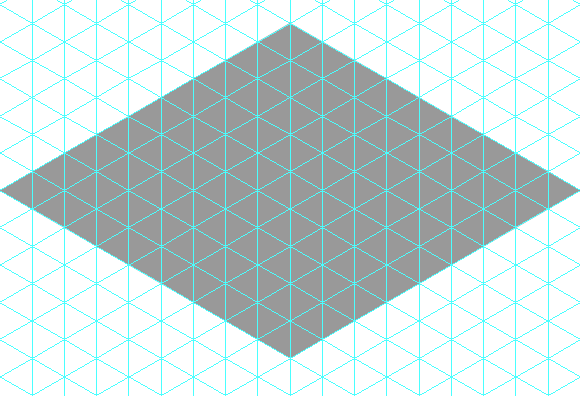
Isometry is a type of depicting a three-dimensional image of the object on the plane in which the magnitudes of the three axes equal each other. Isometry is often used in engineering drafting and design, for example in computer games. Let’s create an isometric grid, which guides are inclined at an angle of 30 degrees to the horizontal. This grid will further help us to design in isometric planes. Take the Polygon Tool and create a hexagon with no fill and a stroke of any color and width.
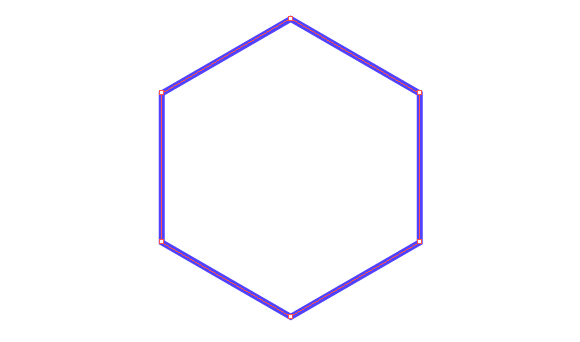
Take the Line Tool (\) and create three straight line segments that connect the vertices of the hexagon.

Group up all the created objects (Cmd / Ctrl + G).
Step 3
Shift the group to the side, holding down the Opt / Alt and Shift keys until the intersection of the copy with the side of the original shape.
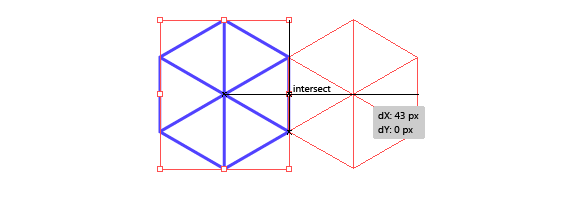
Use Cmd / Ctrl + D shortcuts several times for successive repetition of the last action. The number of copies depends on what width of the grid you want to get.

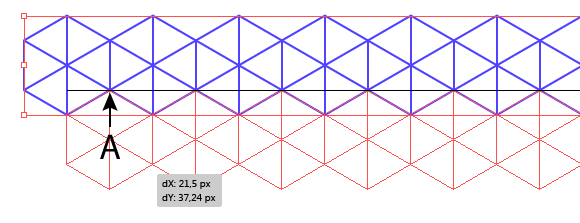
Select and group up all the created objects. Move the resulting group sideways and down while holding down the Opt / Alt, to the intersection of the vertices at point A.
Step 4
Select and group up the objects, and then move the new group down, holding down the Opt / Alt and Shift until the intersection of the copy with the original group at the point B.
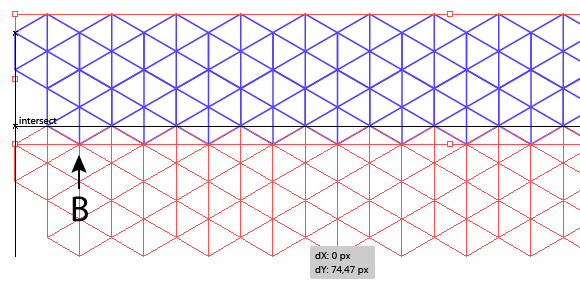
Use Cmd / Ctrl + D shortcuts several times for successive repetition of the last action. The number of copies depends on what height you want for the grid.
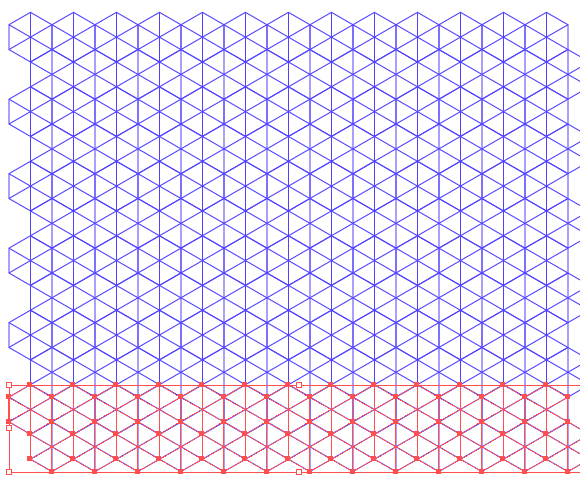
Select and group up the entire grid. Now use the Cmd / Ctrl + 5 shortcuts to create guides from the selected paths.
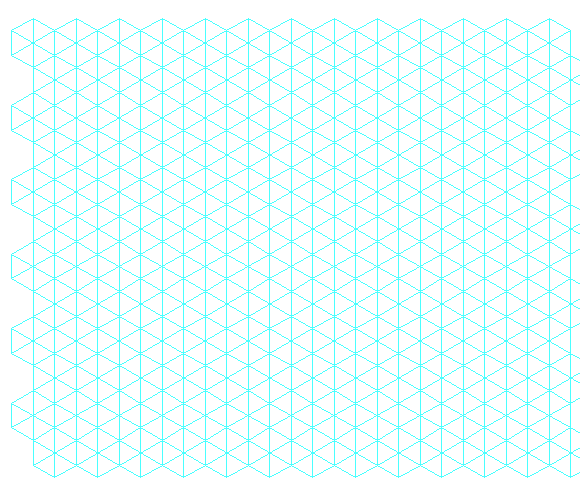
Step 5
Create two inclined guides that will also help us in further designing. Draw a horizontal segment using the Line Tool (\). Now go to Object > Transform > Rotate … and set an angle of 30 degrees in the dialog box.
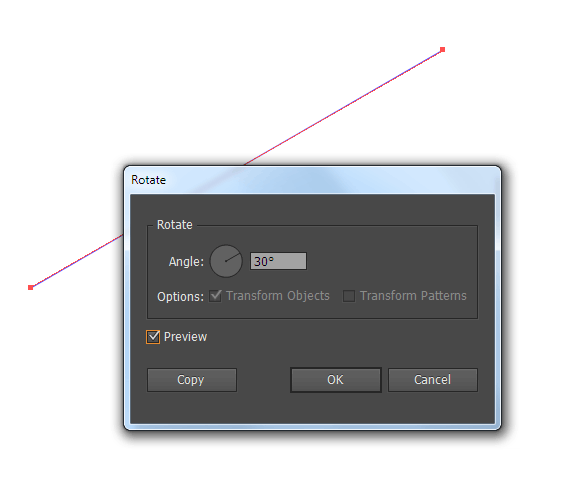
Keeping the path selected, go to Object > Transform > Reflect…. Select Vertical axis, then click Copy in the dialog box.
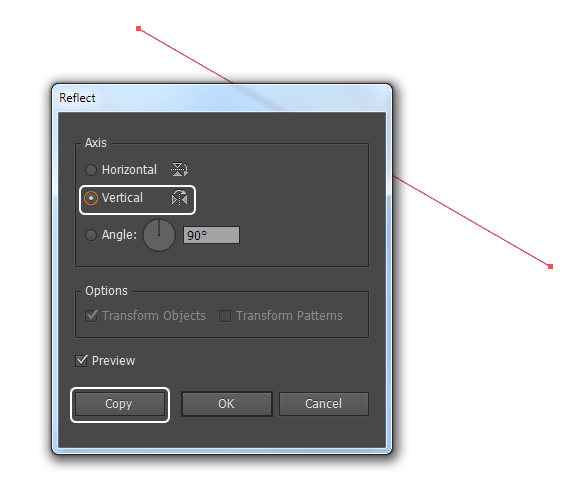
Select both inclined segment, then use the Cmd / Ctrl + 5 shortcuts to create guides.

You can easily move the inclined guides created in this way for large-scale view of the work area. While the native guides will always spontaneously get locked in this case.
Step 6
Create a new layer above the first one in the Layers panel. We’ll be drawing in the new layer. Location of the guides in a separate layer is due to the fact that with just one click you can easily lock them or hide that by clicking on the appropriate icon in the panel.
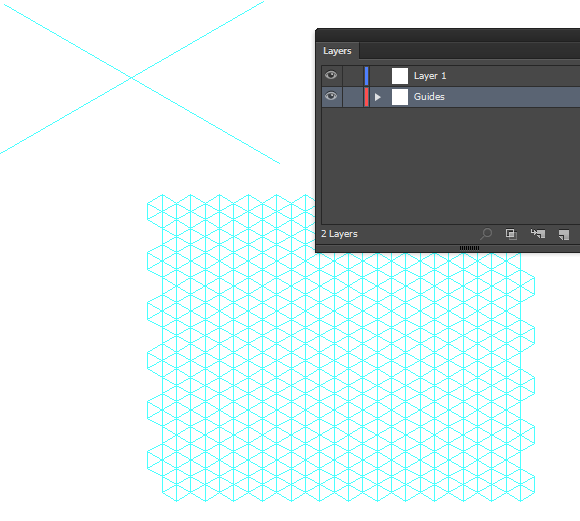
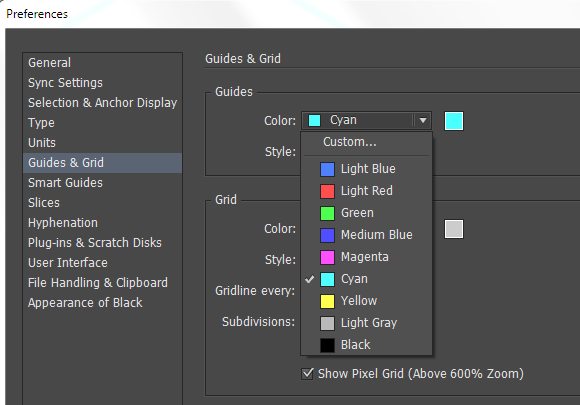
I want to remind you that you can always change the color of the unselected guides in the Guides and Grid section of the Preferences dialog box (Cmd / Ctrl + K).
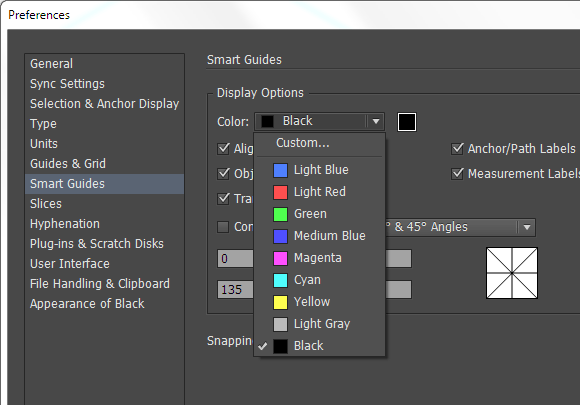
Color of the selected guides always corresponds to the color of the layer in the Layers panel. In my opinion, it is very important to choose a contrasting color for Smart Guides. This can be done in the Smart Guides section of the Preferences dialog box.
And do not forget to turn on the Smart Guides feature (Cmd / Ctrl + U). At this the preparatory work is completed. I devoted so much time to this process, as the isometric design is time-consuming and comfortable settings will save you a lot of time. In order not to go through all the preliminary steps next time, you can save the current document as a template (File > Save as Template …). In this case, creating a new document for isometry, go to File > New from Template….
Step 7
Lock the grid in the lower layer, take the Pen Tool (P) and create shape the foundation of the bank, based on the grid lines.
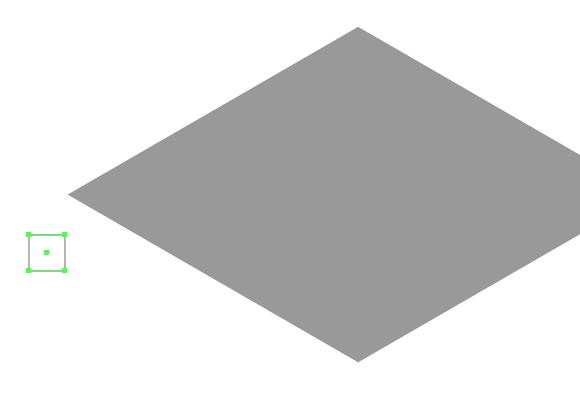
Now proceed to the creation of the stairs. Draw a square with no fill and a stroke using the Rectangle Tool (M).
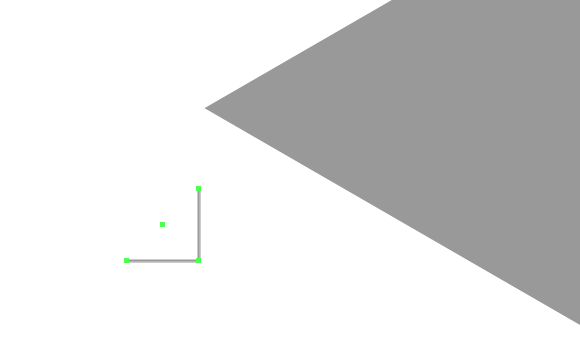
Select its upper left vertex using the Direct Selection Tool (A), then remove it by pressing the Delete button.
Step 8
For the next step on this isometric icon vectors tutorial, duplicate the resulting path (Opt / Alt) and move up to the intersection at point A.
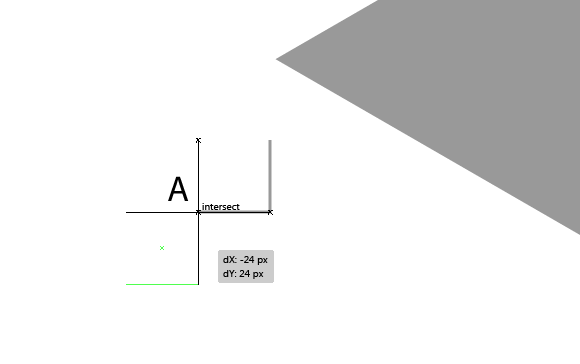
Repeat the last action (Cmd / Ctrl + D).
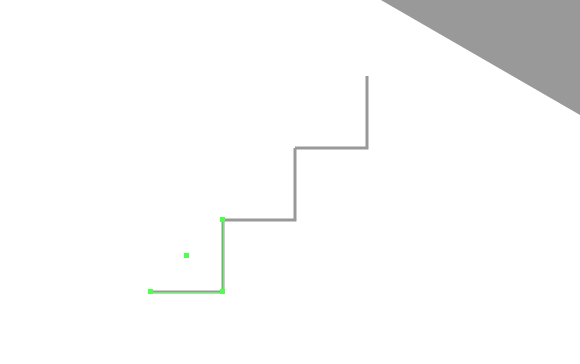
Now remove the lower left segment.
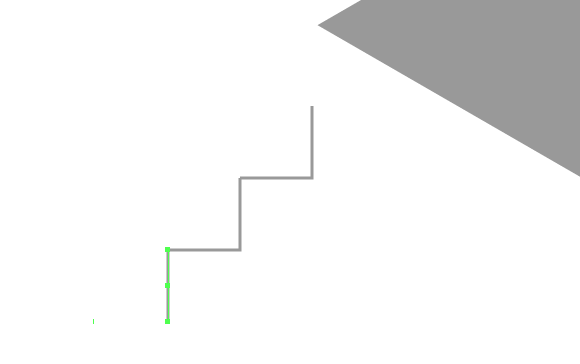
Connect the paths in the places of their intersection using Cmd / Ctrl + J shortcuts.
Step 9
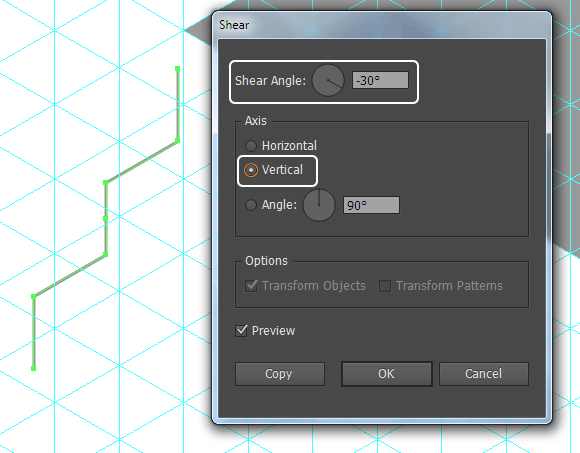
Select the resulting path and go to Object > Transform > Shear…. Set the angle of 30 degrees, and select Vertical axis in the dialog box. As you can see, the slope of the steps exactly corresponds to the slope of the grid guides.
Move the path to the intersection with the foundation at the point A.
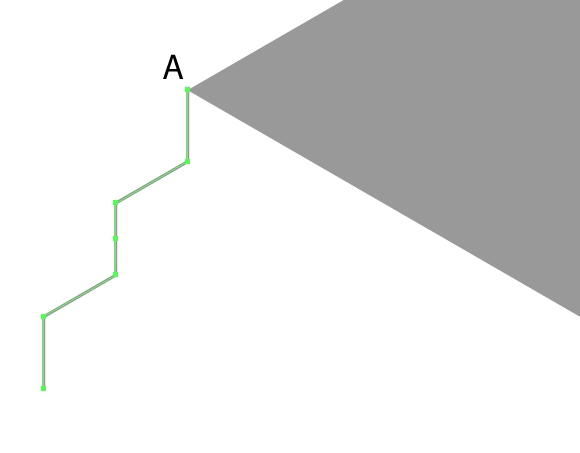
Duplicate the path and move the copy to the intersection at the point B.
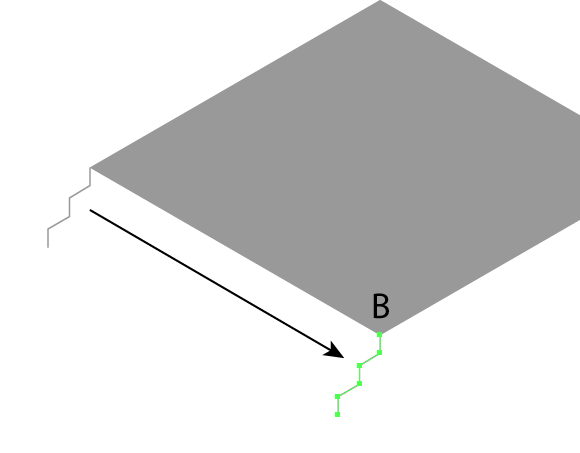
Step 10
Based on the points of zigzag paths, create the five surfaces of stages using the Pen Tool (P).
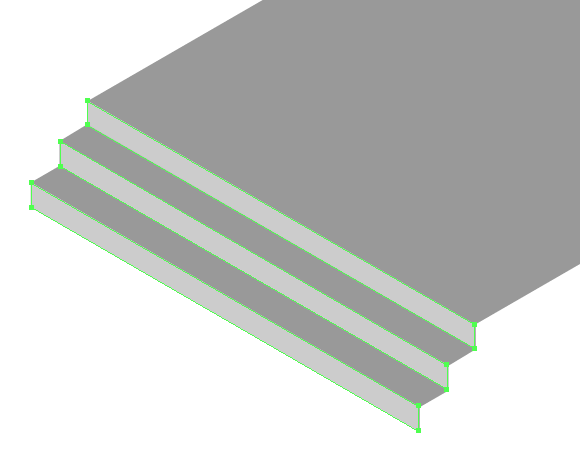
Now left zigzag path can be removed. To build the right surface of the foundation we will need one inclined and one vertical guide, which should be pulled out of the vertical ruler (Cmd / Ctrl + R). Place the guides as shown in the picture below.
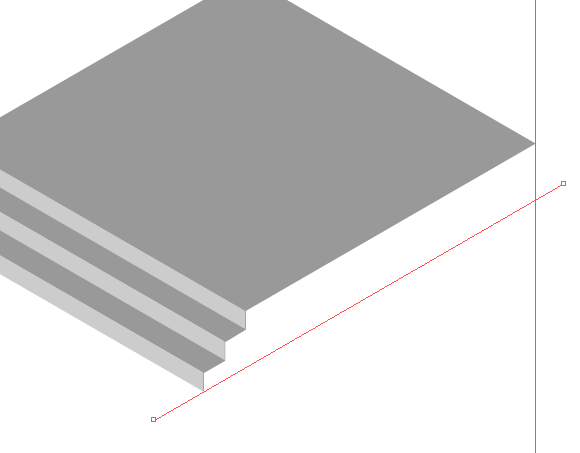
Extend the remaining zigzag path according to the position of the guide using the Pen Tool (P).
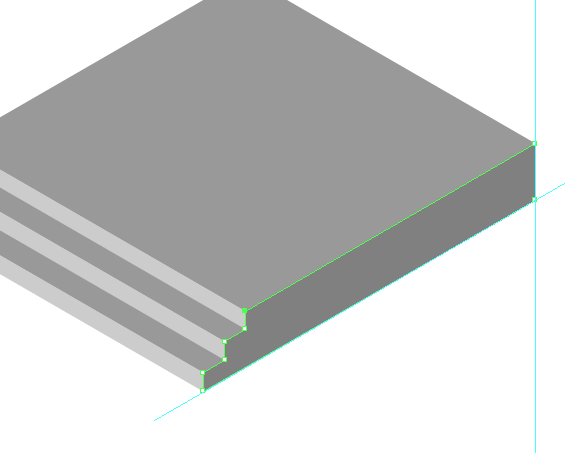
Step 11
We proceed to the creation of the walls of the bank. Select the top surface of the foundation, then go to Object > Path > Offset Path… and set the appropriate value (-40px in my case).
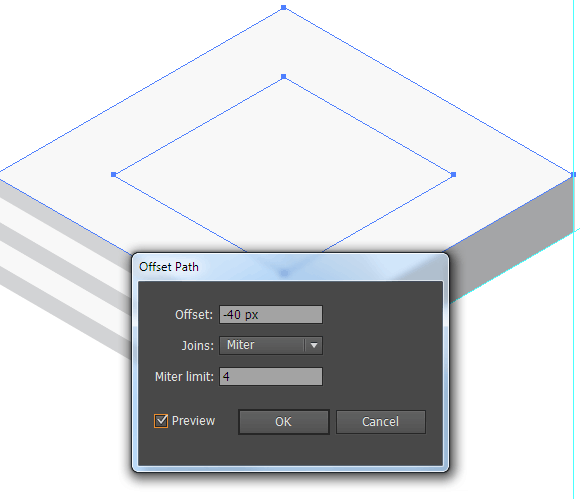
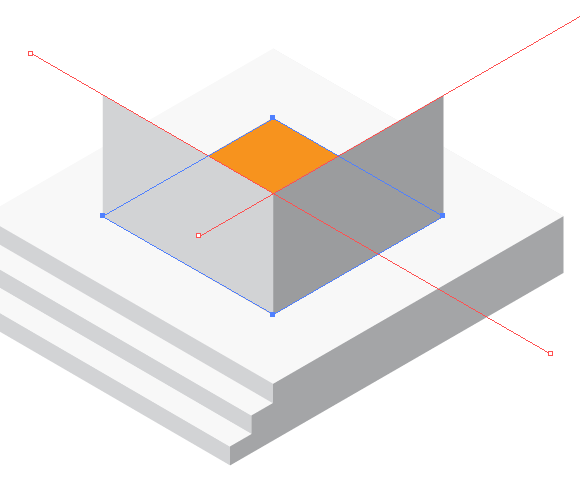
Using this shape, and two inclined guides, create two walls with the help of the Pen Tool. There is no need to create rear walls, as they will not be seen later on our isometric icon vectors.
Step 12
Define the location of the columns. Select the top surface of the foundation, then go to Object > Path > Offset Path … and set the appropriate value (-10px in my case).
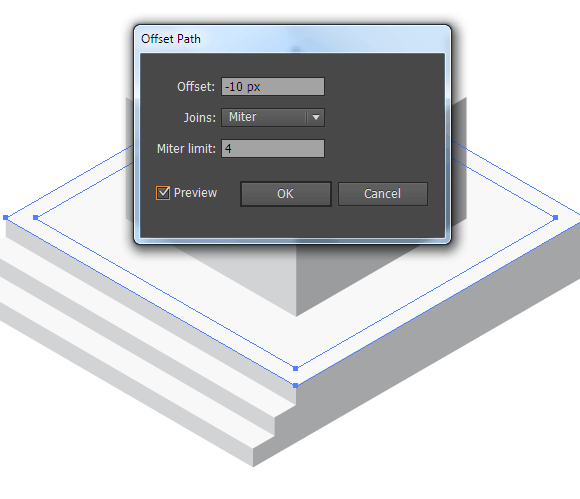
Turn this shape into the guide (Cmd / Ctrl + 5).
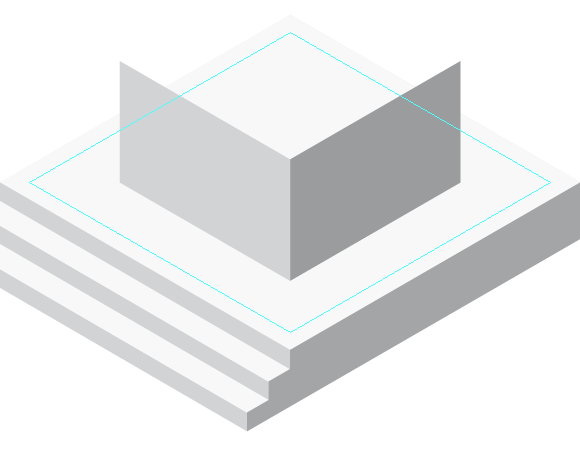
To quickly build isometric projection of the rectangular shapes we can use an isometric grid, which we place in the right place. Now create a square base of the column.
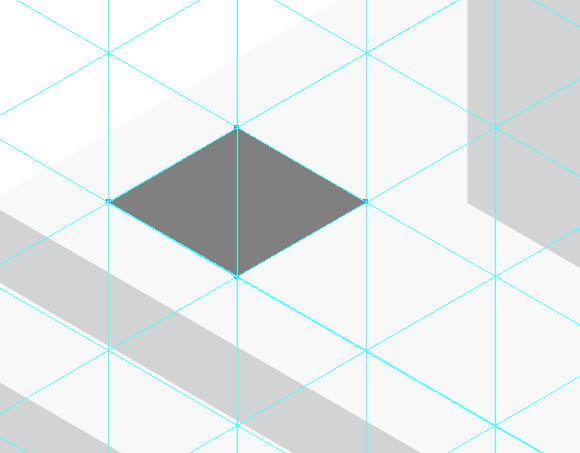
Step 13
Duplicate the base of the column and shift it a bit up.
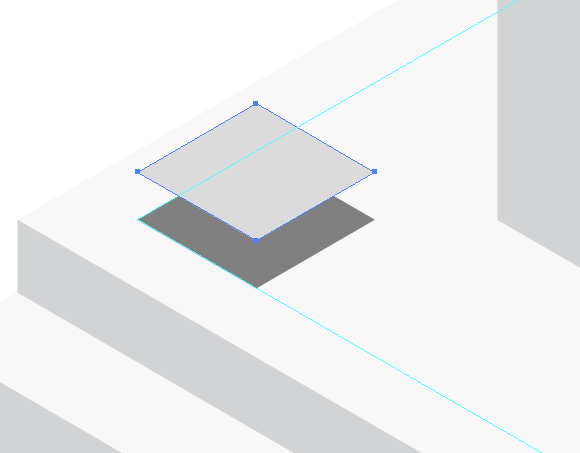
Based on these two create the side walls of the column base.
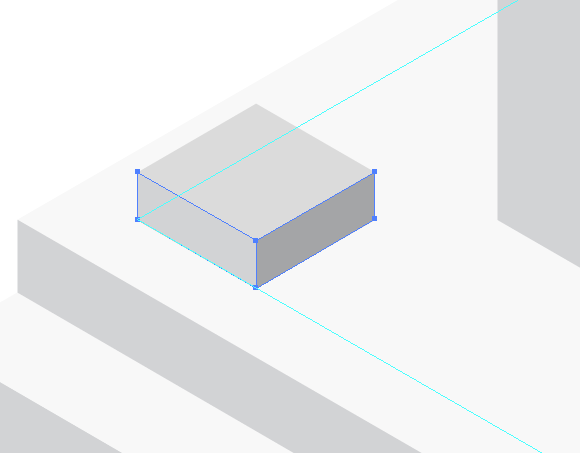
Step 14
Now our task is to create a perspective view of a hexagonal cross-section of the column. Draw a hexagon using the Polygon Tool.
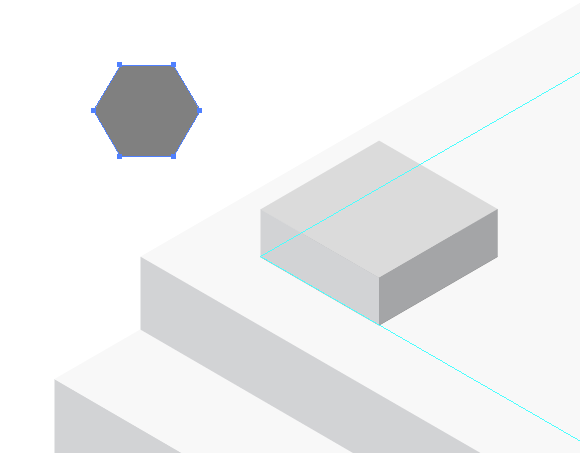
Create a circle from the center of the hexagon that will touch the vertices of a hexagon.
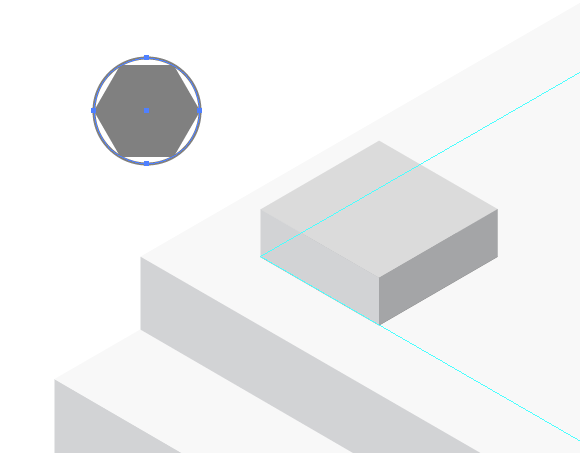
The proportions of the circle in isometric projection are known, so we will deform the two shapes together. Select the circle and hexagon, then set new values for the height and width in the Transform panel. In the isometric projection the height of the circle equals 0.71D, the width of the circle equals to 1.22D, where D is a diameter of the circle.
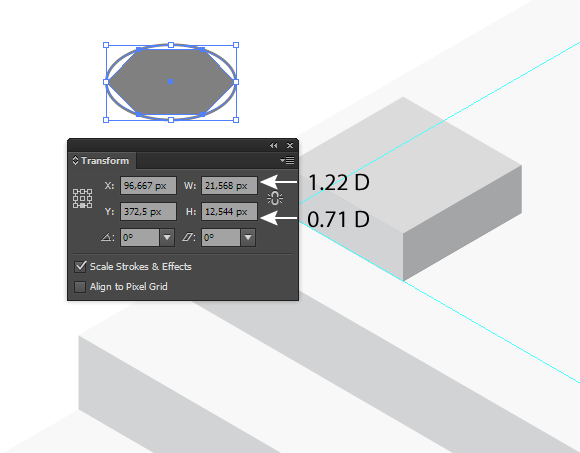
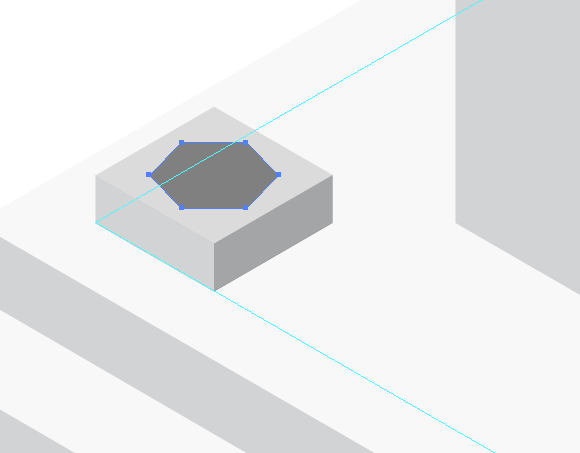
Now remove the resulting ellipse that we simply used as a supporting element.
Step 15
Create sides of the column, based on a hexagon. The upper part of the column may be horizontal, as it will be covered by the roof in our isometric icon vectors in the future.
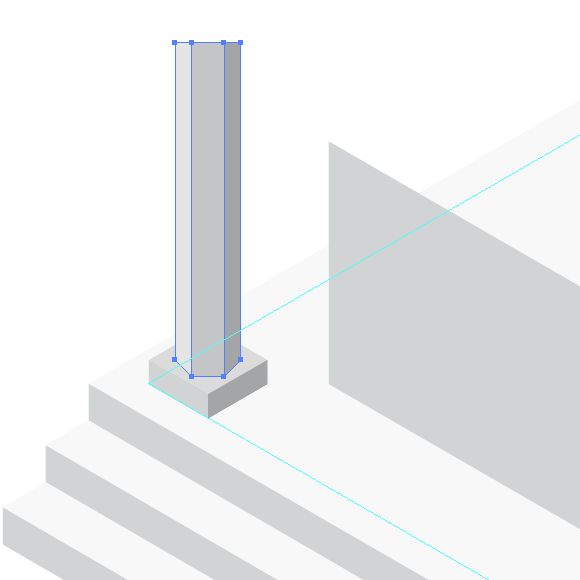
Group up all the elements of the column. Duplicate column and place a copy in the bottom corner of the guide.
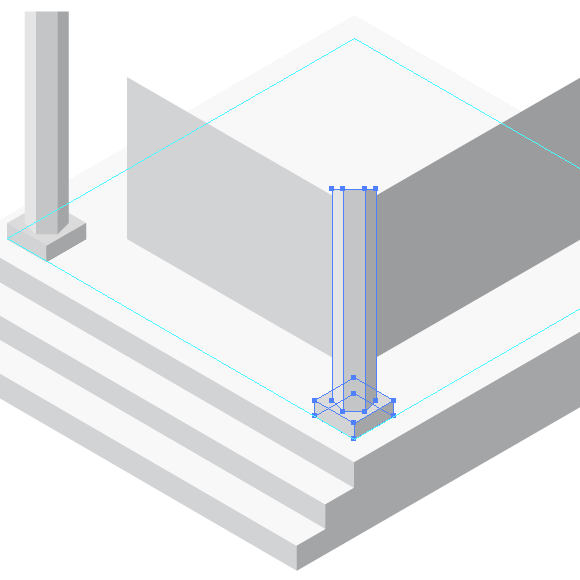
Step 16
Select both columns, then go to Object > Blend > Make. After that, go to Object > Blend > Blend Options … and set the necessary number of steps.
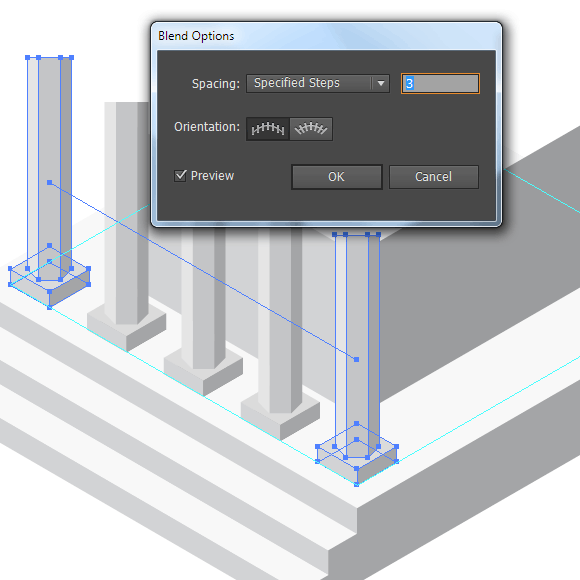
Now go to Object > Blend > Expand and remove the center column.
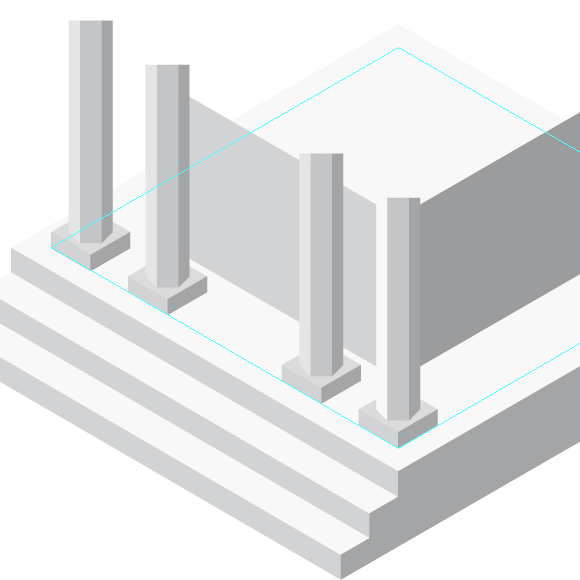
Using the described technique, create a row of columns on the right.
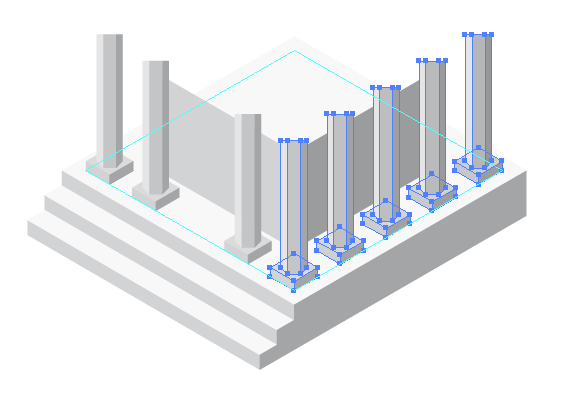
Step 17
Proceed to the creation of the roof of the isometric icon vector bank. Duplicate the upper side of the foundation and place two copies as shown in the picture below.
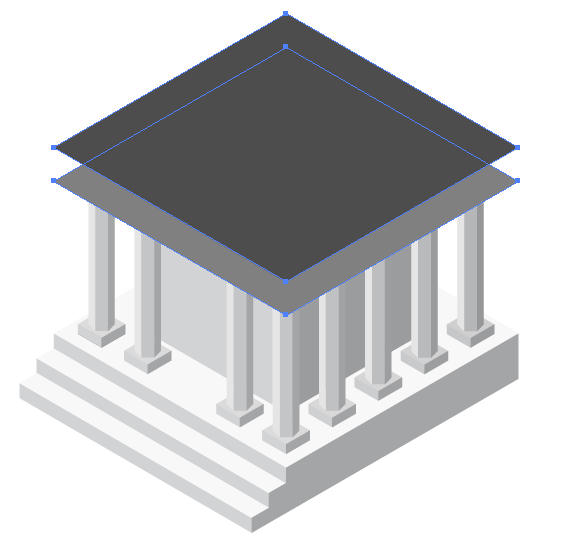
Based on these shapes create lateral surfaces of the roof.
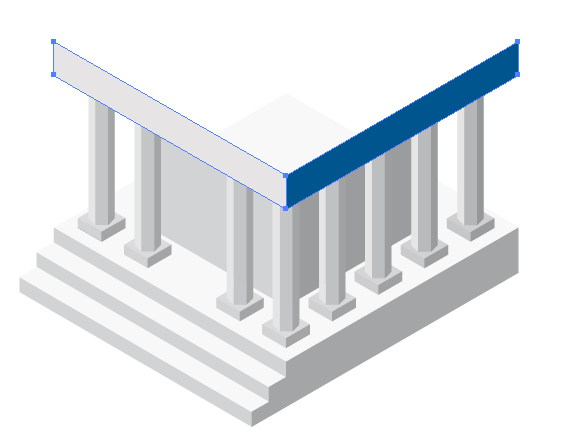
Step 18
Select the left side of the roof, then go to Object > Path > Add Anchor Points. Now place a vertical guide at point A.
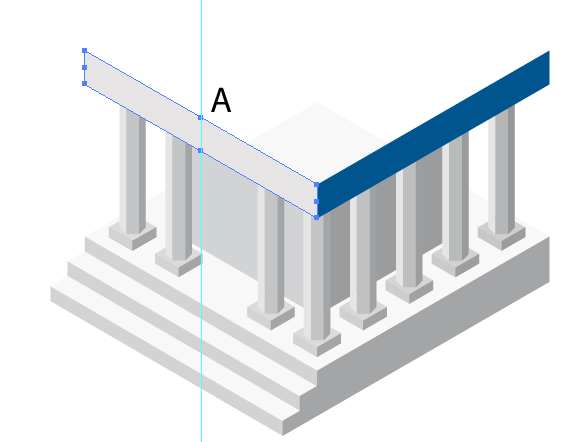
Thus, we have located the position of the crest of the roof. Now we can easily create a side surface of the slope of the roof of our isometric icon vectors, a fronton.
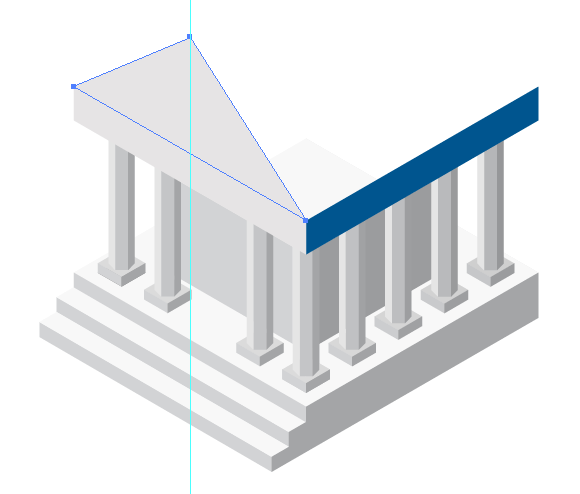
Step 19
Duplicate the fronton and place the copy to the point B.
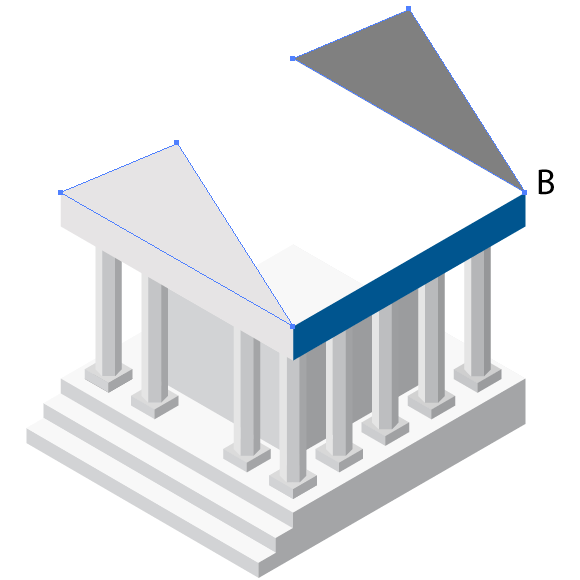
On the basis of the last two shapes create two surfaces of the slope of the roof.
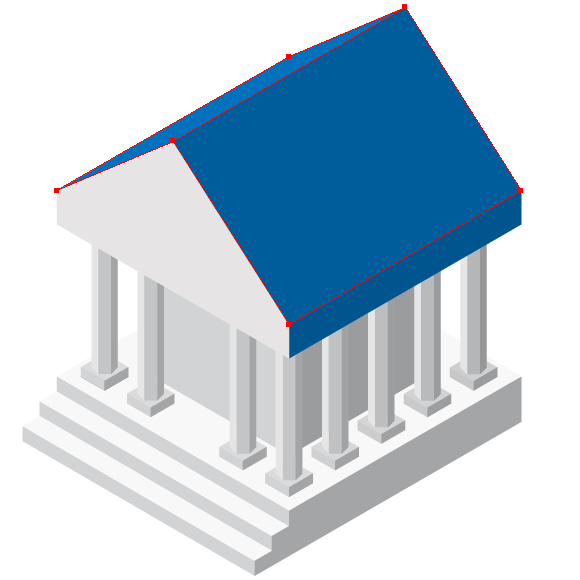
Step 20
Create a deepening in the fronton. Create an inclined guide which passes through the left slope of the roof and vertical guide that goes through the crest of the roof, as shown below.
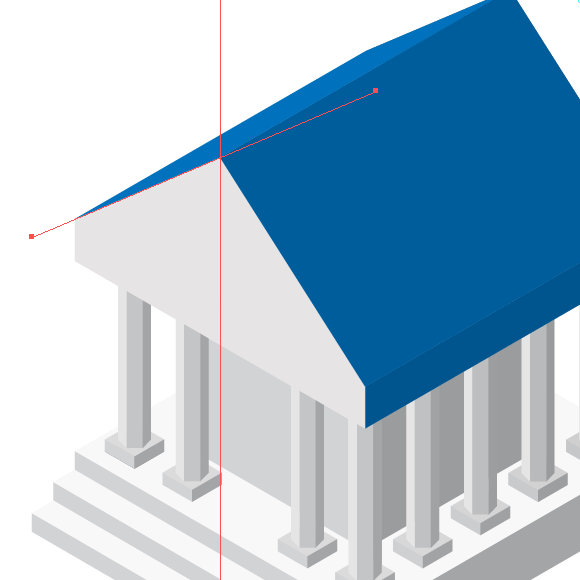
Shift the inclined guide towards the alleged deepening in the fronton.
Step 21
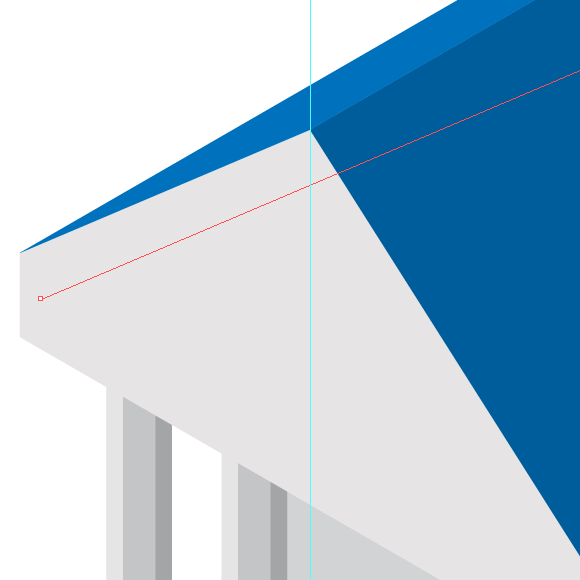
Create a guide which corresponds to the incline of the right slope.

Move this guide to the point of intersection of the first two guides. Thus, we have located the position of the right edge of the deepening.
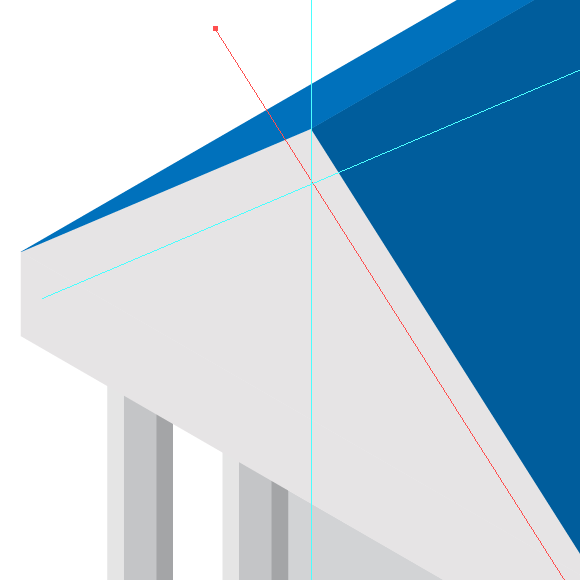
Now we just need to limit the deepening on the bottom with the help of the fourth guide.
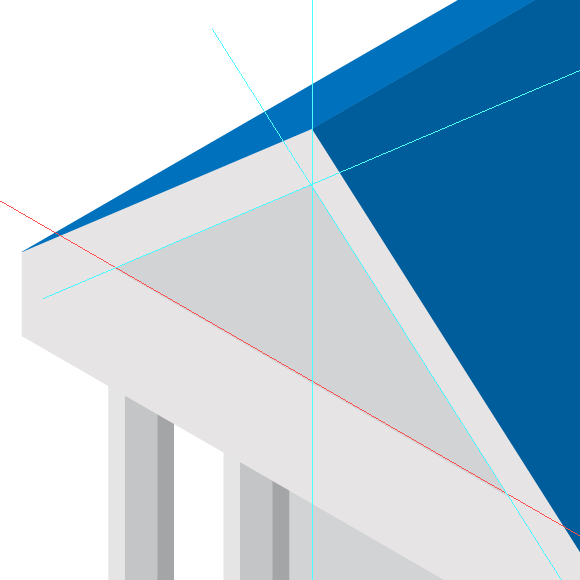
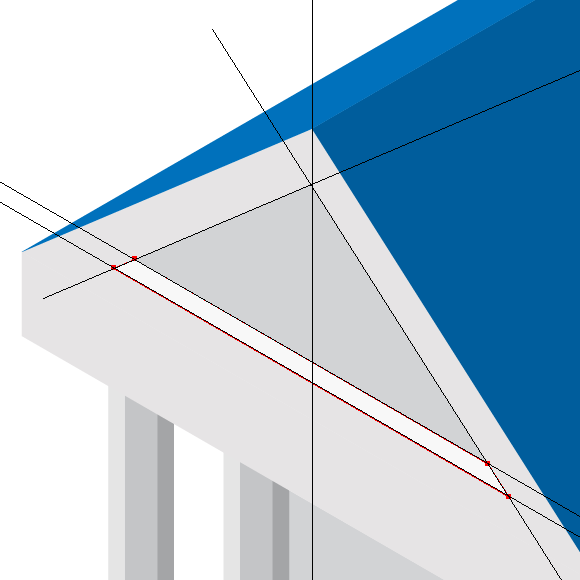
Duplicate the bottom guide, and move the copy a little bit up. Now we can build the lower visible part of the deepening.
Step 22
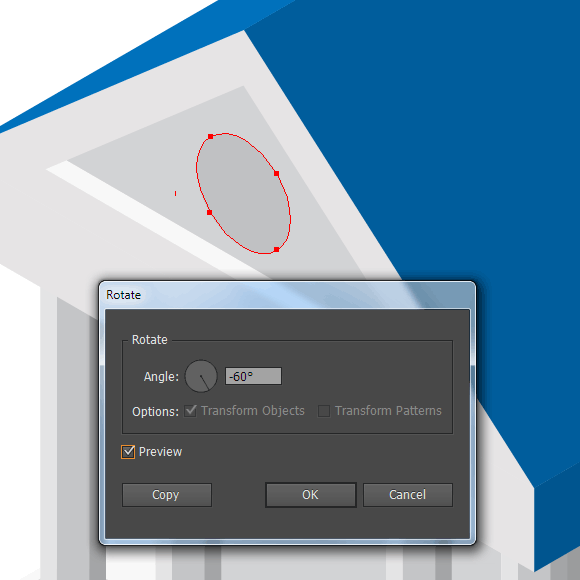
To create a circular deepening create an ellipse with the proportions specified in step 14.
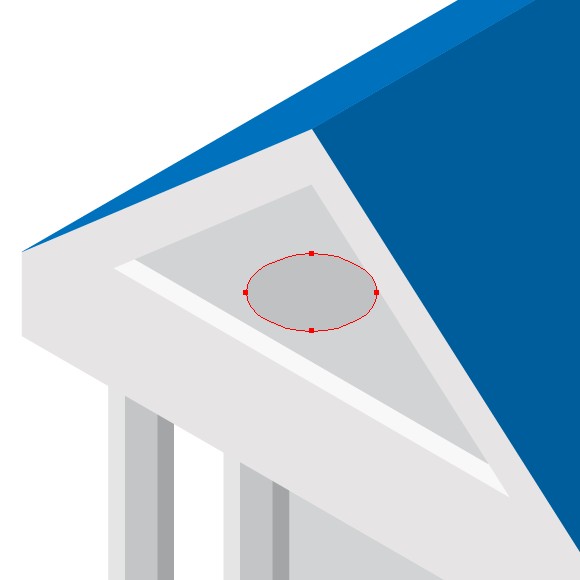
So that the circle is correctly placed in the left isometric plane rotate it at -60 degrees (Object > Transform > Rotate …)
Duplicate the ellipse and shift the copy up a little bit up and to the right along the isometric guide.
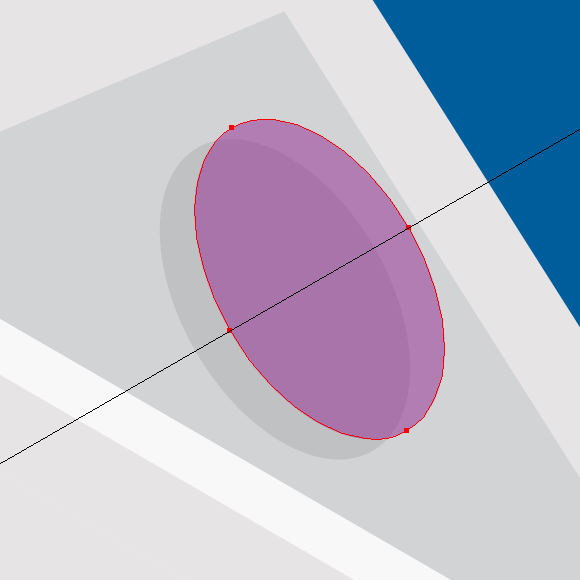
Select both ellipses, take Shape Builder Tool and click in the place indicated by an arrow in the picture below.
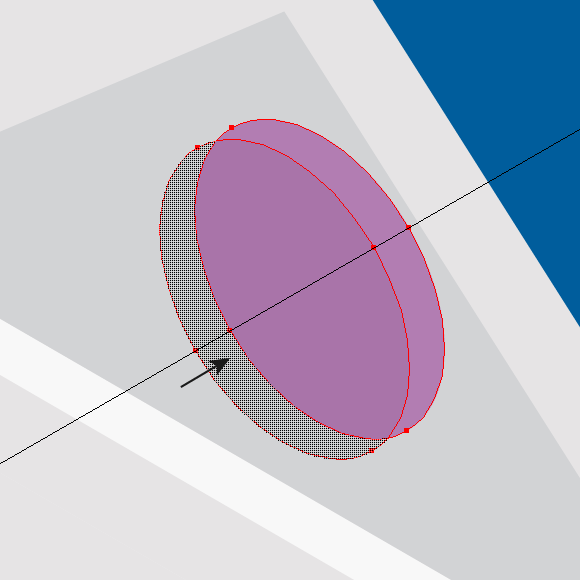
Now just remove the upper ellipse. So we got a side bottom surface of the round deepening.
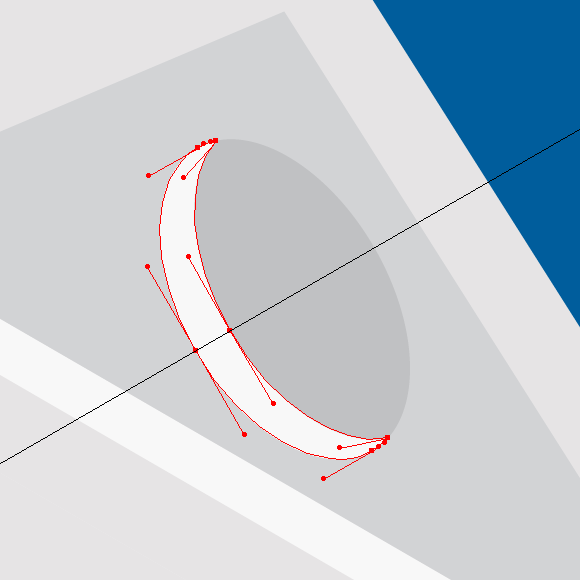
Step 23
The creation of simple elements such as the door and the sign on the isometric icon vectors should not be a big deal and new for you. So I will just show them coarsely with the shape forming guides.
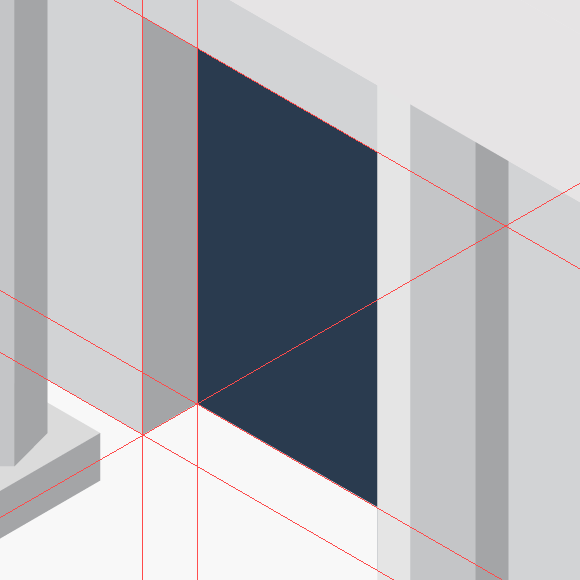
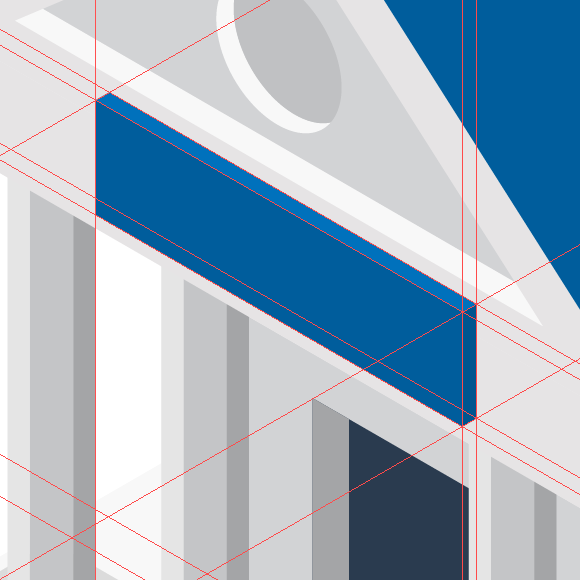
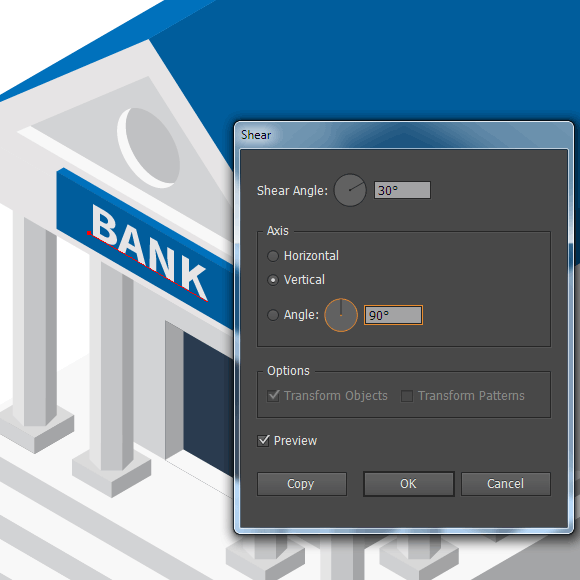
Finally, create an inscription BANK using the Type Tool (T), then go to Object > Transform > Shear…. Set the angle of 30 degrees and choose Vertical axis in the dialog box.
Great job, you’re done! You’ve created your first in what hopefully will be a long line of isometric icon vectors.

![]()
Author: Iaroslav Lazunov
My name is Iaroslav Lazunov, I am a graphic designer from Ukraine. I am glad that I finally found a job in my life that I can share my knowledge and experiments with you in my tutorials. Follow me on Twitter or visit my blog Vectorboom.com


Very nice and detailed tutorial
In step 14 – when you use the transform palette to change the circle properties, how do i work this out?
“The proportions of the circle in isometric projection are known, so we will deform the two shapes together. Select the circle and hexagon, then set new values for the height and width in the Transform panel. In the isometric projection the height of the circle equals 0.71D, the width of the circle equals to 1.22D, where D is a diameter of the circle.”
will illustrator work this out, or do I need to use a calculator?
Wow your steps are really nice.Thank you for sharing.
Thank you!
Great tutorial!
Learned a lot from it, Thank you.
Just have a little confuse on Step 20, how do you know what exact position to move the inclined guide?
You should move the guide by an arbitrary distance.