

We live in amazing times when people launch rockets into space and walk on the Moon. Let’s dream a bit about the future when we’ll be able to explore the deep space even further and visit other planets! In this tutorial we will create a cute bunny space-explorer. We’ll be modifying simple geometric shapes and manipulating the most useful tools and function of Adobe Illustrator to design a stylized character who is ready for his first space adventure! 3… 2… 1… Go!
Tutorial Details
- Program: Adobe Illustrator CS6 – CC
- Difficulty: Intermediate
- Topics Covered: Shape Building, Scale Tool, Stroke Panel, Pencil Tool
- Estimated Completion Time: 20 minutes
Final Image: Cartoon Space Bunny
Step 1
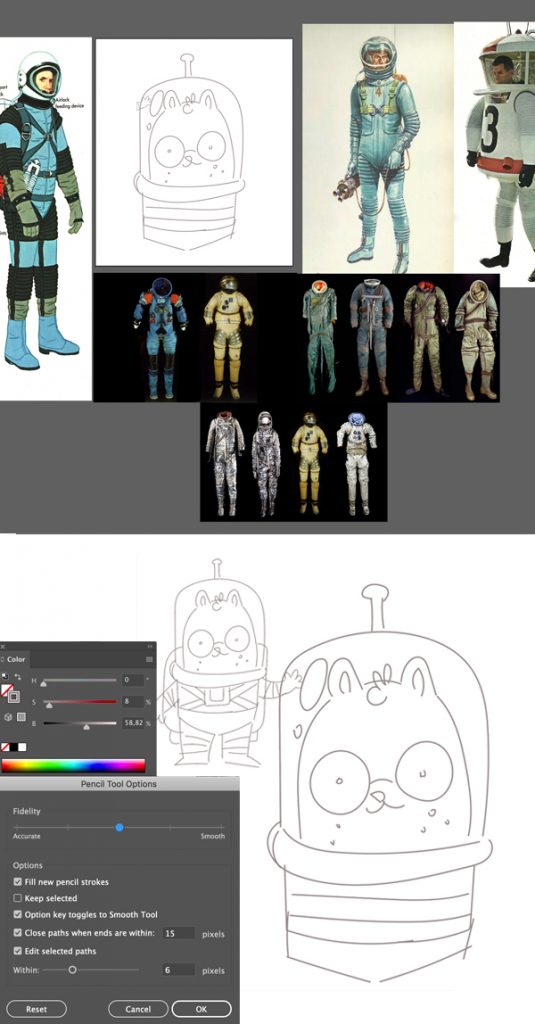
When creating a character, I always start with a mood-board and a simple sketch to express my idea. This time I gathered a collection of retro spacesuits for inspiration and details.
Your doodle doesn’t need to be clean and proportional, it will just serve as a guide for the overall shapes and silhouette of the character.
Tip: You can create a mood-board of reference images right in Adobe Illustrator! Just drag and drop images from you browser directly into your opened file and arrange them around the Artboard. Gather all the images in a separate Layer and Lock it. You can toggle the Visibility of the layer at any moment by pressing the Eye icon in the Layers panel.
I’m using the Pencil Tool (N) with a grey Stroke color to draw a sketch. I keep it on a separate layer as well, so that I can turn it on and off when I need.
Step 2
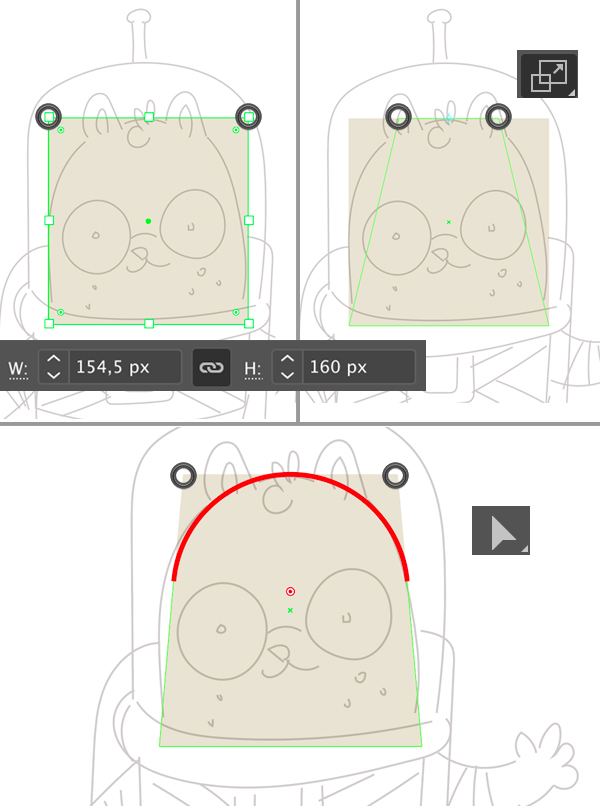
Let’s start with the bunny’s head. Take the Rectangle Tool (M) and create a shape, using your sketch as a guide for the size. My shape is about 155 x 160 px, but you might have different numbers. You can also use my values to create your bunny from zero without a sketch just by following the guidelines of this tutorial.
Select the top anchor points with the Direct Selection Tool (A) and use the Scale Tool (S) (click and drag) to make the top part narrower.
Finally, keeping the top points selected with the Direct Selection Tool (A), pull the circle marker of the Live Corners (see the red dot in the image below) to make the top corners fully rounded. You can also adjust the Corners value manually from the control panel on top.
Step 3
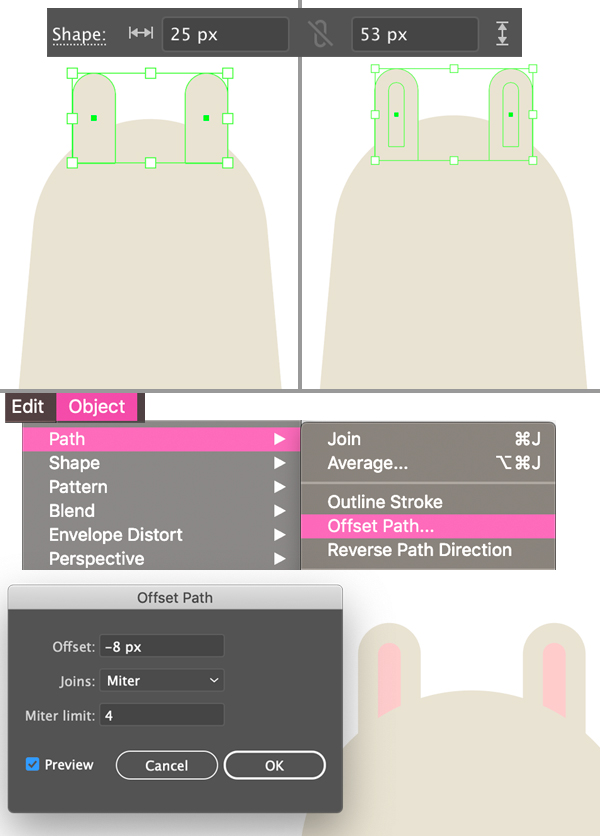
Create two small ears from the rectangles with rounded tops. Adjust their position on top of the head.
Now let’s form the inner shape of the ears. Keeping the ears selected, go to Object > Path > Offset Path and set the Offset to -8 px. Leave all other settings as default and press OK.
Fill the created shapes with pink color. Group (Control-G) all the ear parts and Send to Back (Shift-Control-[).
Step 4
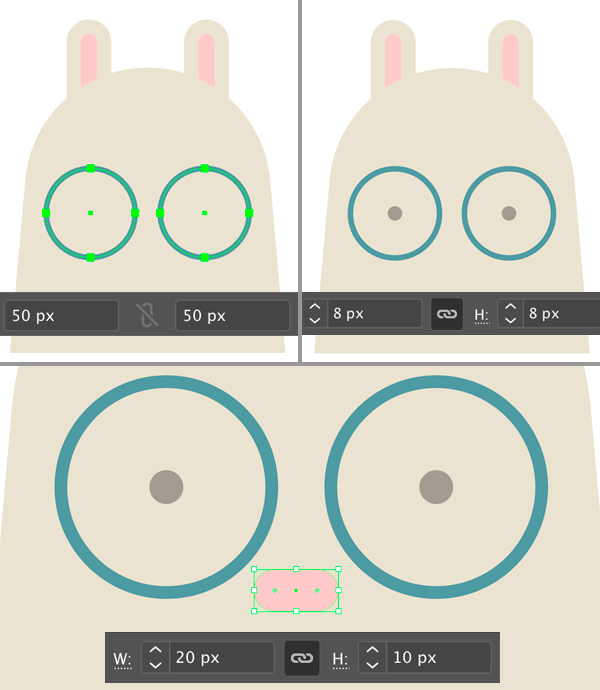
Now we’ll make the glasses! Use the Ellipse Tool (L) while holding down Shift to create a 50 x 50 px circle with no Fill and blue Stroke.
Use the Selection Tool (V) to click and drag the circle to the side while holding Alt-Shift to create a copy.
Make two smaller 8 x 8 px circles for the eyes and fill them with brown color.
Finish up with the face by creating a cute pink nose from a 20 x 10 px Rounded Rectangle.
Step 5
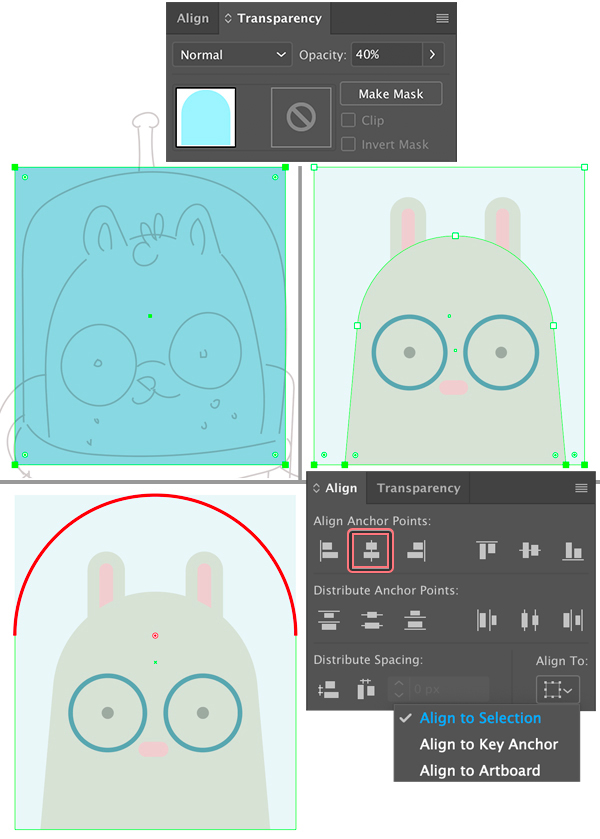
Let’s make a helmet of the spacesuit. I turn on the visibility of my sketch to check the shape and proportions of the helmet. Then I make a blue rectangle using the Rectangle Tool (M).
Set the Opacity of the shape to 40% in the Transparency panel (Window > Transparency) to make it semi-transparent.
Use the Align panel (Window > Align) to align the bottom part of the helmet to the bottom part of the head (select Align to Selection and click the Vertical Align Center button).
We can also Align all the objects to the center of the Artboard (remember to Group (Control-G) the eyes, glasses and ears) by selecting Align to Artboard and clicking Horizontal Align Center.
Make the top part of the helmet fully rounded with the help of the Direct Selection Tool (A) and the Live Corners.
Step 6
Create another rectangle for the antenna. Make the top part of the rectangle slightly narrower with the help of the Scale Tool (S). Attach a circle on top.
Set the same Opacity settings for the antenna or merge it together with the helmet using the Unite function of the Pathfinder panel.

Step 7
Let’s proceed with the lower part of our space suit.
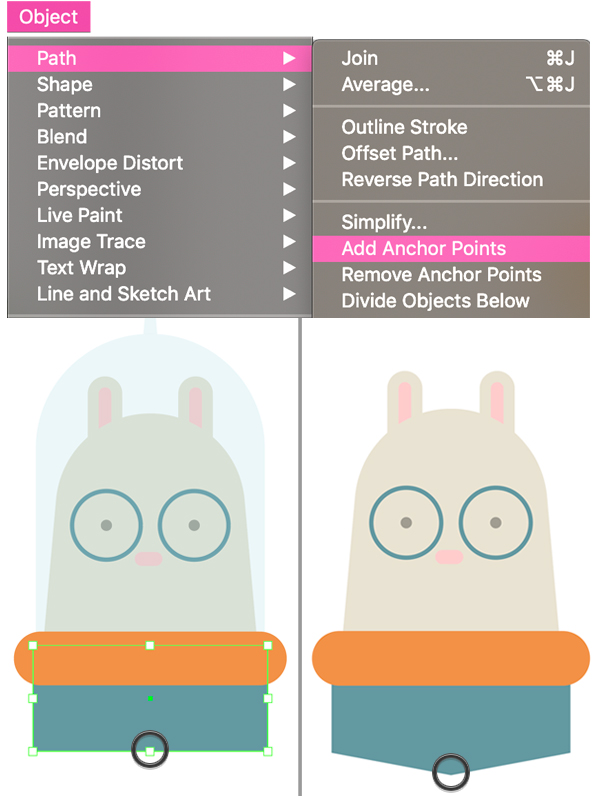
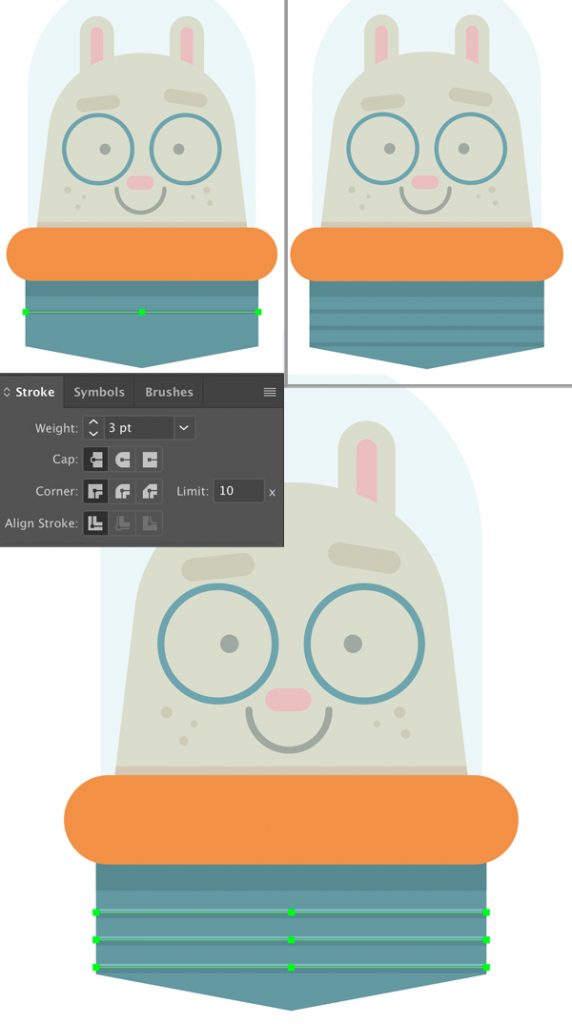
Use the Rounded Rectangle Tool to create an orange shape for the bottom part of the helmet. Then create a rectangle of blue color and Send to Back (Shift-Control-[), beneath all other shapes.
Let’s modify the shape a bit. Keeping it selected, go to Object > Path > Add Anchor Points. Now we have new anchor points in the center of each edge. Select the bottom anchor point with the Direct Selection Tool (A) and drag it a few pixels down to create triangular shape.
Step 8
Our main shapes are ready, now let’s add some details to make our character more interesting and appealing!
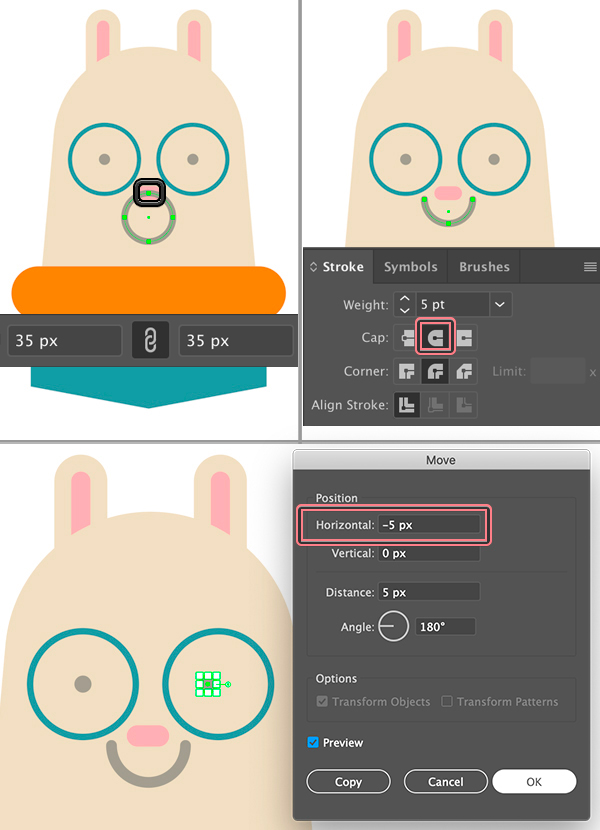
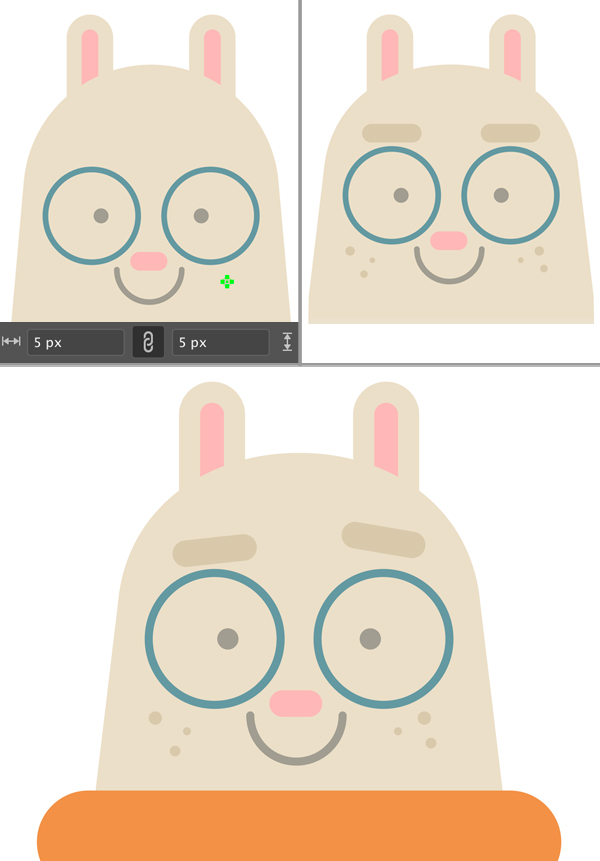
Use the Ellipse Tool (L) to create a smiling mouth. Make a circle of about 35 x 35 px size with no Fill and brown Stroke.
Select its top anchor point with the Direct Selection Tool (A) and press the Delete key to remove the point together with the top half of the shape. We can adjust the Weight of the line and the shape of its tips in the Stroke panel.
Let’s also move the eyes a bit closer to each other, this way making the character funnier and cuter. We can do this either manually (with the help of the arrows keys) or by selecting the shape and pressing Enter to open the Move window. From here we can change the Horizontal value to positive or negative number to move the shape to the right or to the left.
Step 9
Use the Ellipse Tool (L) to create a few freckles on the cheeks. Vary the size and position of each freckle to make it look more interesting and not so «generic».
Create a pair of funny chunky brows with the help of the Rounded Rectangle Tool. Use the Rotate Tool (R) to rotate each brow. Finally, move one brow slightly up to make our space bunny look smarter.
Step 10
Let’s add some minor details to the suit to decorate it.
Use the Line Segment Tool (\) or the Pen Tool (P) to create a horizontal line of the same width as the suit. Set its Stroke color to darker blue and the Stroke Weight to 3 pt. Create a couple more copies to make the suit striped.
Copy (Control-C) and Paste in Back (Control-B) the created stripes and move the copies a few pixels up with the help of the up arrow key. Set the Stroke color of the created copies to lighter blue. This way we’re creating volume by adding subtle highlights to the suit.
Finish up by adding a simple shadow to the suit by creating another dark-blue rectangle in its top part.
Step 11
Create a dark-blue rectangle of a size of your Artboard and Send to Back (Shift-Control-[). Lock this object. Now we have a deep space background!
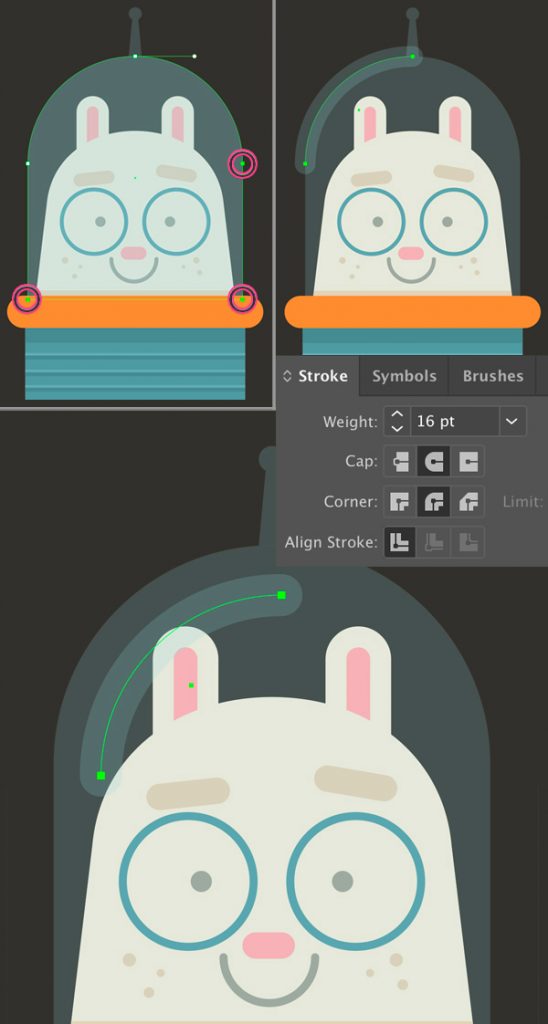
Let’s make a simple highlight on the helmet. Duplicate (Control-C > Control-F) the helmet and use the Direct Selection Tool (A) to select three anchor points that are marked with pink circles in the image below. Delete these points and now we have only a small arc left. Press Shift-X to swap Fill and Stroke colors of the shape and set the Stroke Weight to 16 pt, making it thick.
Make the shape slightly smaller and move it down a bit. Now the glass surface looks shinier and more realistic.
Step 12
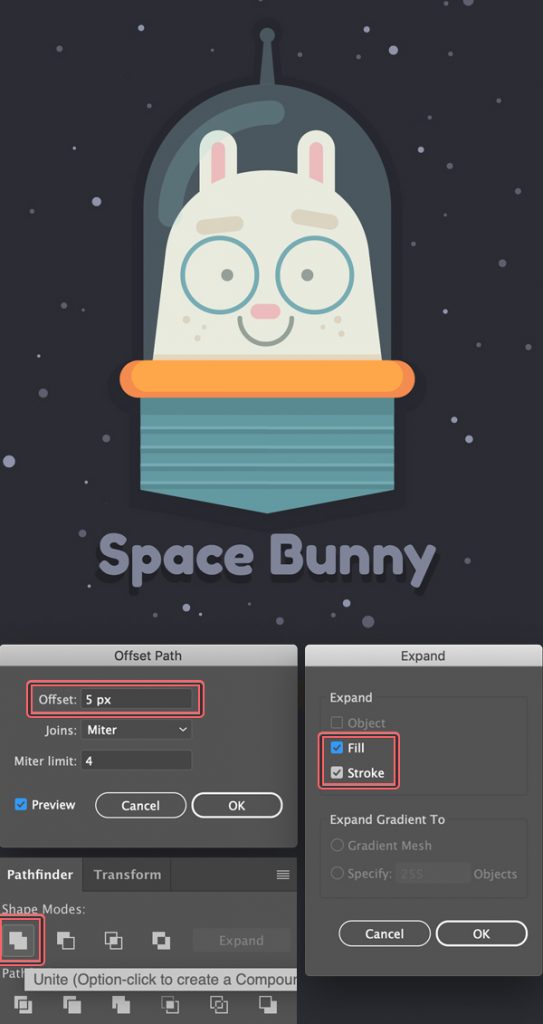
Let’s work on the composition a bit to make it look more balanced. Use the Ellipse Tool (L) to create small round stars, varying the size and color of the circles.
I’m using the Fredoka One font to add some text in the bottom part of the canvas.
We can also add a dark shadow beneath the character. To do this, Group (Control-G) all the elements of our space bunny and Duplicate (Control-C > Control-F) it. Select the copy group and go to Object > Expand to turn all the strokes and lines into curves. Merge all the objects of the copy into one shape with the help of the Unite function of the Pathfinder. Keeping this shape selected, go to Object > Path > Offset Path and set Offset to 5 px.
Expand and Unite the shape again if needed and finish up by filling it with dark-blue color.
Voila! Don’t forget to add a dark shadow to the text as well.
Step 13
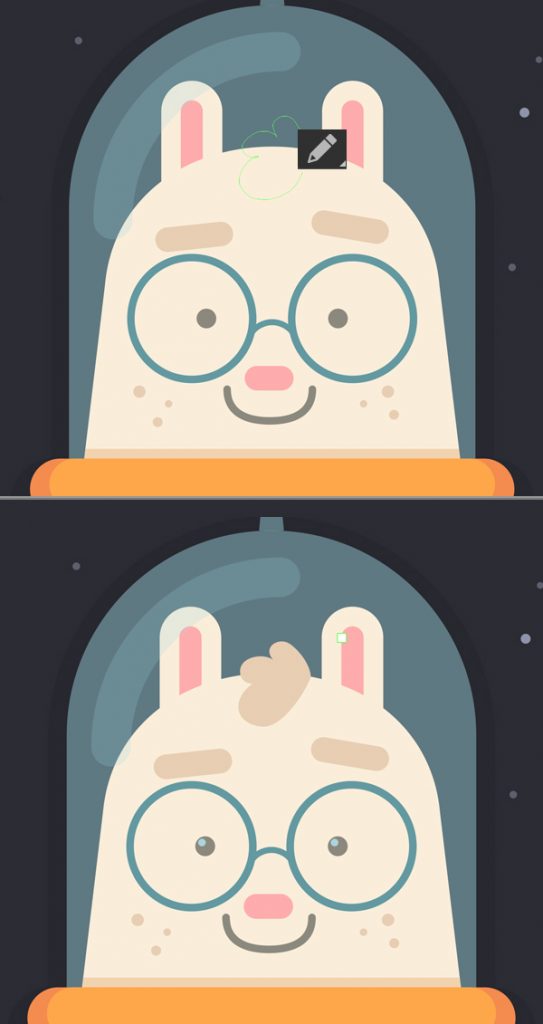
Let’s add a final touch to our space bunny! Take the Pencil Tool (N) and draw a curly tuft of hair on the forehead. Finish up by adding tiny circular highlights in the eyes.
Now the space bunny looks much better!
Congratulations! Our Space Bunny is Ready for Adventures!
Great work guys! Now you know some simple tips and tricks of Adobe Illustrator and are ready to draw a whole space crew and launch your spaceship!
I hope you’ve enjoyed following this tutorial and discovered something new that might be useful for you!
Stay tuned!
Author: Yulia Sokolova
2D/3D artist and tutorial instructor, focusing on character creation, icons, lettering design, and illustrations.


Really enjoyed this blog.Really thank you! Really Great.