

In this tutorial we will learn how to design traditional Chinese lanterns to create a festive postcard that you can send to your friends and family on a Chinese New year! We’ll be using basic geometric shapes, some of the most useful tools of Adobe Illustrator along with Effects and Pathfinder panel to vary the shapes of our lanterns to make them look interesting as a composition. Let’s start!
Tutorial Details
- Program: Adobe Illustrator CS6 – CC
- Difficulty: Intermediate
- Topics Covered: Shape Building, Stroke panel, Pathfinder Panel, Effects
- Estimated Completion Time: 20 minutes
Final Image: Chinese Lanterns

Step 1
Let’s take the Rectangle Tool (M) and start creating our first Chinese lantern. Make a 130 x 80 px red shape and use the Direct Selection Tool (A) to drag the circle markers of any of the corners to make all the corners rounded using the Live Corners feature. We can also control the exact value of the Corners radius from the control panel on top by entering the number in the Corners window. Let’s set it to 40 px.
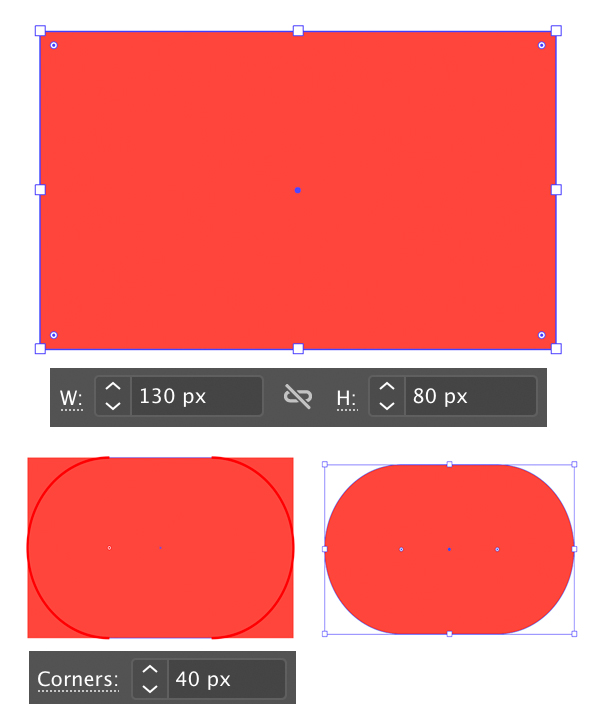
Step 2
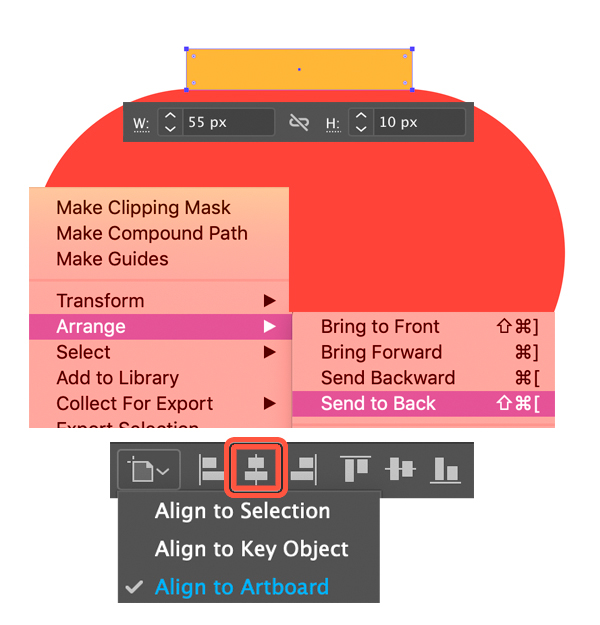
Create another rectangle of 55 x 10 px and fill it with golden yellow color. Place it on top of the first shape to decorate the lantern. We can press Shift-Control-[ to Send to Back while the shape is selected.
Let’s make sure that everything is perfectly centred. Select both shapes and click Horizontal Align Center in the control panel on top or in the Align panel (Window > Align).
Step 3
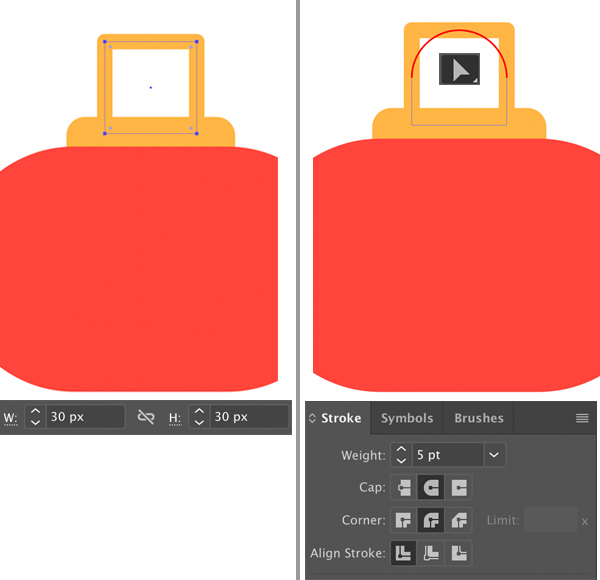
Place a 30 x 40 px rectangle on top of the Chinese lantern to create a handle. Set its Fill color to none and its Stroke color to golden yellow. Select the two top anchor points and make them rounded using the Direct Selection Tool (A).
Set the Weight to 5 pt in the Stroke panel to make it thicker.
Step 4
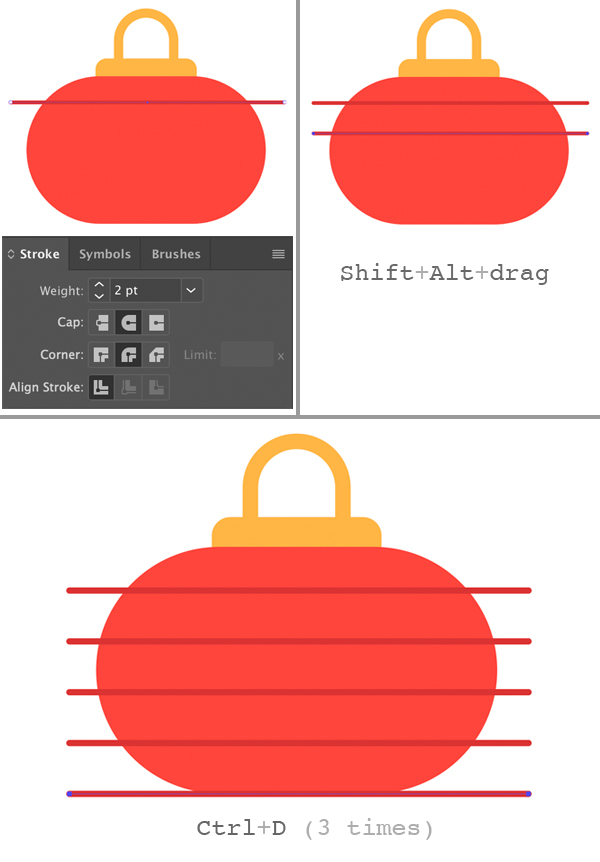
Now let’s add some decorative elements to the Chinese lantern. Use either the Pen Tool (P) or the Line Segment Tool (/) to make a horizontal line (hold down Shift to make it easier). Set the Weight to 2 pt this time.
Keeping the line selected with the Selection Tool (V), hold down Shift-Alt and drag it down as show in the image below to create a copy.
Then press Control-D a few more times to repeat the last action, making more copies.
Step 5
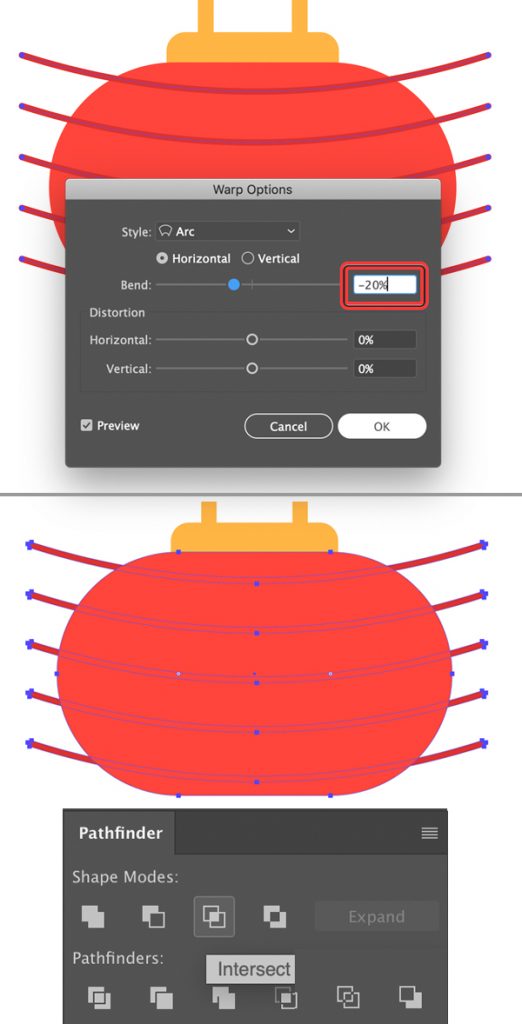
We need to bend the lines to make them follow the rounded shape of the lantern. Select all the lines and go to Effect > Warp > Arc. Set the Horizontal Bend value to -20% and press OK. Then go to Object > Expand Appearance to apply the effect and turn the strokes into curves. Keeping the lines selected, press Control-8 to Create Compound Path.
Finally, let’s cut the unneeded pieces of the lines that are outside the edges of the Chinese lantern. Select the red base of the lantern and copy it twice (Control-C > Control-F > Control-F). Then select the lines together with one of the lantern copies and click Intersect in the Pathfinder panel to cut the shapes.
Great! Now the lines are much shorter and fit the lantern.
Step 6
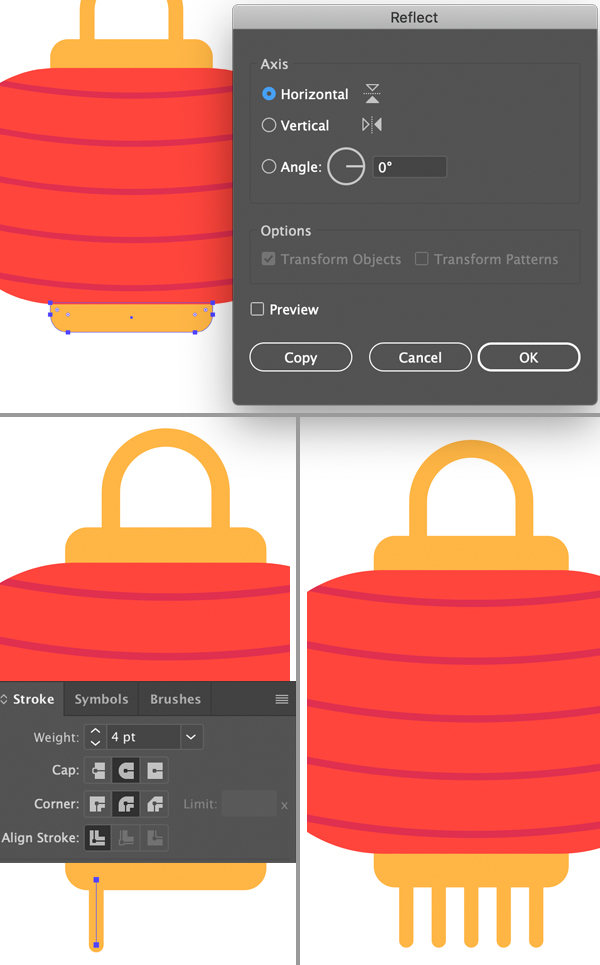
Let’s copy the top decorative part of the lantern and attach it to the bottom using the Reflect Tool (O). Double-click the tool icon in the Tools panel and flip the shape over the Horizontal Axis. Click Copy and drag the mirrored shape into its place.
Use the Line Segment Tool (/) to attach short vertical lines to the bottom of the shape. Make them thick enough by setting the Weight to 4 pt.
Add more lines by using Shift-Alt-drag and pressing Control-D a few more times.
Step 7
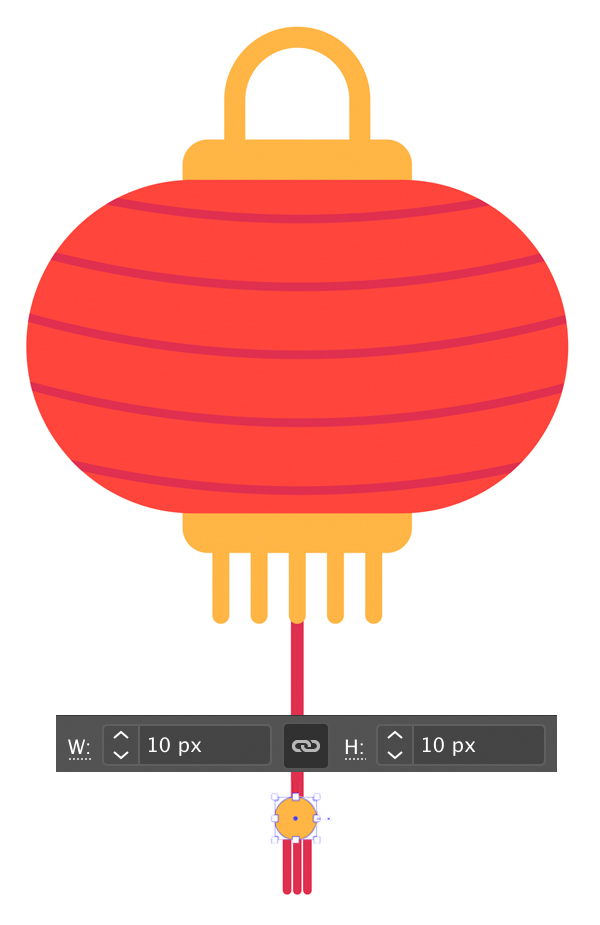
Now we can finish up decorating our Chinese lantern by adding a few red strings and using the Ellipse Tool (L) to draw a 10 x 10 px circle for a golden bead.
Awesome! Let’s move on to the next lantern.
Step 8
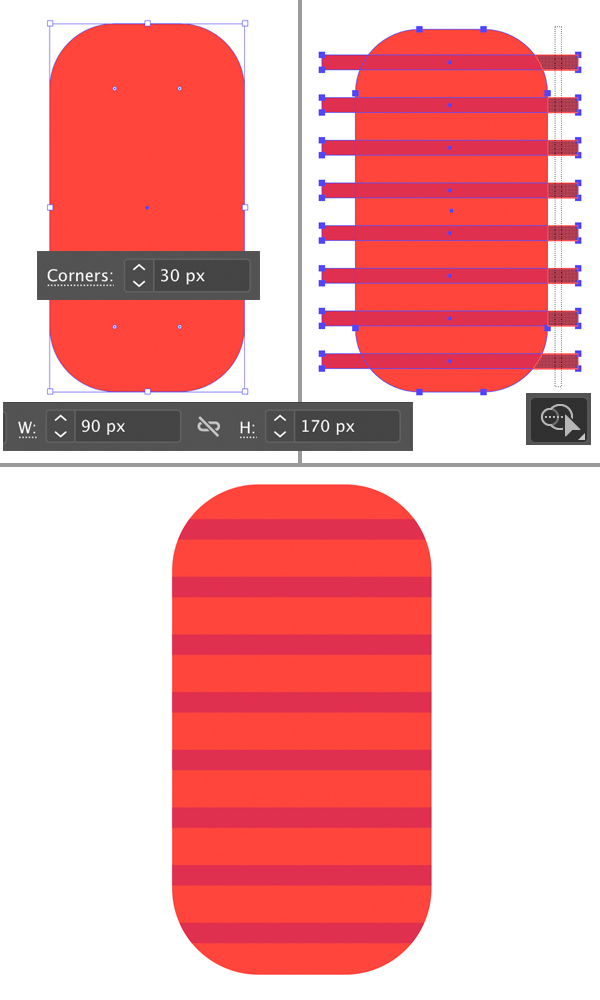
Let’s make our next lantern taller and more rectangular. Use either the Rectangle Tool (M) or the Rounded Rectangle Tool to make a 90 x 170 px shape with rounded corners.
Then use the Rectangle Tool (M) to add horizontal stripes of darker red color. This time we can use the Shape Builder Tool (Shift-M) to delete the unneeded pieces of the stripes. Just select all the stripes together with the lantern and hold down Alt while the tool is active to click and delete the unwanted pieces.
Step 9
Now we can duplicate the decorative elements from our first lantern and make them fit. Voila! Our second Chinese lantern is ready!

Step 10
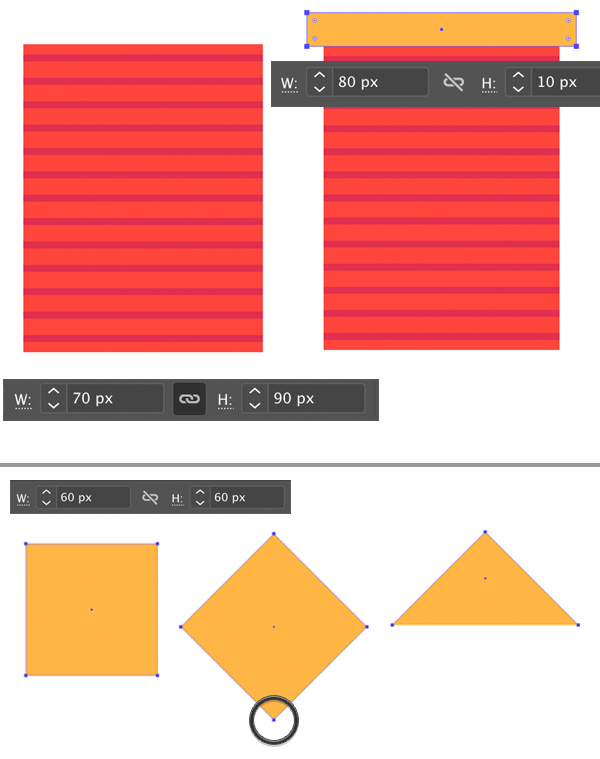
Let’s make another rectangular Chinese lantern from a red base (70 x 90 px) with dark-red stripes. Decorate its top part with a 80 x 10 px golden stripe.
Use the Rectangle Tool (M) to make a 60 x 60 px square. Then rotate it 45 degrees and select its bottom anchor point with the Direct Selection Tool (A). Delete this point, so that we have only the top triangular part left.
Step 11
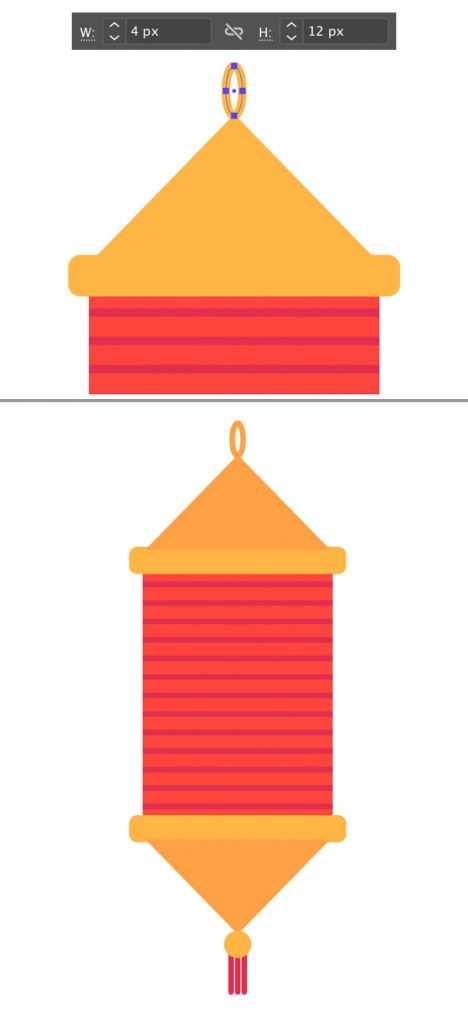
Attach the triangle to the top of the Chinese lantern and add an elliptical handle on top.
Finish up with the lantern by mirroring the triangle to the bottom part and adding a small bead with red a brush made of lines.
Great! Let’s move on to the next one.
Step 12
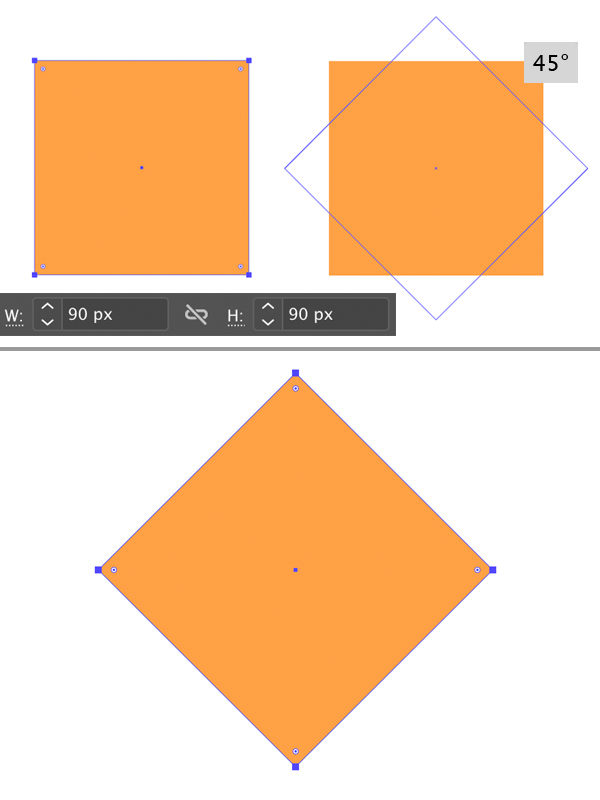
Let’s start with a 90 x 90 px golden square for our next Chinese lantern. Use the Select Tool (V) to rotate it 45 degrees.
Step 13
Copy (Control-C) the shape and Paste in Front (Control-F). Fill the top copy with a lighter yellow color and squash it so that it is 40 px wide. Then squash the bottom copy, too, to 90 px.
Attach a top part for decoration. I’ve duplicated it from one of the previous lanterns and just made it smaller.
Then I’ve selected the top and bottom anchor points of the lantern with the Direct Selection Tool (A) and used the Live Corners function to make the shape rounded. This way I’m hiding the top part of the lantern beneath the decorative element so that nothing sticks out or intersects.

Step 14
Add the bottom decorative element and finish up with the lantern by adding some red details so that it looks bright and vivid.

Step 15
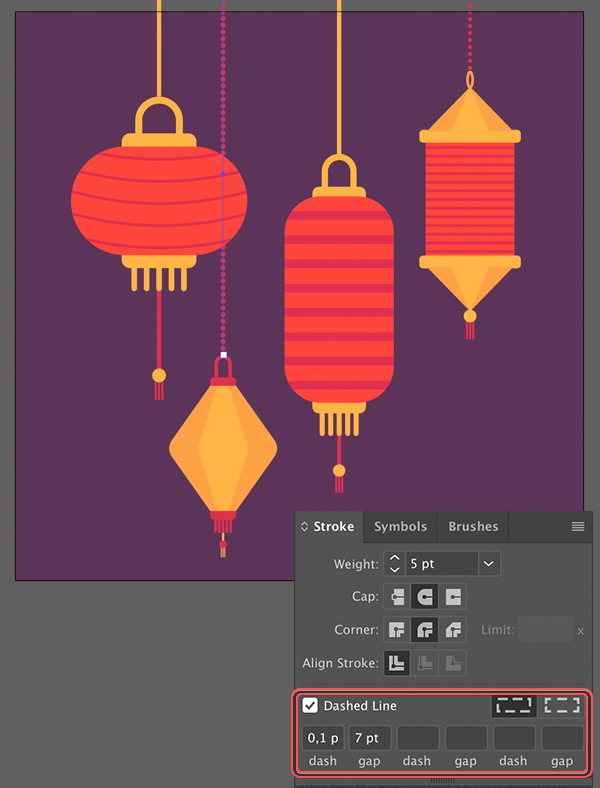
Now we can arrange the lanterns so that they create a nice composition together. I’ve added strings on top of each lantern so that they are hanging from the top. You can make a beaded string by ticking the Dashed Line box in the Stroke panel and setting the dash value to some very low number like 0,1 pt and the gap value to 7 pt.
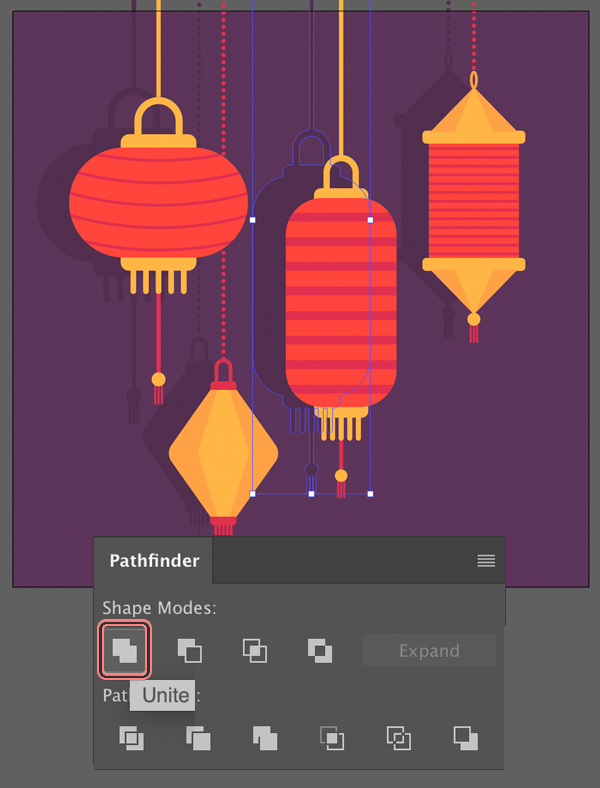
Step 16
We can also add shadows to the background by duplicating the lantern to back (Control-C > Control-B) and Uniting all the elements of the lantern group in the Pathfinder panel to create a flat silhouette.
Congratulations! The Chinese Paper Lanterns are Finished!
Great work guys! I hope you’ve enjoyed following this tutorial. Don’t forget to add a message in the bottom corner – and your festive postcard is ready.
Happy designing!
Author: Yulia Sokolova
2D/3D artist and tutorial instructor, focusing on character creation, icons, lettering design, and illustrations.


Woah! I’m really enjoying the template/theme of this website. It’s simple, yet effective. A lot of times it’s very difficult to get that “perfect balance” between usability and visual appeal. I must say you have done a awesome job with this. Also, the blog loads very quick for me on Opera. Outstanding Blog!