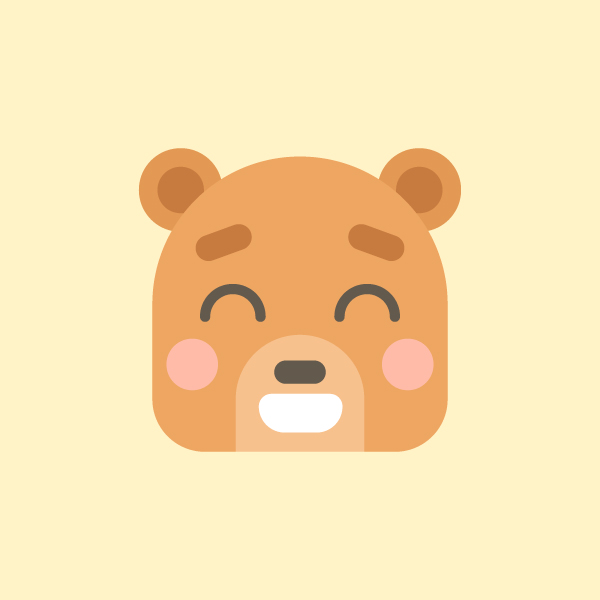
 In this tutorial we’ll be creating a cute flat teddy bear using simple geometric shapes and various tools and functions, which will help us to modify these shapes, creating facial features. Let’s get started!
Tutorial Details
- Program: Adobe Illustrator CS6 – CC
- Difficulty: Intermediate
- Topics Covered: Shape Building, Stroke panel, Live Corners, Rotate Tool, reflect Tool
- Estimated Completion Time: 15 minutes
Final Image: Cute Teddy Bear Icon in Adobe Illustrator
Step 1
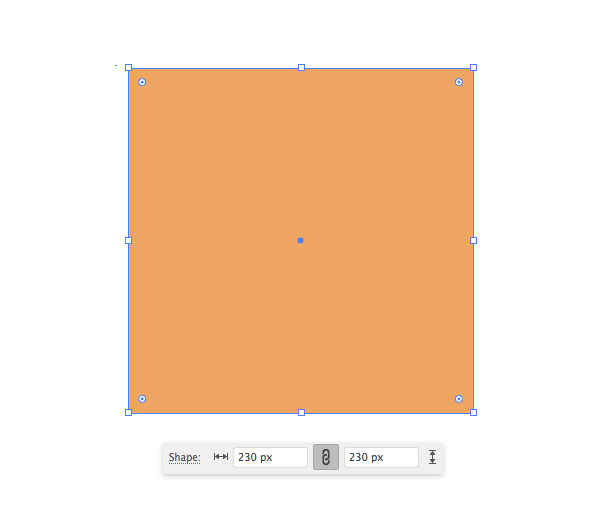
Let’s starts by making a head. Take the Rectangle Tool (M) and make a 230 x 230 px light-brown square.
Step 2
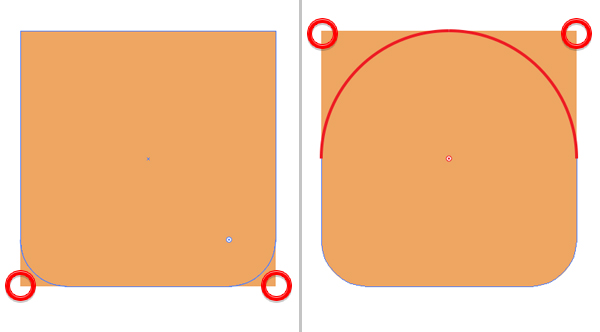
Take the Direct Selection tool (A) and select the bottom anchor points. Once the circle markers of the Live Corners appear, drag any of them up, making the corners rounded.
Then select both top points and use the Live Corners again to make the top of the head fully rounded.
You can also adjust the Corner Radius manually by setting the desired value in the control panel on top.
Step 3
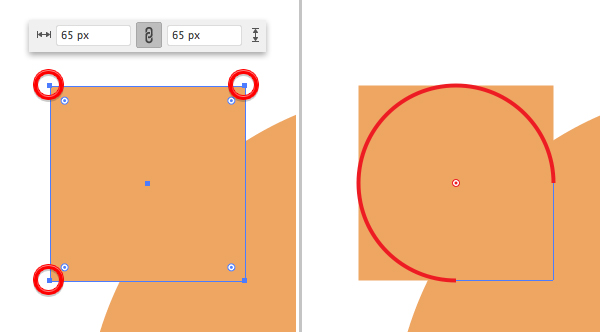
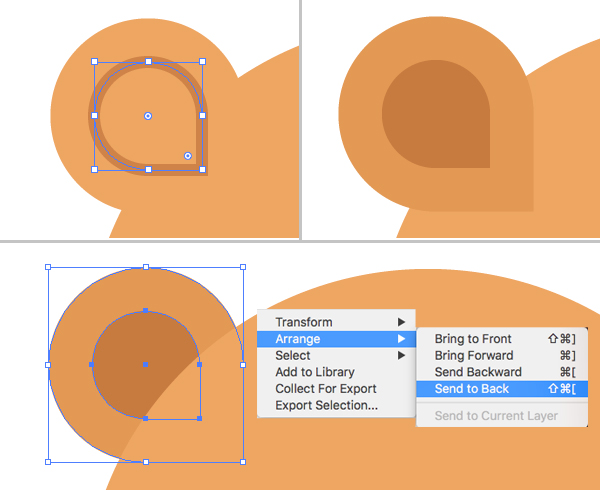
Now let’s shape an ear. Use the Rectangle Tool (M) to make a 65 x 65 px square. Use the Direct Selection Tool (A) to select both left points and top right anchor point and use the Live Corners feature to make these points fully rounded.
Step 4
Copy (Control-C) the shape and Paste in Front (Control-F). Make the copy smaller and fill it with dark-brown color. Make the bottom shape a bit darker as well.
Group (Control-G) both elements of the ear and Send to Back (Control-Shift-[) to place it beneath the head.
Step 5
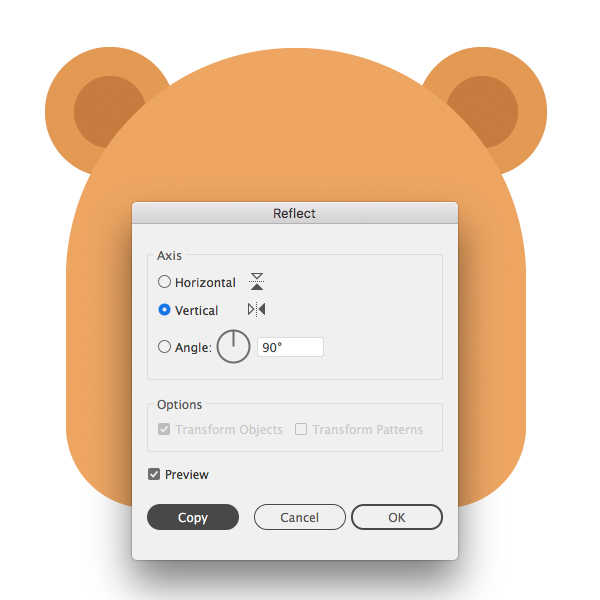
Select the ear and double-click the Reflect Tool (O). Flip the shape over the Vertical Axis and click Copy. Place the second ear at the opposite side of the head.
Step 6
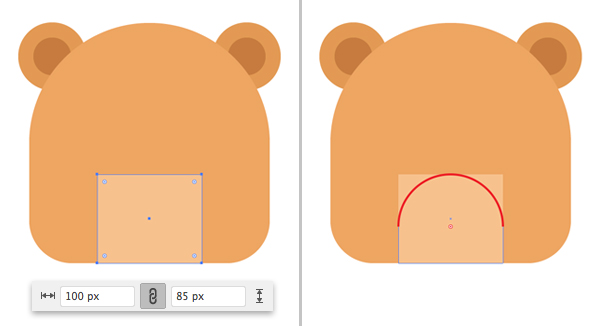
Now let’s draw a muzzle. Take the Rectangle Tool (M) and make a 100 x 85 px beige shape, attaching it to the bottom edge of the head.
Select its top points with the Direct Selection Tool (A) and make the corners fully rounded.
Step 7
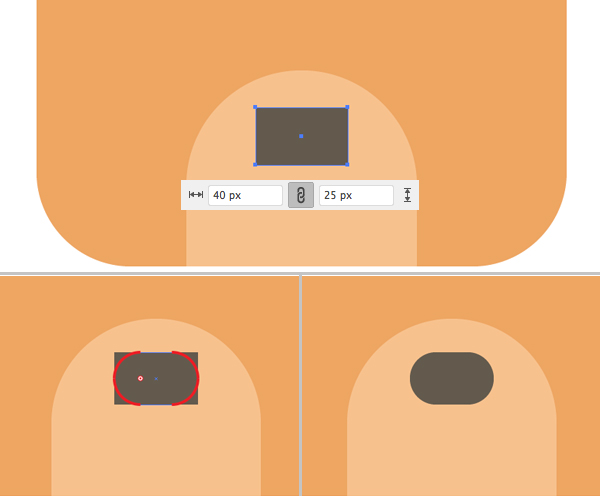
Make a 40 x 25 px dark-grey rectangle for the nose and use the Live Corners feature to make its corners rounded.
Step 8
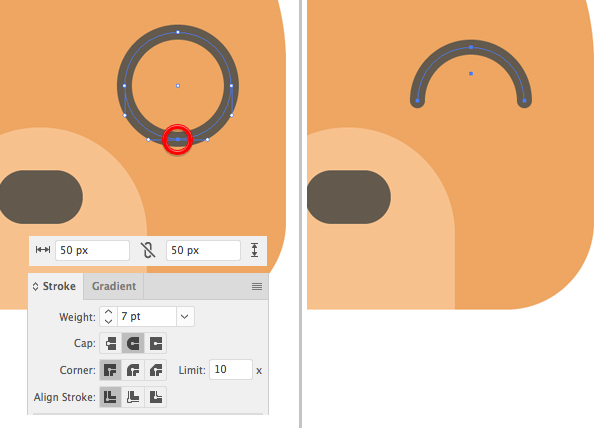
Now we’ll create an eye. Take the Ellipse Tool (L) and make a 50 x 50 px circle with dark-brown Stroke. Open the Stroke panel (Window > Stroke) and set the Weight to 7 pt, Cap to Round Cap.
Take the Direct Selection Tool (A) and select the bottom point of the circle. Hit the Delete key to make a semi-circle for the eye.
Step 9
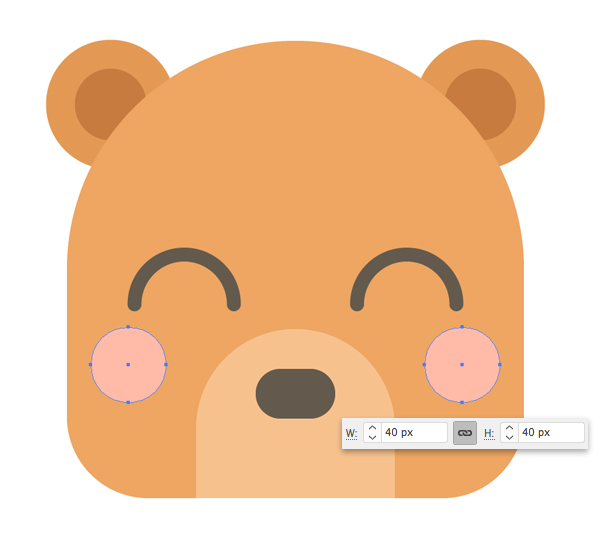
Hold Alt-Shift and drag the eye to the opposite side, creating a copy.
Use the Ellipse Tool (L) to create a 40 x 40 px light-pink circle for the blush on the cheeks.
Step 10
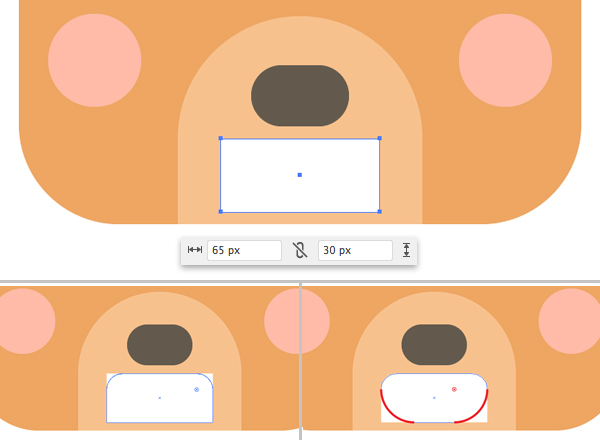
Now let’s move on to the mouth. Use the Rectangle Tool (M) to make a 65 x 30 px white rectangle. Use the Live Corners feature to make its top and bottom corners rounded, forming a smiling mouth, as shown in the image below.
Step 11
Make a 45 x 20 px brown rectangle for the eyebrow and use the Live Corners feature to make it smooth and rounded.
Step 12
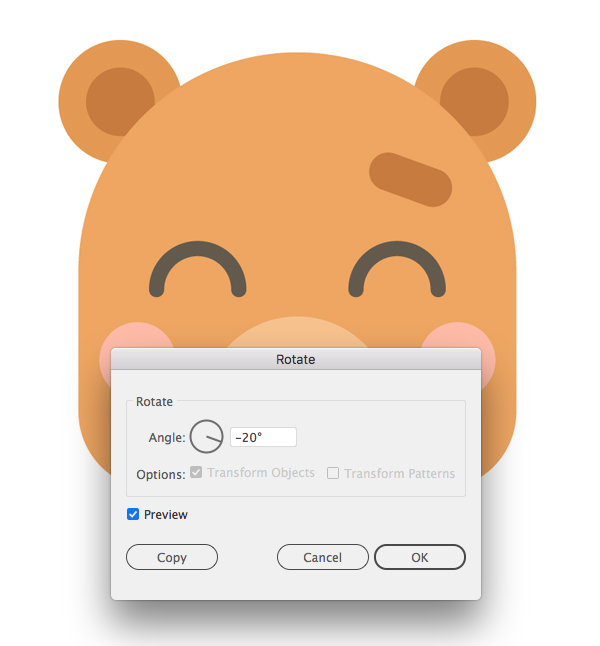
Keeping the brow selected, double-click the Rotate Tool (R) and set the Angle value to -20 degrees.
Step 13
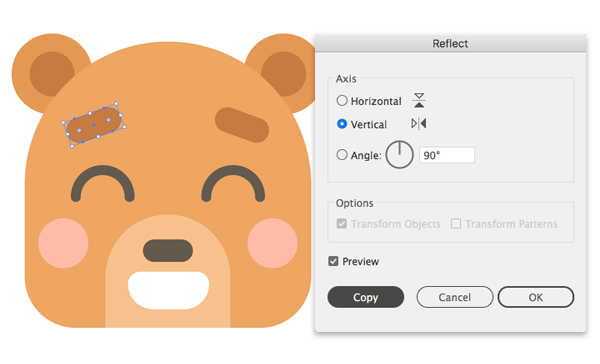
Now use the Reflect Tool (O) to flip the brow over the Vertical Axis and click Copy to make a second eyebrow.
Yippee! Our Cute Bear Icon is Finished!
That’s all, folks! I hope you’ve enjoyed following this simple tutorial and discovered some new tips and tricks that will be useful for you! Go ahead and create some more animals icons with your favourite pets!
Happy designing!




This site was very helpful.