

In today’s tutorial we will create intersecting futuristic lightsaber vector with the help of the blend objects, blending modes, and gradient fills. The tutorial is relatively simple and can be applied to many other Illustrator projects. Let’s get started!
Tutorial Details
- Program: Adobe Illustrator CS5 – CC
- Difficulty: Intermediate
- Topics Covered: blend objects, blending modes and gradient fills
- Estimated Completion Time: 45 minutes
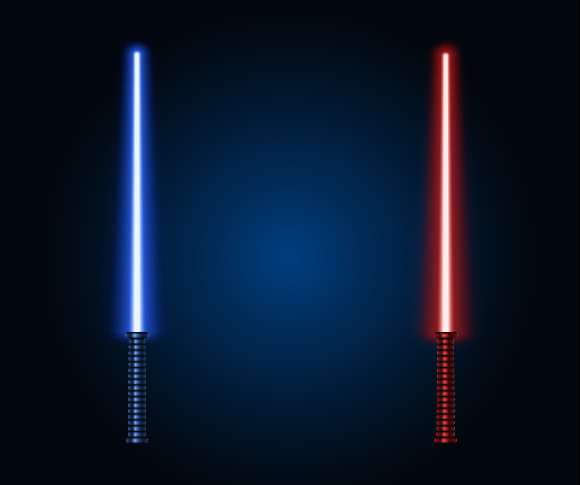
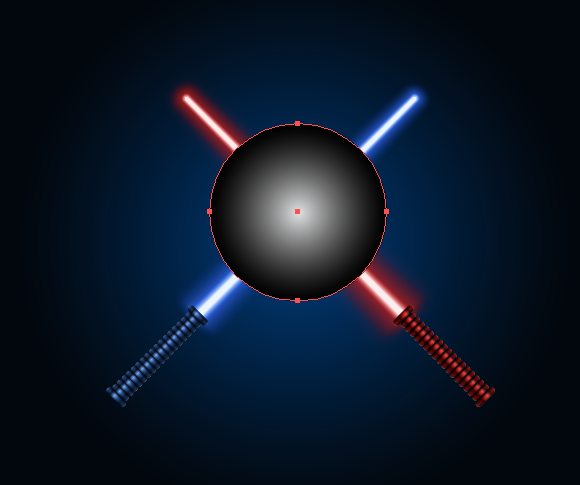
Final Image

Step 1
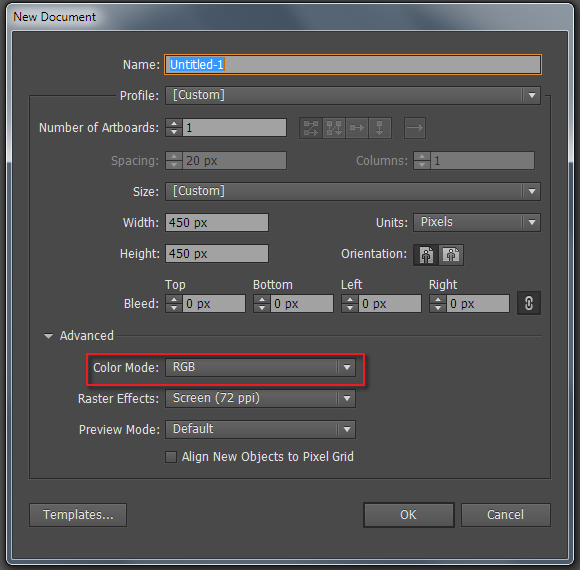
To begin our Lightsaber vector tutorial, start Adobe Illustrator, and then go to the File> New…. In the opened dialog box choose the RGB color mode for our illustration.
Create a rectangle with the help of the Rectangle Tool (M), the size of which corresponds to the size of an artboard. Fill the rectangle with a radial gradient from dark blue to black color.
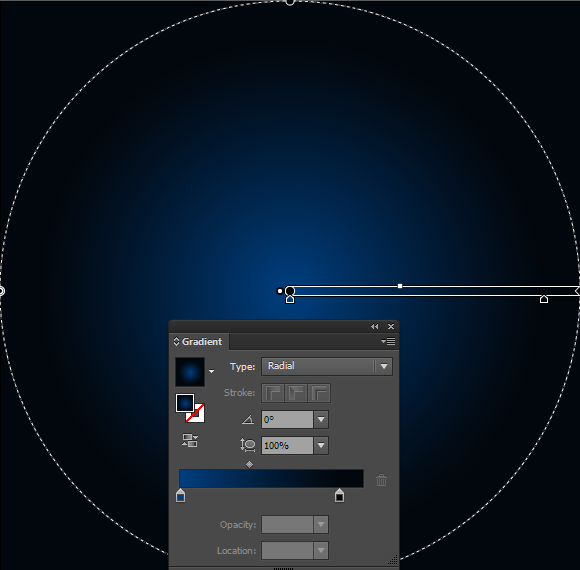
This object will serve as a background for the illustration and allow us to pick the right colors in the process of creating light swords.
Step 2
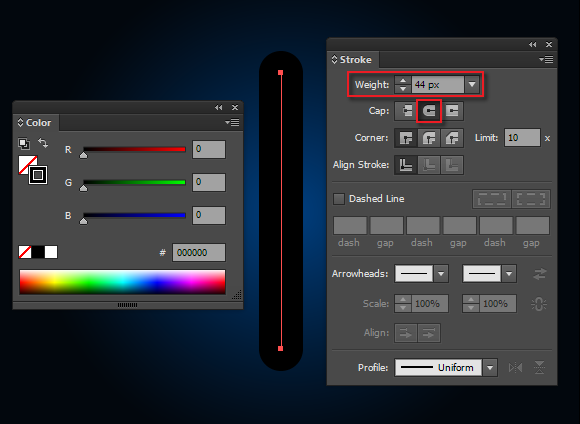
Proceed to the creation of the plasma blade of the first lightsaber. Take the Line Tool (\) and holding down Shift, create a vertical straight line segment with a black stroke (R = 0, G = 0, B = 0) and without a fill. Set the width of 44px and tick Round Cap option in the Stroke panel.
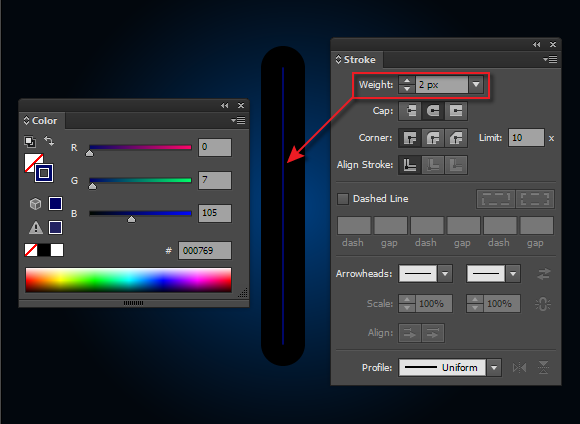
Duplicate the straight-line segment (Cmd / Ctrl + C, Cmd / Ctrl + F). Set 2px stroke width and blue color (R = 0, G = 7, B = 105) for the new object.
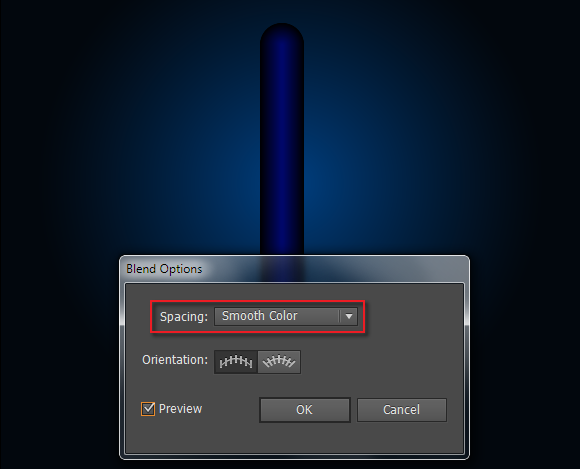
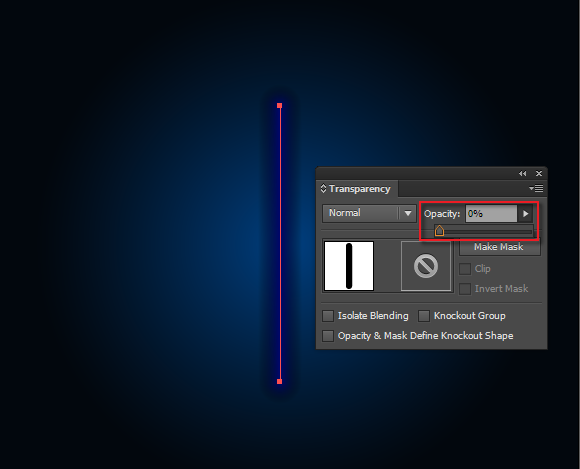
Select both straight-line segments and create the blend object (Opt / Alt + Cmd / Ctrl + B).
Select the black stroke in the blend object (it is convenient to do so in the Layers panel) and set the 0% Opacity in the Transparency panel.
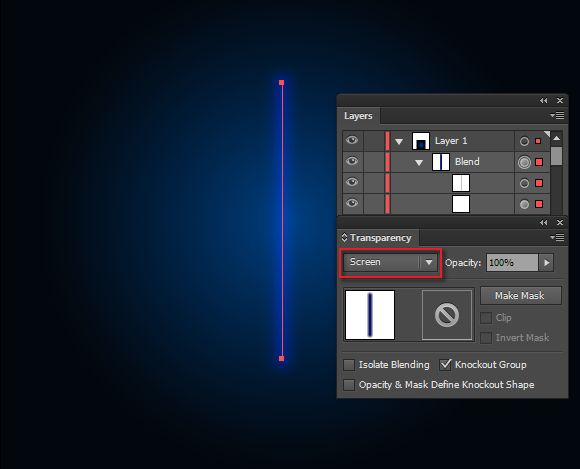
Select the entire blend object and use Screen blending mode in the Transparency panel.
Step 3
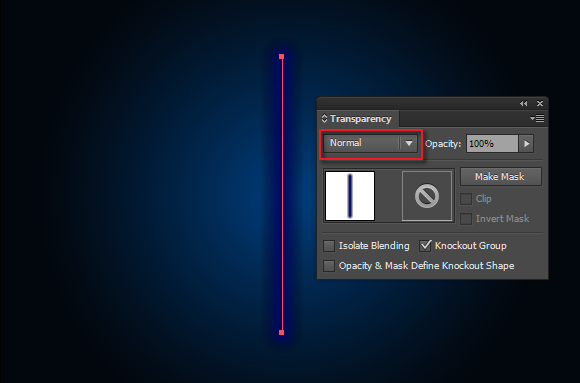
Duplicate the blend object (Cmd / Ctrl + C, Cmd / Ctrl + F) and apply the Normal blending mode to it.
Decrease black stroke width down to 29px and recolor it with blue color (R = 4, G = 42, B = 107).
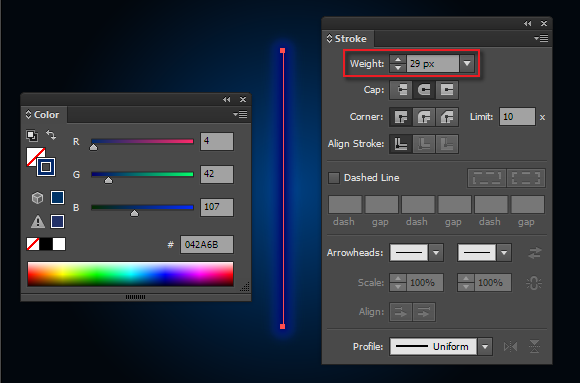
Recolor the stroke of the upper path of this blend object with light blue color (R = 59, G = 109, B = 255).

Step 4
Duplicate the upper blend object (Cmd / Ctrl + C, Cmd / Ctrl + F). For the lower path of this blend object set 8px for Stroke width and recolor it with blue (R = 54, G = 141, B = 255).
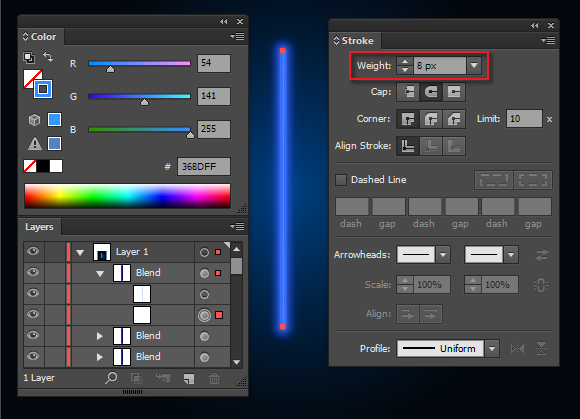
Recolor the upper path with light blue color (R = 237, G = 245, B = 255).
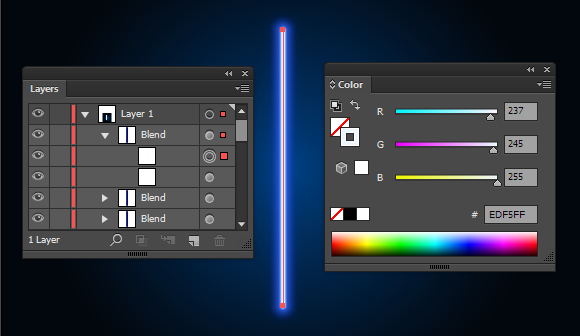
Select and group up all three blend objects (Cmd / Ctrl + G).
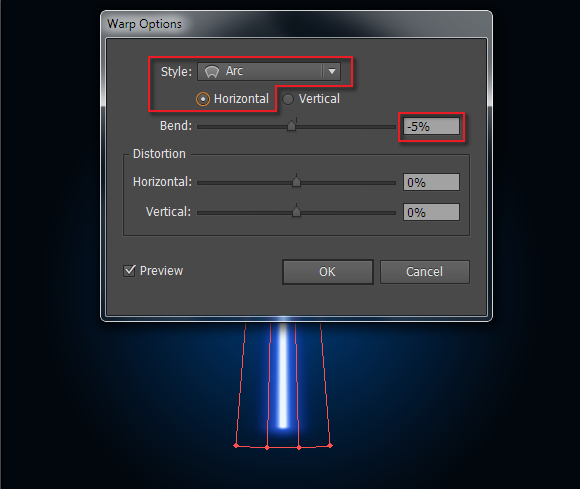
Step 5
Select the group, then go to Object > Path > Outline Stroke. As a result of this action stroke paths have converted to filled objects.
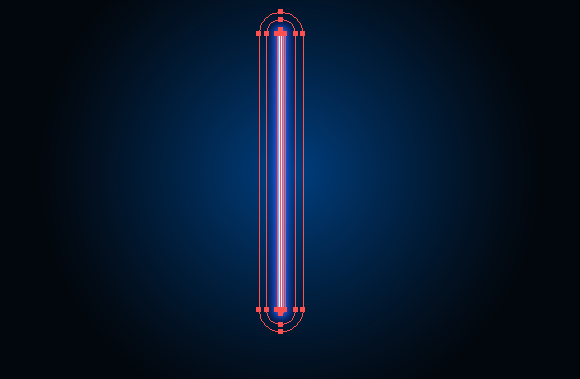
Now go to Object > Envelope Distort > Make with Warp…. In the Warp Options dialog box, select the Arc Style and set -5% for the Horizontal Bend.
Step 6
Proceed to the creation of the handle of the lightsaber vector. Create two horizontal straight-line segments using the Line Tool (\) at certain distance from each other. Apply to these paths 6px wide stroke of any color and turn on the Round Cap option in the Stroke panel.
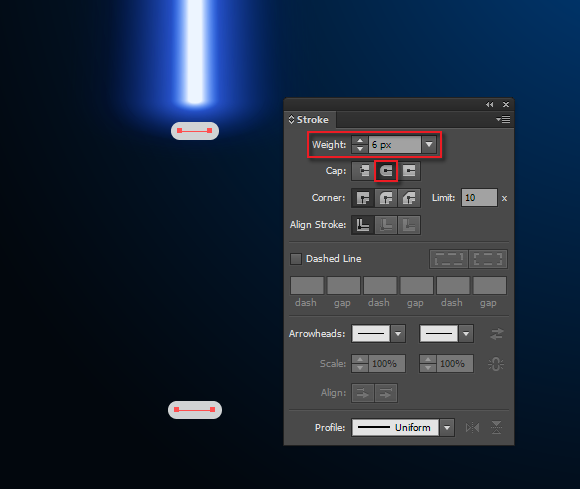
Select these paths and create a blend object (Opt / Alt + Cmd / Ctrl + B).
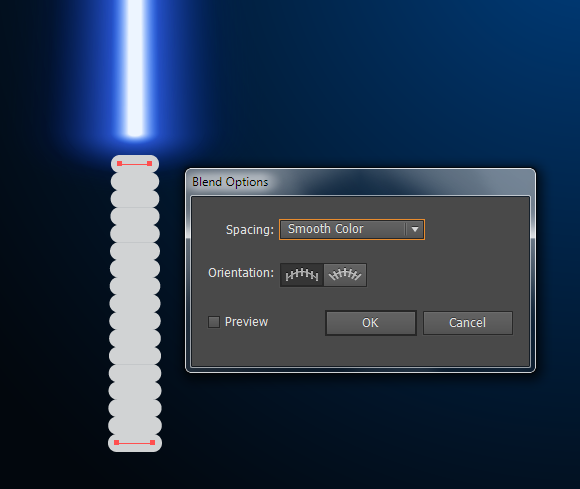
Create two more horizontal straight-line segments at the top and bottom of the handle as shown in the picture below.
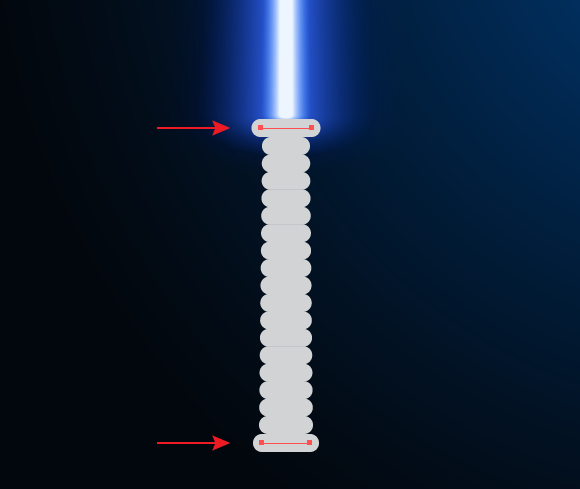
Step 7
Select all the objects of the handle, then go to Object > Path > Outline Stroke and fill obtained objects with vertical linear gradient, which consists of two black (on the edges) and one white (in the center) slider.
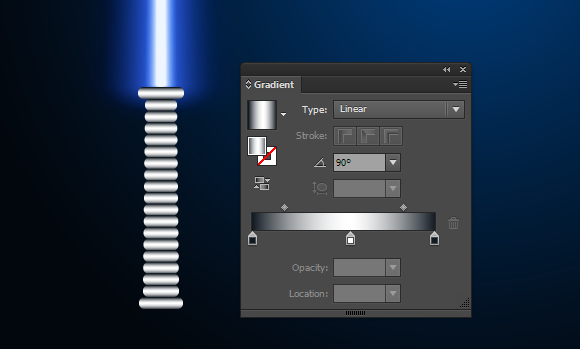
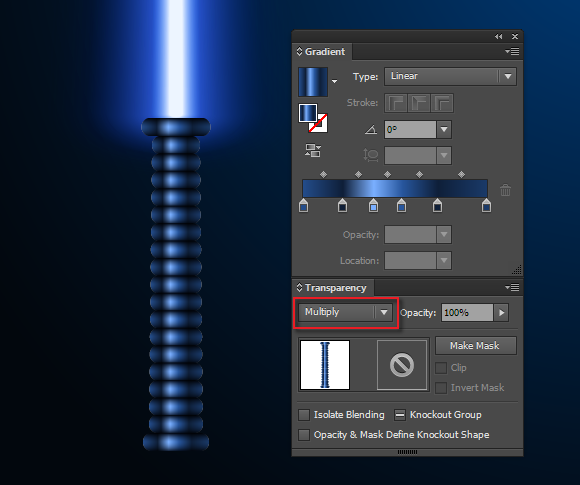
Group up all the elements of the handle (Cmd / Ctrl + G). Duplicate the handle (Cmd / Ctrl + C, Cmd / Ctrl + F), fill its objects with horizontal linear gradient, which consists of various shades of blue, like the one shown in the picture below. Apply to the upper group the Multiply blending mode in the Transparency panel.
Blue lightsaber is ready, duplicate it and recolor blue colors of the copy with red shades. Although this manual work will take some time, but you will surely get better result than the result after applying the Recolor Artwork feature (Edit > Edit Color > Recolor Artwork …).
Step 8
Before crossing the swords, select the lightsaber vector plasma blades and go to Object > Expand …, choose the Objects option in the dialog box.
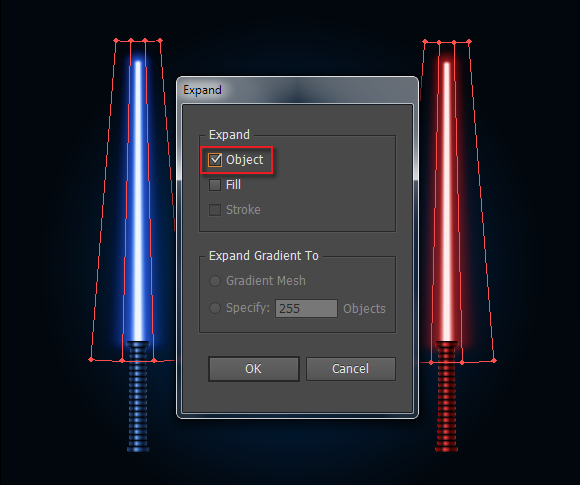
Now turn swords into meeting each other at an angle equal to 45 degrees.

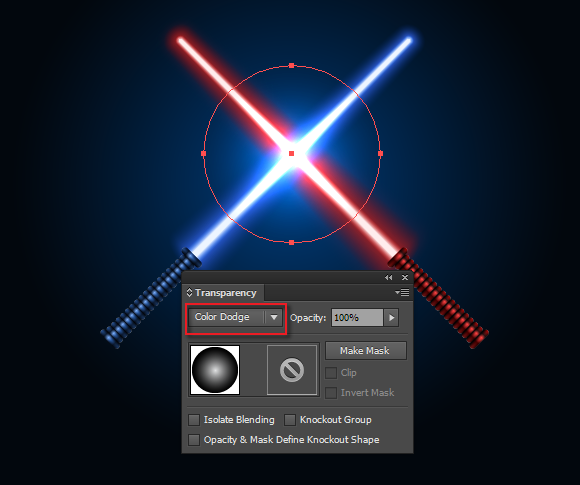
Step 9
In place of lightsabers crossing create a circle using the Ellipse Tool and fill it with a radial gradient from white to black.
Apply to the circle the Color Dodge blending mode in the Transparency panel.
Step 10
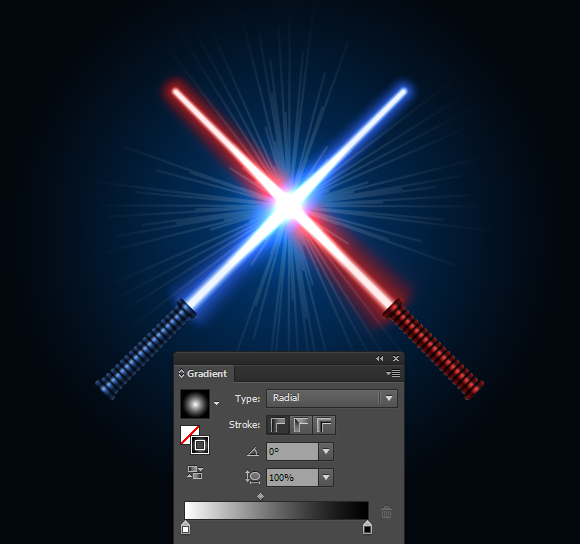
Take the Flare Tool and click at the place of swords crossing. In the opened dialog box, turn off the Rings option, and pick parameters for Rays option.

Select the Flare object, then go to Object > Expand… and tick Objects option in dialog box.
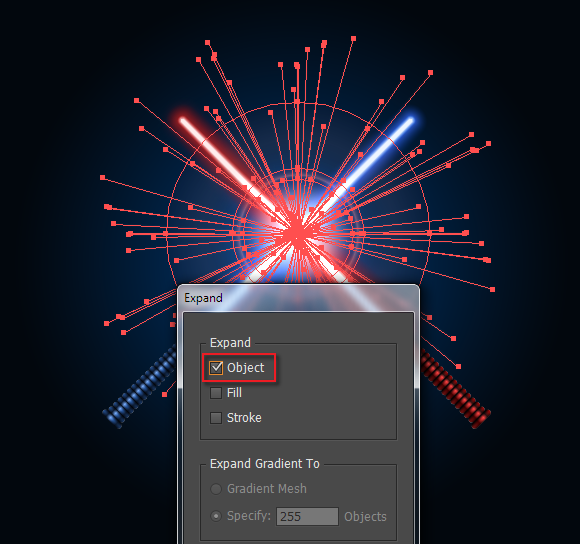
Delete all the options leaving only the divergent rays.

Step 11
Increase the Opacity of the rays up to 20% in the Transparency panel.
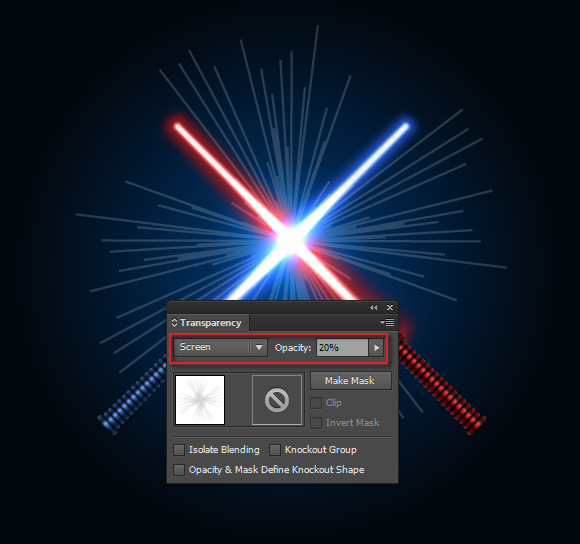
Now apply the radial gradient from white to black to the strokes of the rays.
Here is how your lightsaber vector should look. I hope you’ve enjoyed this tutorial and can apply these techniques in your future projects.

Author: Iaroslav Lazunov
My name is Iaroslav Lazunov, I am a graphic designer from Ukraine. I am glad that I finally found the job in my life that I can share my knowledge and experiments with you in my tutorials. Follow me on Twitter or visit my blog Vectorboom.com


Thanks a lot for getting most out of this tutorial
I’m struggling to follow Step 5. When I apply the Outline Stroke command to the group all of my previous gradients disappear and I’m left with unblended objects.