It goes without saying that Adobe Illustrator is all about using shapes to create artwork. In this tutorial I’ll cover how to use basic shapes, and tools to create a variety of logos. The more seasoned designer may pick up a fact or two, but this tutorial is perfect for the expert beginner who is working on reaching intermediate status. I’ve also included several animated gifs to help more clearly illustrate how certain steps are performed.
Tutorial Details
- Program: Adobe Illustrator CS6
- Difficulty: Beginner
- Topics Covered: Shape Tools, 3D Tool, Eraser Tool, Pathfinder, Flip & Rotate Tools
- Estimated Completion Time: 1-1.5 hours
Piece of Cake—Windows 8
Let’s start with the basics. We’ll use the following tools:
- Rectangle Tool
- Move Tool
- 3D Rotate Tool
Step 1
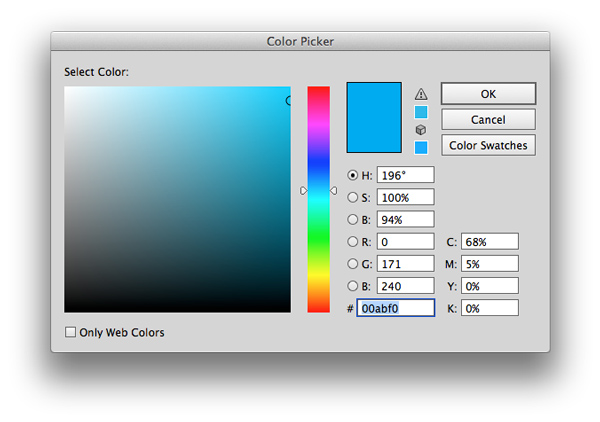
Start by selecting the color of the logo. I’m using 00abf0.
Step 2
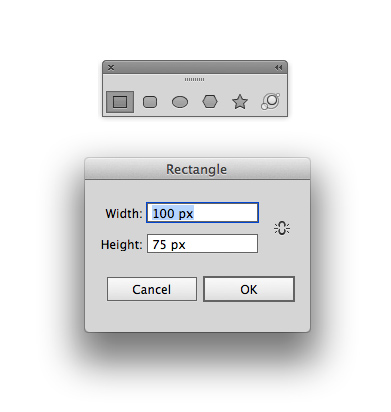
Press M to get the Rectangle Tool. It’s commonplace to simply draw an arbitrary rectangle shape but since we’re making a more specific design, we’ll use Illustrator’s precision to our advantage. To make a shape that has specific dimensions, click once on the Artboard to bring up the dialog box. Enter 100 px X 75 px.
This is your resulting shape.
Step 3
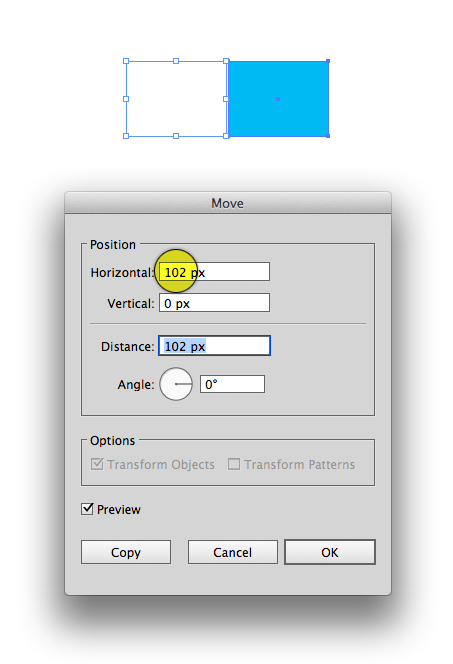
Go to Object > Transform > Move. Since our rectangle is 100 px wide, we’ll move it 102 px to the right which will give us a 2 px gap. Click Copy.
Step 4
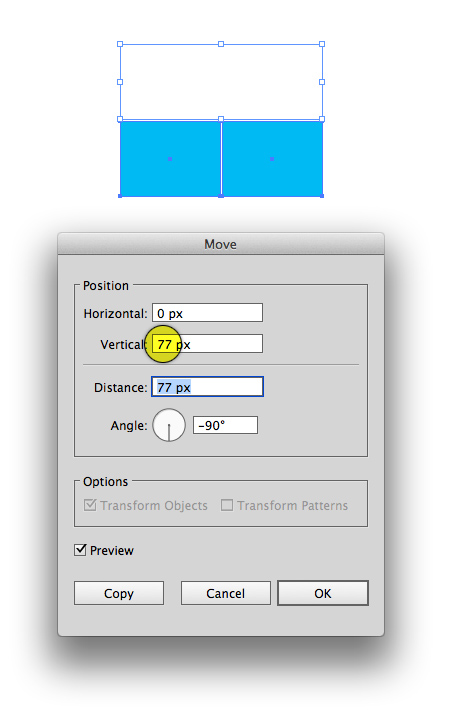
You’ll now have two rectangles. Select both of them and now move them vertically by 77 px. Click Copy.
This is your result. You’ll now have a perfect 2 pixel gap both vertically, and horizontally between your shapes.
Step 5
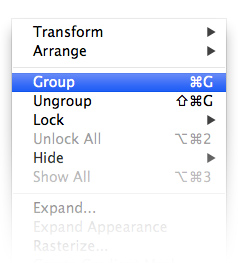
Select all four rectangles and go to Object > Group (Command + G.) If you don’t group your objects the next step will apply a transformation to each rectangle individually. So, make sure not to skip this step!
Step 6
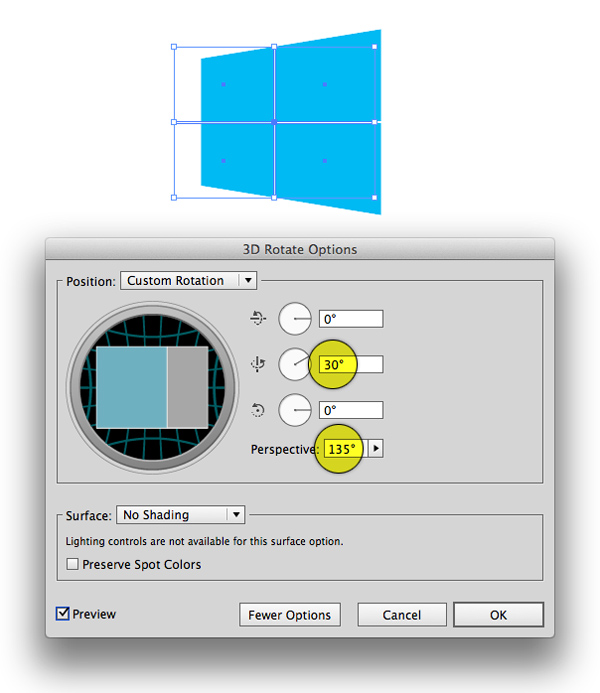
Go to Effect > 3D > Rotate. Enter 30 for the Y Axis and, 0 for the others. Change the Perspective to 135. Click OK.
That’s it! Piece of cake, right? I’ll turn up the heat as we move on to the next section.
Let’s Rock—Android
Ok, you made easy work of creating the Windows logo. This Android logo will be a bit harder. This is what I’ll cover:
- Rounded Rectangle Tool
- Eraser Tool
- Rotate Tool
- Flip Tool
- Pathfinder
Step 1
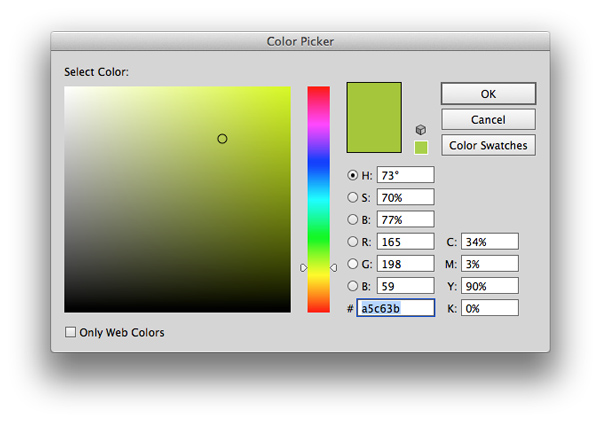
Start by selecting the color of the logo. I’m using a5c63b.
Step 2
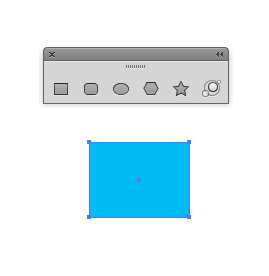
There are several ways to draw a rectangle with rounded corners. You can use the standard Rectangle Tool (M), and add rounded corners to it. Or, you can use the Rounded Corner Rectangle Tool, shown below.
All Illustrator shape tools have additional options that can be invoked by either double clicking on the tool itself or clicking once on the artboard with the tool selected. Even better, you can use modifier keys like spacebar, option key, and arrow keys to manipulate a shape or its position as you’re drawing it.
Notice below that when I first select the Rounded Corner Rectangle Tool the shape has square corners. I gradually round the corners by holding the up arrow before I release the mouse button.
Step 3
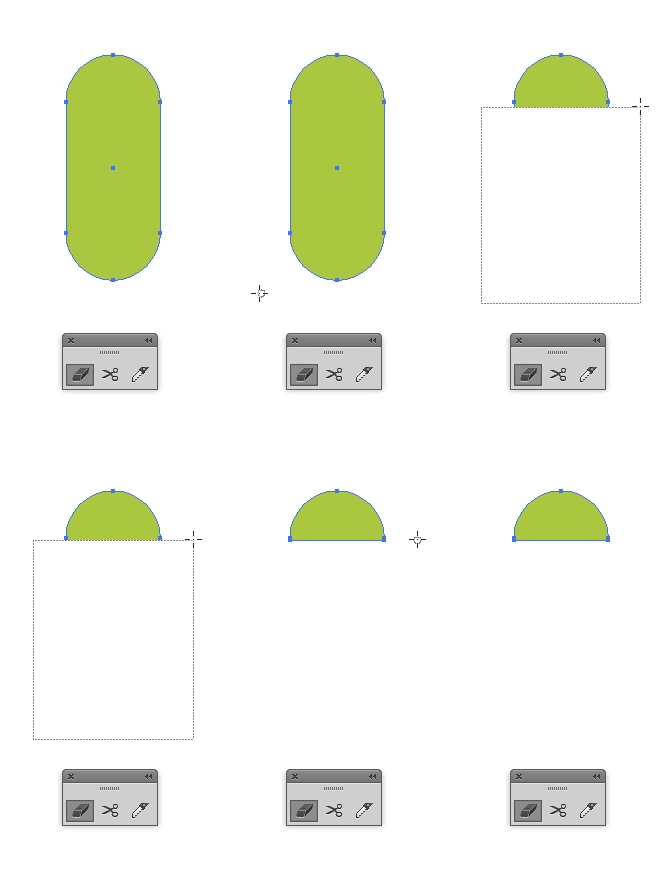
The Eraser Tool can work wonders. Not only can it erase in arbitrary directions and sizes, it can erase entire sections of a shape. To erase a large section, grab the Eraser Tool (Shift + E), then hold down Option and click and drag over the area of a shape you want to erase. It’s that easy!
Step 4
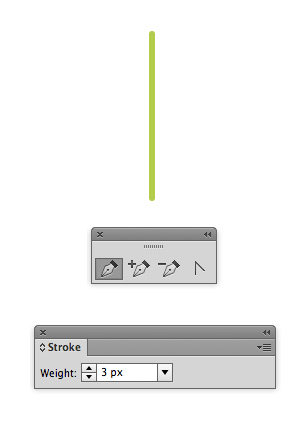
Using the Penn Tool (P) make a line and give it a 3 px Stroke.
Step 5
Both the Selection Tool (V), and the Rotate Tool (R) can rotate shapes. Below, I’m using the Rotate Tool to change the angle of my shape.
Step 6
Using the Reflect Tool (O) duplicate the line so that you have a perfect copy and the opposite angle of the first shape.
Step 7
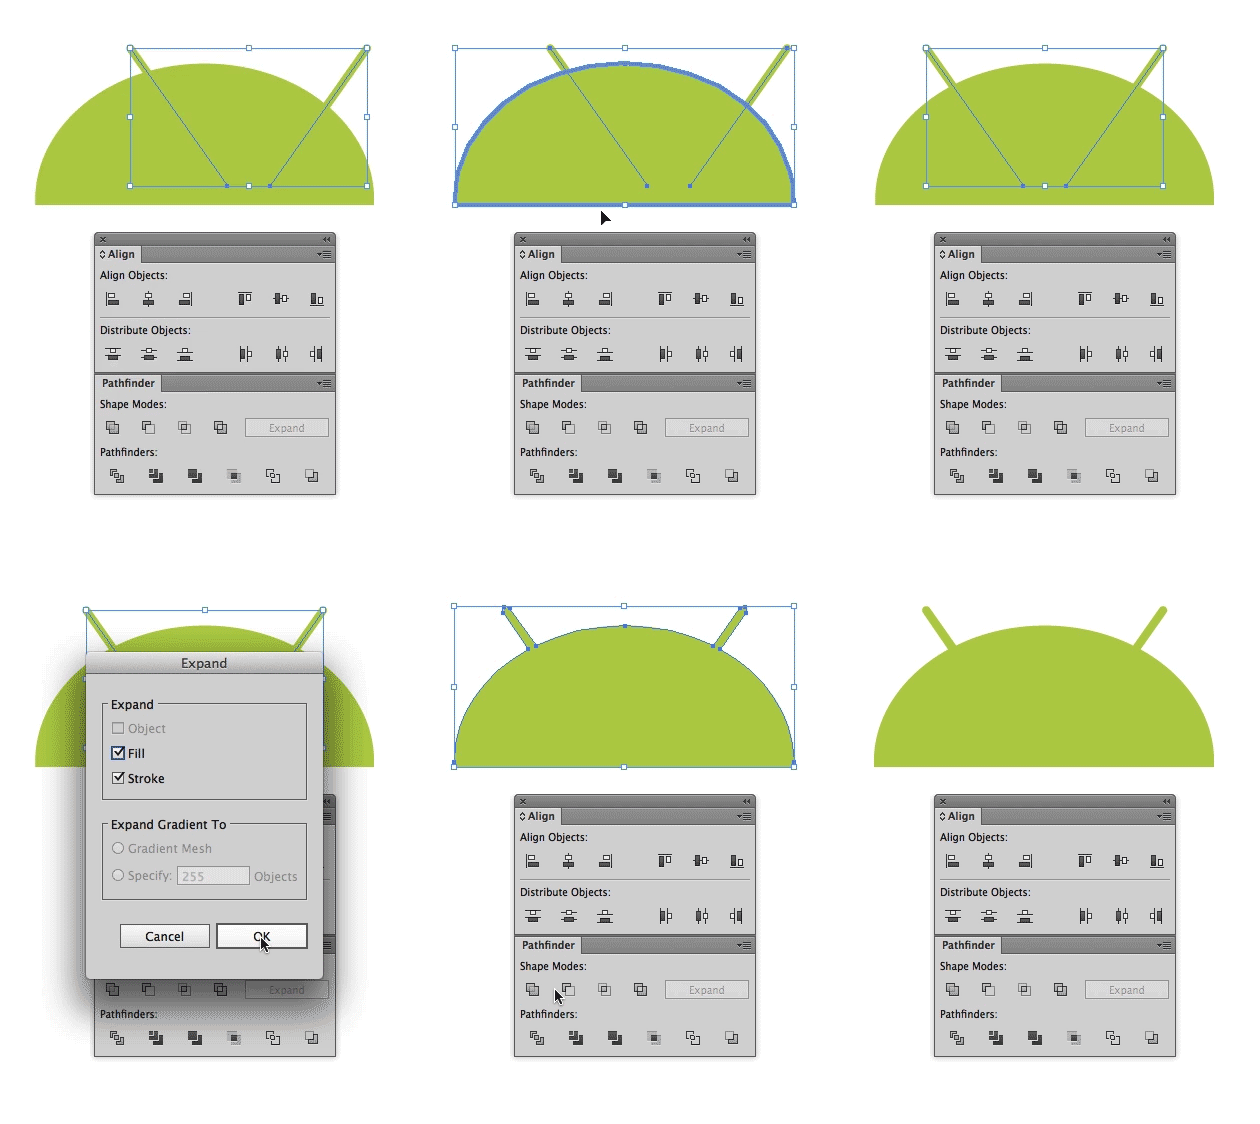
Align the antenna with the head then select the antenna and go to Object > Expand, then click OK. You can align objects to an anchor object by first selecting all the objects that need to be aligned and then clicking once more on the anchor object. As you’ll see below, the anchor object is the head. The two antenna (which have already been grouped together) are aligned to the head shape, then expanded.
Merge all of your shapes together using the Unite option in the Pathfinder Palette.
Step 9
Using the Ellipse Tool (L) draw two circles. Make them perfect circles by holding down the Shift key as you draw them. Group both of the circles then center align them to the head shape.
Step 10
We’ll again use the Rounded Rectangle Tool, and Eraser Tool to make easy work of creating the Android’s body.
Step 11
Use the trusty Rounded Corner Rectangle to make the legs, and arms. That’s it!
Come Get Some—CNN
As you advance your Illustrator skills it will be critical to have a command of the Pen Tool. This last logo shows you firsthand the power of the Pen Tool and how it can save you valuable time when creating shapes. I’ll use the following tools:
- Ellipse Tool
- Pen Tool
- Direct Selection Tool
Step 1
Select your color. I’m using f21919.
Step 2
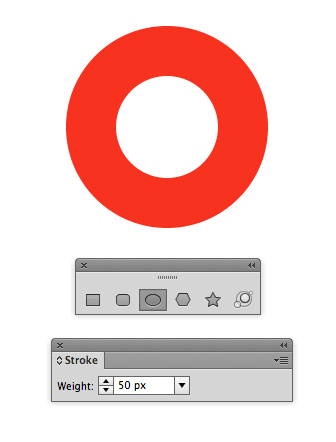
Using the Ellipse Tool (L) draw a perfect circle. Give the circle a substantial Stroke.
Step 3
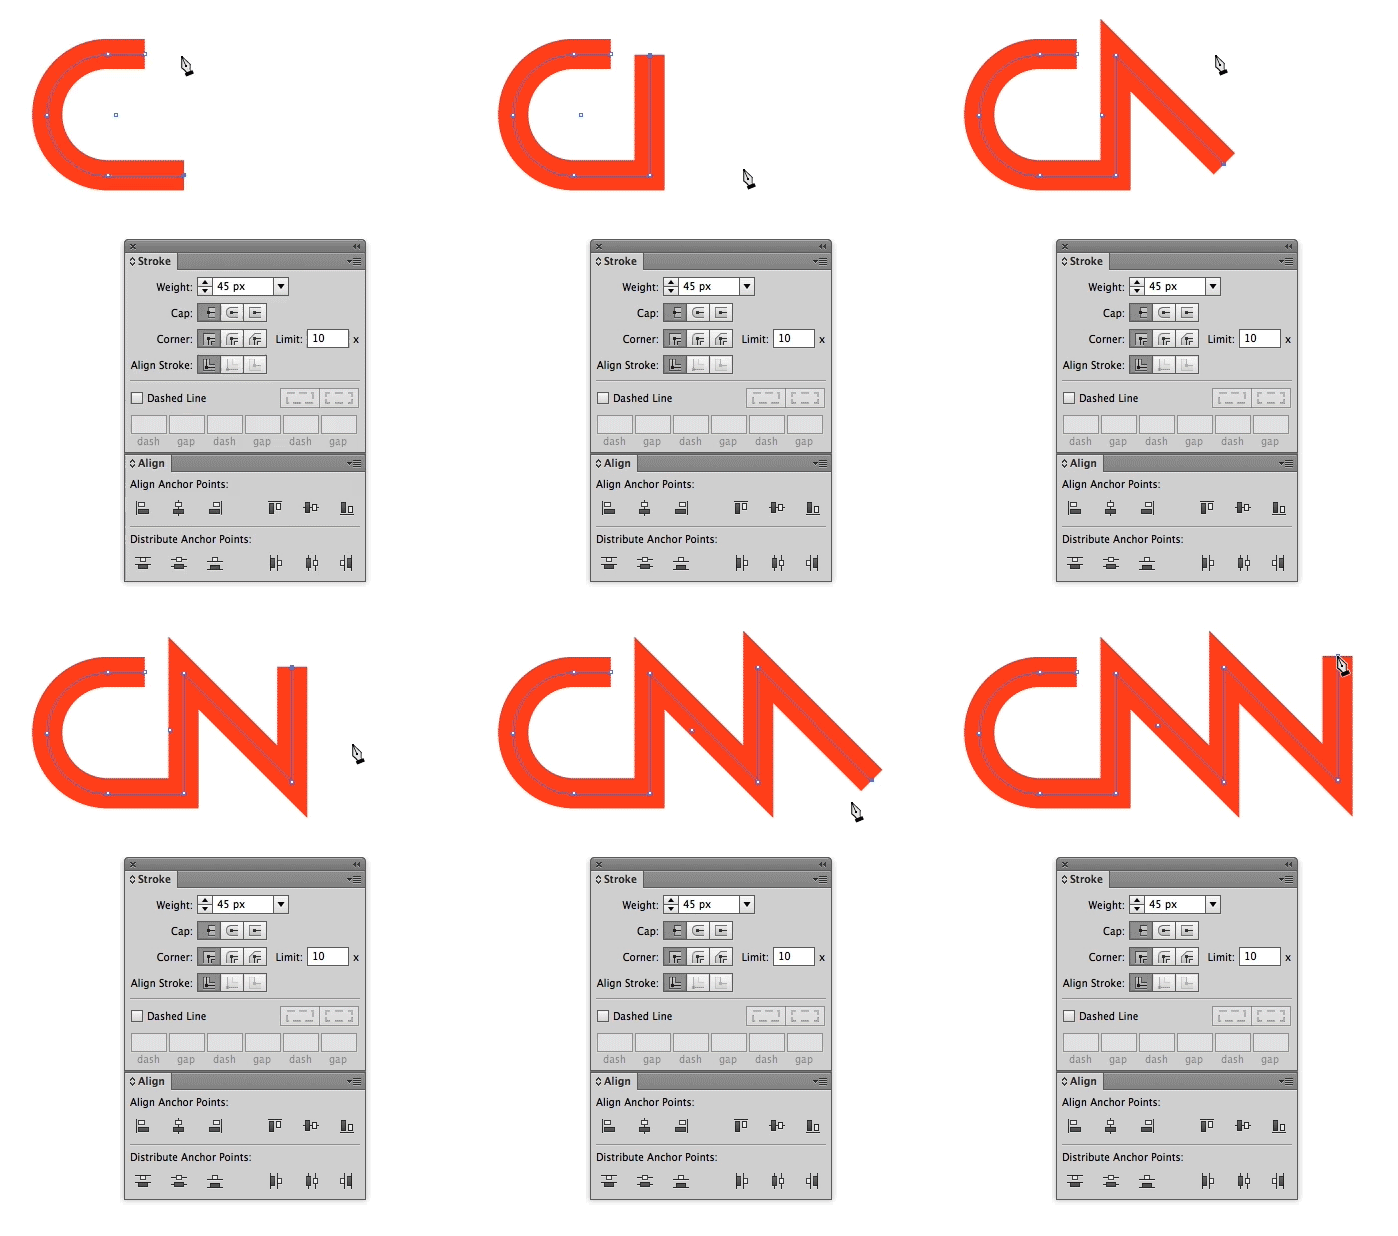
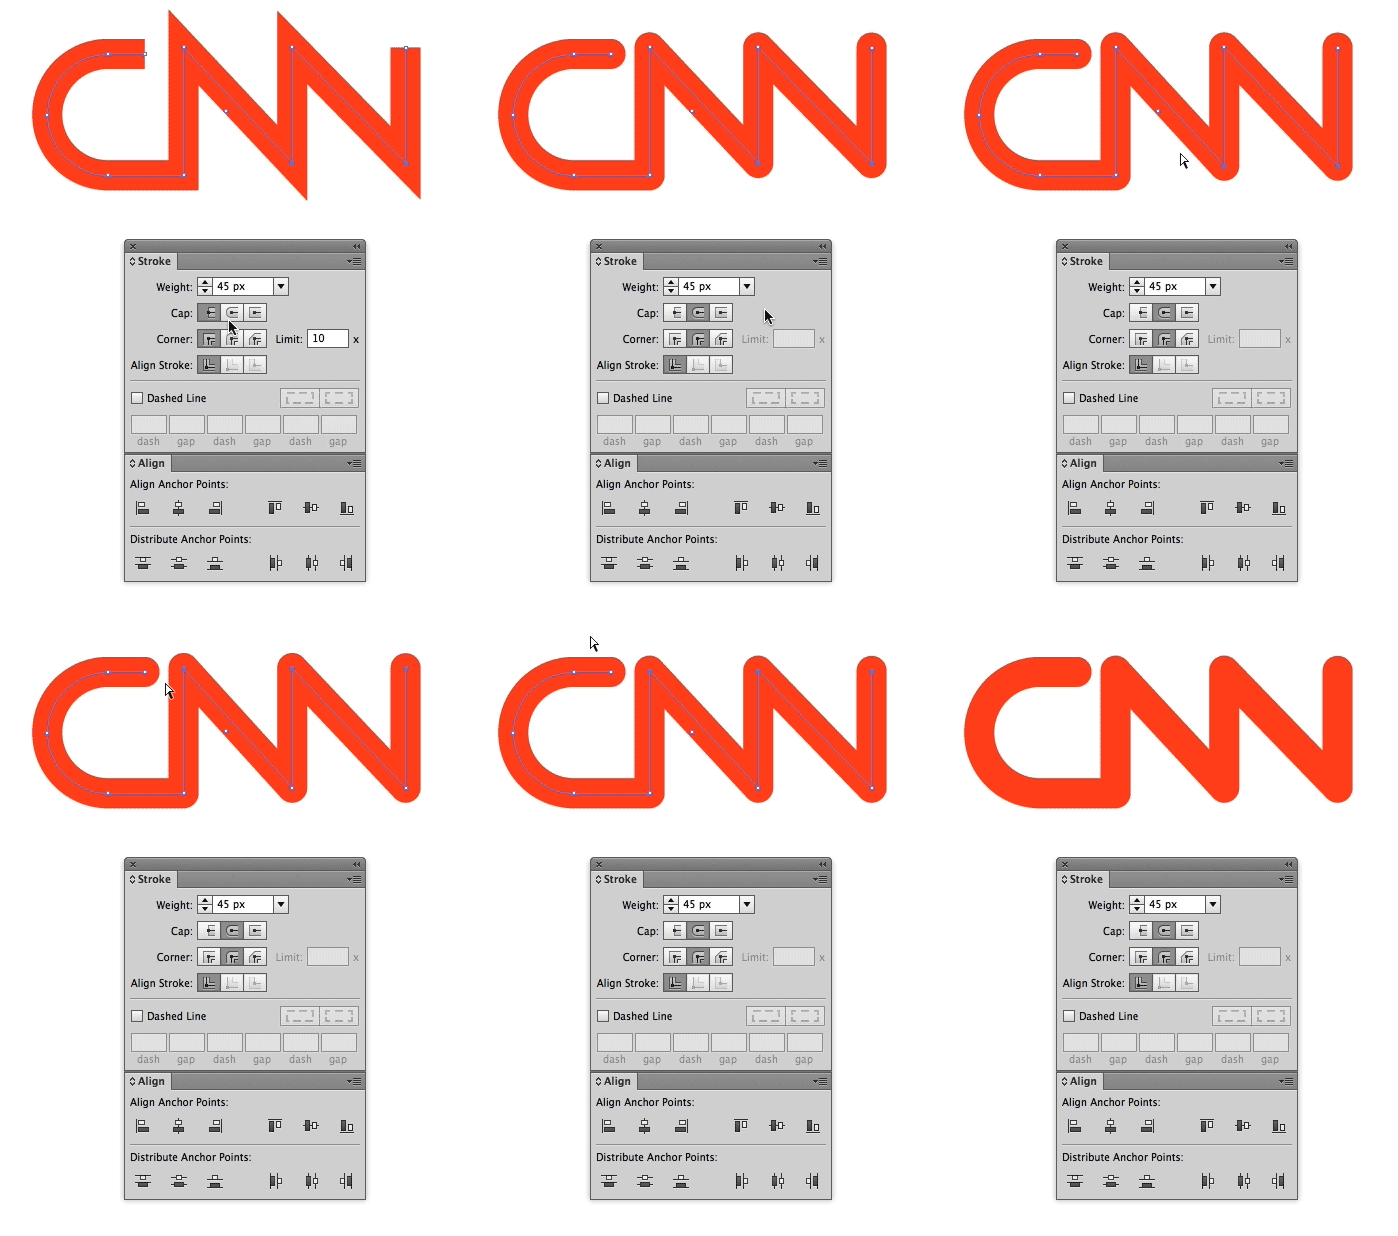
Use the Direct Selection Tool (A) (the white arrow) and delete the right point of the ellipse. Using the Pen Tool (P), click once of the point you want to start drawing from, then click again to create where you want to finish the line. In order to start drawing from a new point you must first deselect the shape or change tools then switch back to the Pen Tool. In everyday work, this is accomplished with a couple quick keystrokes, (Escape, then P to reactivate the Pen Tool) but below I’m physically clicking on the different tools to better illustrate this step.
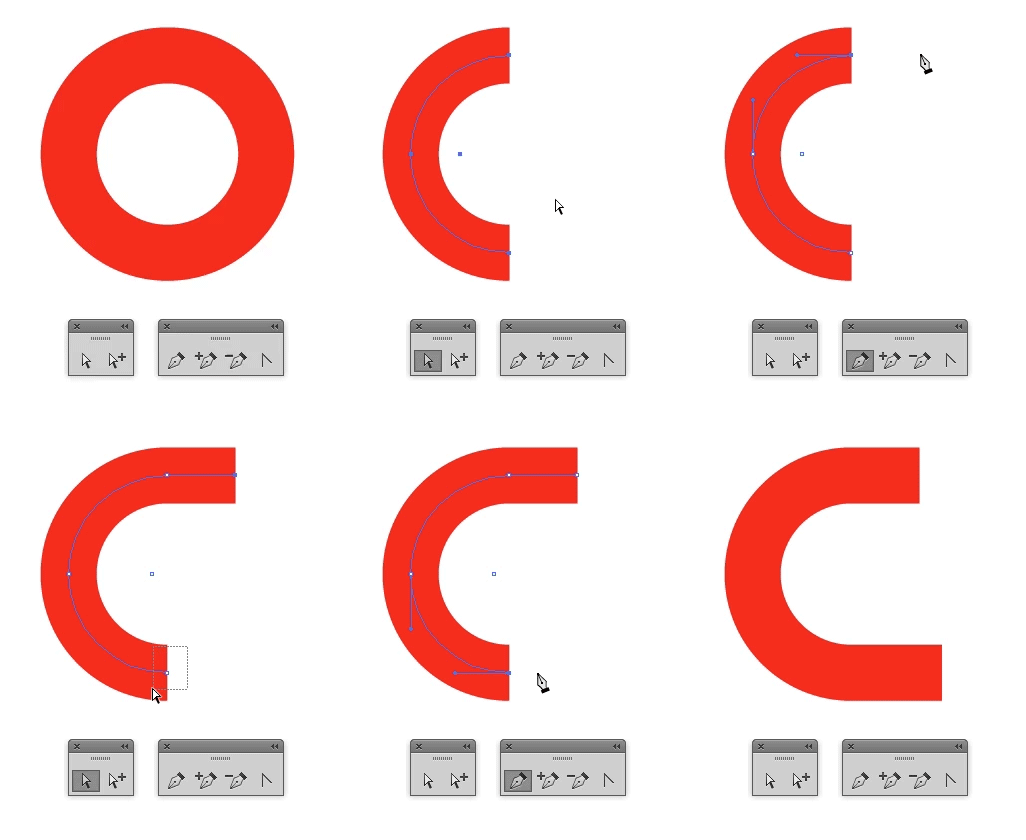
Deselect and reselect your shape (by switching tools) when starting from a new point or your shape will automatically close.
Step 4
Continue using the Pen Tool to lay down the overall shape of the logo. I’m holding down the Shift key when drawing each line so that the vertical lines are completely vertical, and both angled lines on the N’s are at identical 45 degree angles. Even though I may not need 45 degree angles, this way I at least know they’re identical and I can later move those points simultaneously to achieve any slant I need.
Step 5
Round the Joins and Caps of the shape and use the Direct Selection Tool (A) to select and adjust several points at once. Points can be aligned to one another using the Align Palette, and/or nudging them using arrow keys!
Step 6
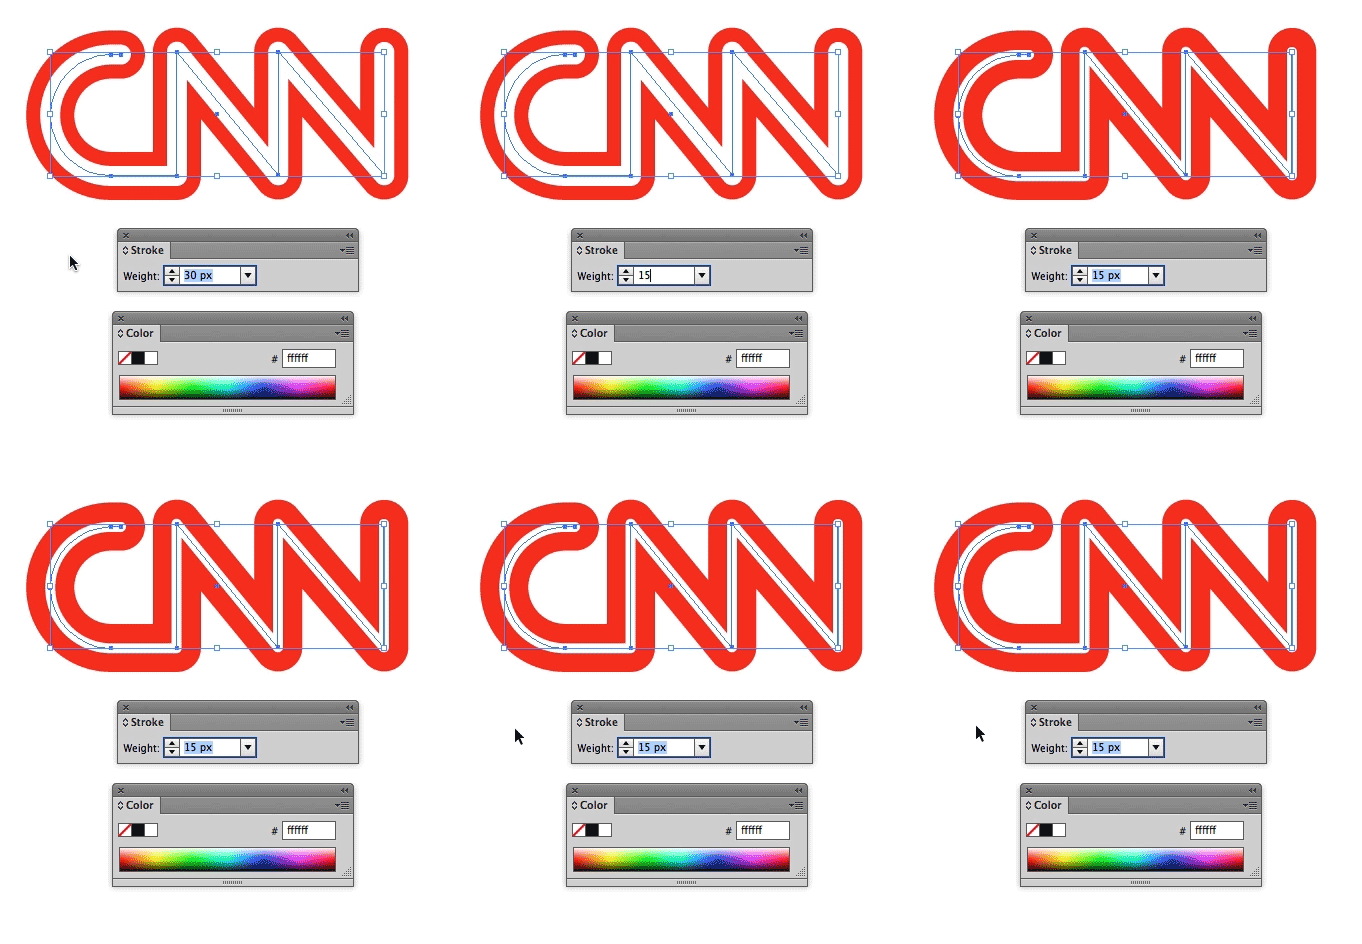
Copy (Command +C), and Paste in Place (Command+F) your shape then change the stroke weight and color.
Step 7
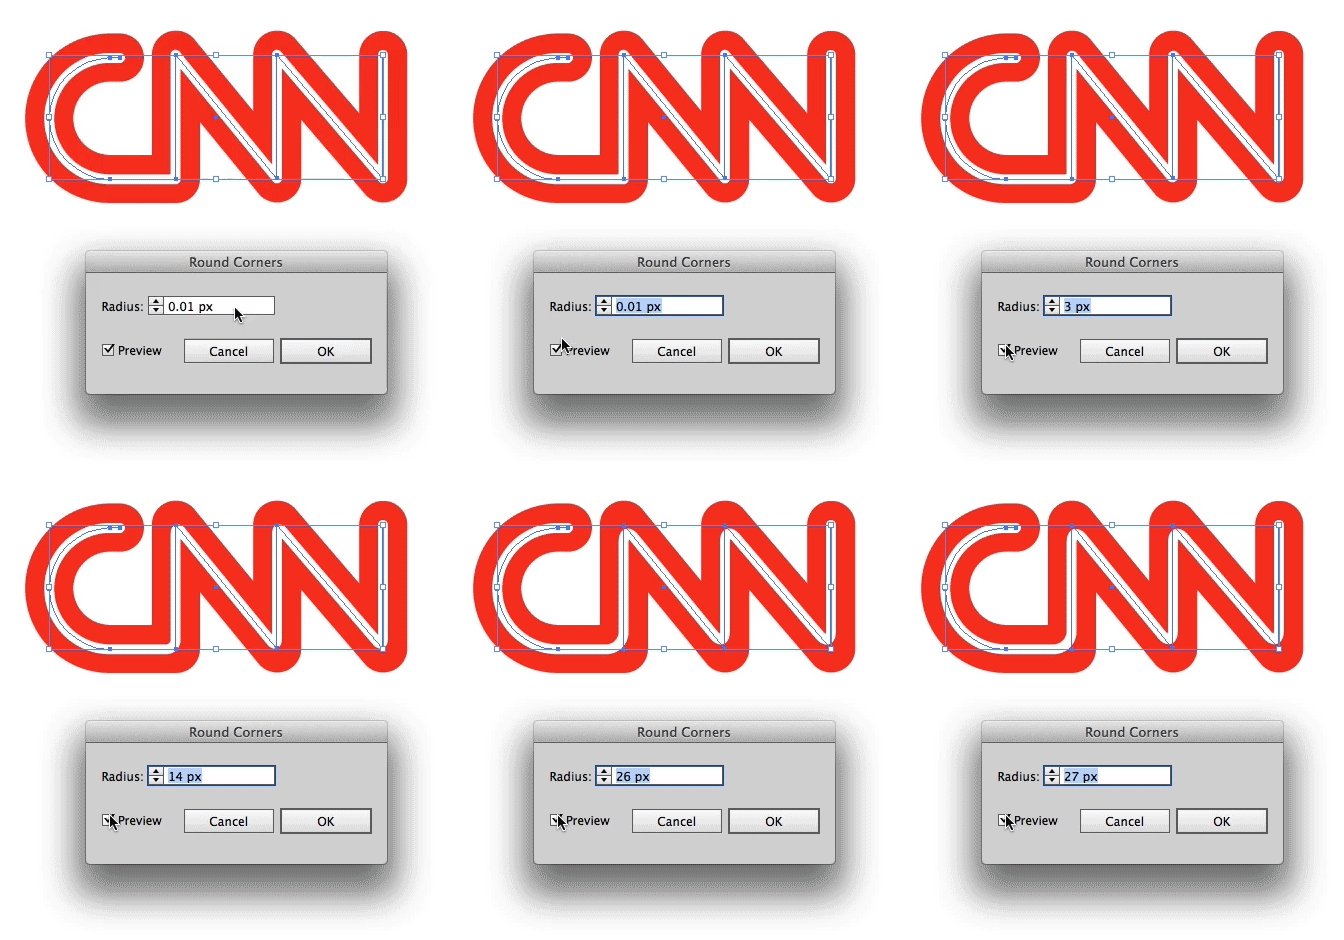
Go to Effect > Stylize > Round Corners to add the proper roundness to the inside white shape. Sidenote, at times, you may be applying a radius to a shape that has multiple radii. When this happens, simply divide the line into several sections and apply the appropriate radius to each section.
Step 8
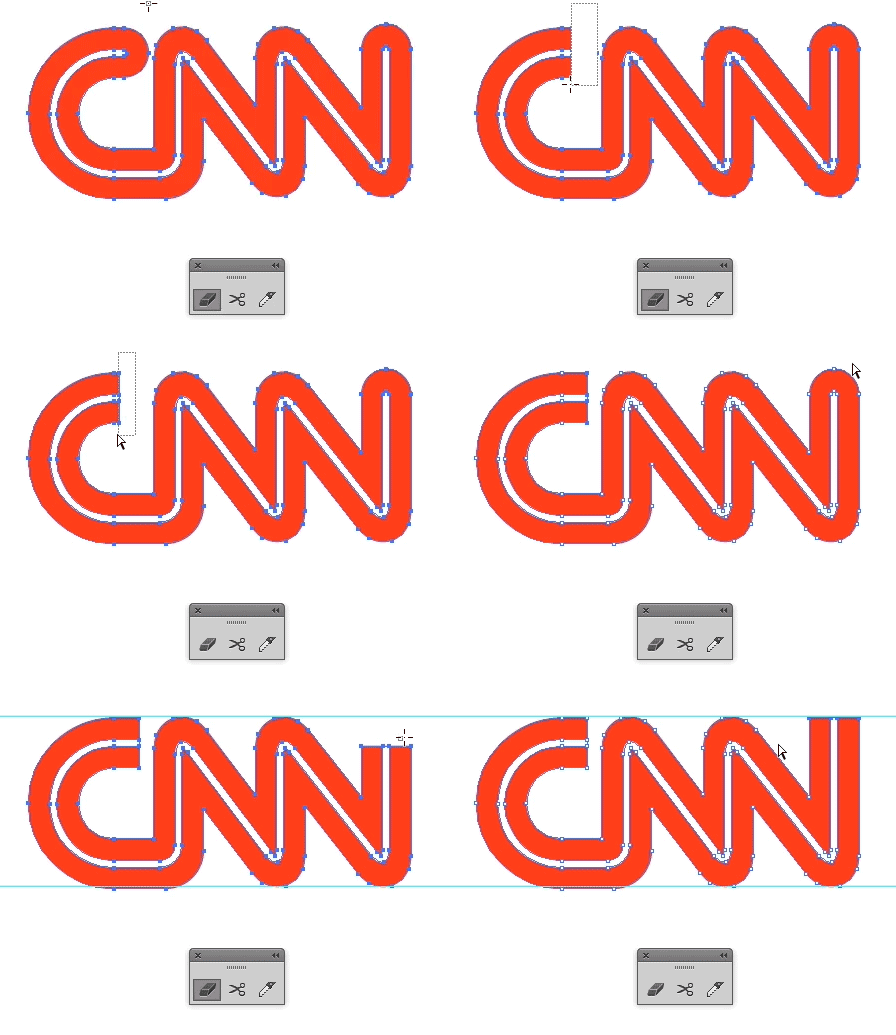
Make absolutely sure that your overall shape is looking how you want it to before you expand your lines. Below, I’ve expanded both the red and white stroke so that I can do more refined edits.
Use the Eraser Tool (Shift+E) to erase the rounded edges. Notice that the edge of the C has a small amount of space that’s not curved. I’ve specifically deleted just enough of the edge of the shape so that when I use the Direct Selection Tool to extend that edge, I won’t be altering the curve.
That’s a wrap! You should now be well on your way to creating fundamental shapes in Adobe Illustrator. Stay tuned for Lesson 2 which will highlight a different set of tools, shapes, and increase in difficulty.
Jonathan Patterson’s Social Profiles
![]() Follow him on Twitter: @Jon_Patterson
Follow him on Twitter: @Jon_Patterson
![]() Follow him on Dribbble: dribbble.com/jon_patterson
Follow him on Dribbble: dribbble.com/jon_patterson











Very simply explained the brand logos. Nice Tutorial.
Thank you for this! I will try this tutorial, I think you’ve made it very simple yet effective! love from PH
Came here for the tutorial, stayed for the “Duke Nukem 3D” difficulty setting references.
Windows 8 Logo >>>
Before Make 3d Must Be Group it all……… Please Attach it…..
Nice tut. Really a step to be taken for any beginner. Thanks
Cool tutorial forever.
Great man..
Thanks..
thanks
Really great tutorial man.. I had helped me so much so quickly. Thanks for the hard work
Thanks that was a very well written tutorial
Nice and easy for learners like me. A lot of thanks to the blog writers.
Thank you SO MUCH! I’ve been using Illustrator for almost 20 years and never knew about the rounded corners/up arrow trick!
Thans!I love it.
Hi there to all, the contents existing at this web page are really remarkable for people experience, well, keep up the good work fellows.
Awesome! and loving the gif screenshots 😀
Lesson 2 is now out. Check it out. http://vectips.com/tutorials/the-fundamentals-of-shape-design-in-adobe-illustrator-lesson-2/
We’re a group of volunteers and opening a new scheme in our community. Your website offered us with valuable information to work on. You’ve done an impressive job and our whole community will
be grateful to you.
Just stumbled upon this website and I have to say you have excellent tutorials. Keep up the good work!
wow nice tuts
& briliant idea for making screenshot with gif, your get it bro 😀
showing work in the steps with animated gifs like a video tutorial is a great technique!
actually this hybrid technique may be much better than a video tutorial in some situations, now the following the steps are more easy.
this tutorial is great and inspiring for first learners.
hope to see also more expert tips and tricks for experienced users with this hybrid technique 🙂
You guys are great! I have never thouth that drawing these type of shapes along with pen tool could be easy
This is great for someone just trying to get familiar with the illustrator tools and functions. Especially coming from a a strict photoshop only background. Thanks. Looking forward to further exploring this site
Thanks
Thanks for this. I always relied on the Scissor tool bc i never knew how to properly use the eraser. Thanks!!
A SOLID beginning for me…great work bro.
Great advices!
There’s only one problem for me (not with the tutorial). I can’t erase the top of the last N and the beginning of the C in the CNN logo. When I try to do so with the Eraser tool the C and the N shorten but stay round instead of losing the round edge. My guess is that im doing something wrong in this last step. Can you help me?
That will happen if you don’t first expand the stroke.
How do you expand the stroke though?
Nevermind I figured it out
A very good and easy to understand tutorial with a surprising amount of depth. It’s absolutely fantastic to see vectips up and running again! I have to say it did leave a certain gap on the internet for me,… so really glad to see it brought back to life again!
popoandkiki
The gif’s are a great addition – brilliant touch for written tutorials!
Thanks, so helpful and easy to follow 🙂
Great post!
Loving the .gifs instead of just pictures.
Thanks
What program did you use to record the video and save as gif?
I recorded it with Screenflow and made the animated gif part with Photoshop.
Wow! never seen such tut before with animated GIF’s. Keep it up. Great tute. Thanks
So well done. This reminded me of things I’d forgotten, thanks!
This is a really great tutorial. Thanks a lot.
I like the GIF part. Genius 😀
Great tutorial! Can’t wait for the next one.
Thanks for your job, really nice tutorial. Welcome back Vectips 🙂
Glad you guys found this informative! A second, more advanced lesson is next.
Amazing tutorial, i never leave reply’s, this would be my first one!
Using the animated gifs really gives it an edge on all the other tutorials out there!
Thanks from the netherlands
These are really cool examples of working on some simple skills in Illustrator. Excellent work…
Thank you
Great tips! Didn’t know we can use the arrow keys for rectangle tool 😀
lovely tips and appreciate the use of animated gifs 🙂
keep ’em coming, glad vectips is at it again!
Agreed – welcome back Vectips – you were missed…
Great and easy to follow tutorial. Look forward to more!
i just learned how to modify the rectangle with rounded corners.. -_-‘
thanks so much! very useful tips
Like.
indeed