 In today’s tutorial, we’re going to take an in-depth look behind the process of creating a payment icon, and learn how easy it is to do so using nothing more than a couple of basic geometric shapes that we’re going to adjust here and there.
So, assuming you already have the software up and running, let’s jump straight into it!
Tutorial Details: Payment Icon
- Program: Adobe Illustrator CS6 – CC 2019
- Difficulty: Beginner
- Topics Covered: Design Theory, Compositional Construction, Shape Alignment, Grid Positioning
- Estimated Completion Time: 25 Minutes
Final Image: Payment Icon

Step 1
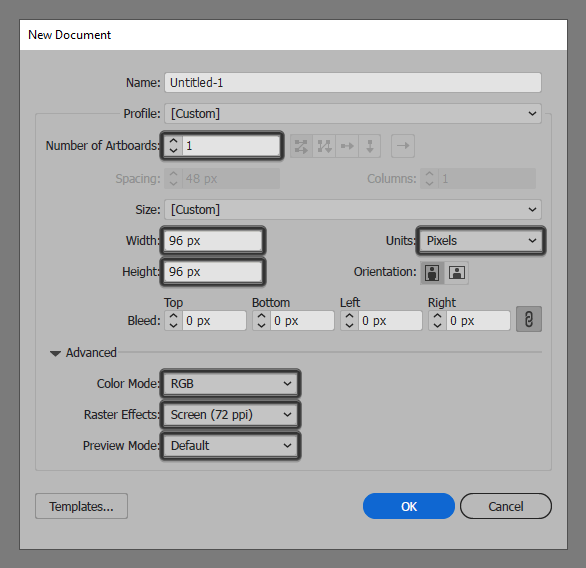
As with every new project, we’re going to kick things off by setting up a New Document, by heading over to File > New (or by using the Control-N keyboard shortcut), which we will then adjust as follows:
- Number of Artboards: 1
- Width: 96 px
- Height: 96 px
- Units: Pixels
And from the Advanced tab:
- Color Mode: RGB
- Raster Effects: Screen (72ppi)
- Preview Mode: Default
Quick tip: most of the indicated settings can be automatically triggered if you set the document’s Profile to Web, the only one that you’ll have to manually adjust being the Artboard’s Size (Width x Height).
Step 2
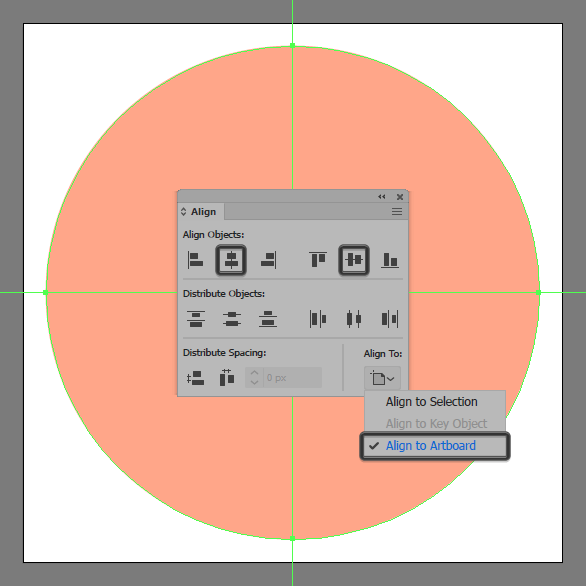
As soon as we’ve finished setting up our project file, we can start working on the actual payment icon, and we will do so by creating the background using an 88 x 88 px circle, which we will color using #FFA88A and then position to the center of the underlying Artboard using the Align panel’s Horizontal and Vertical Align Center options.
Step 3
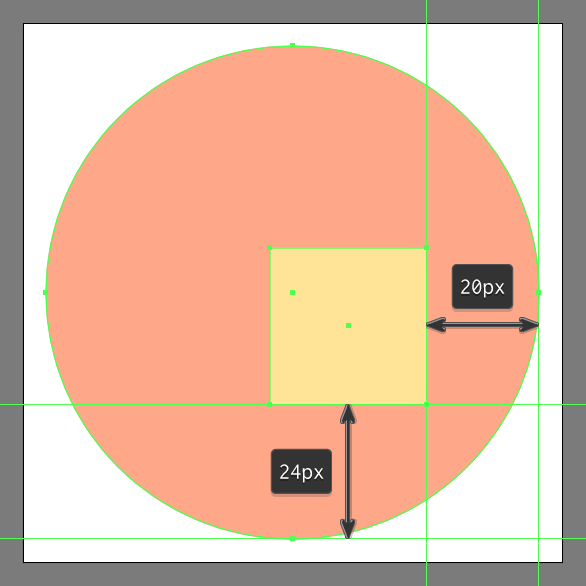
Add the main shape for the folded card section using a 28 x 28 px square, which we will color using #FFE497 and then position onto the background as seen in the reference image.
Step 4
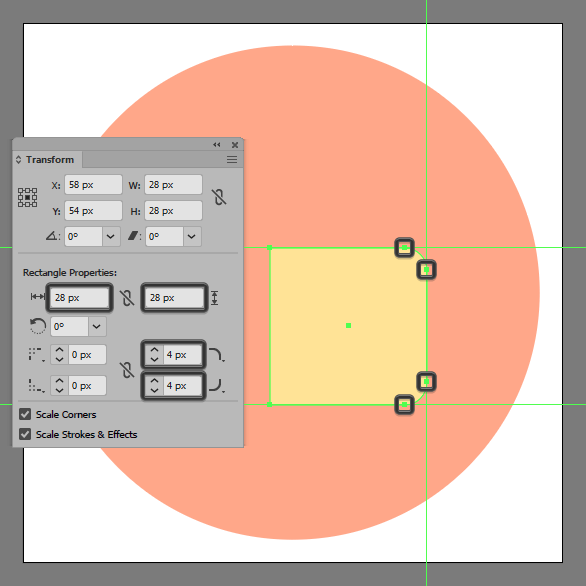
Adjust the shape that we’ve just created by opening up the Transform panel, and then setting the Radius of its right corners to 4 px from within the Rectangle Properties input boxes.
Step 5
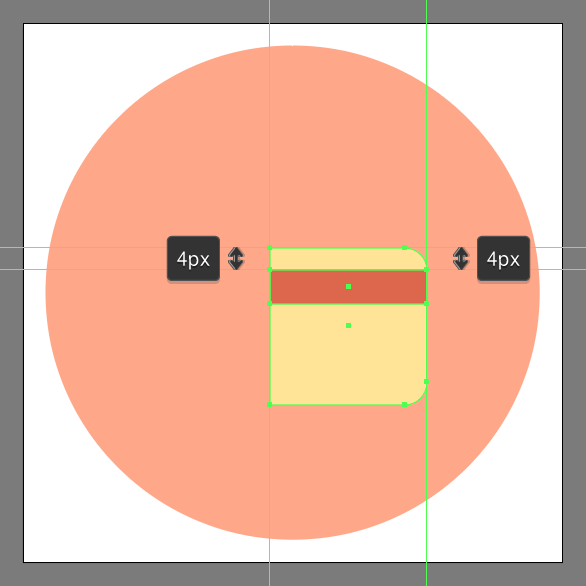
Add the magnetic stripe using a 28 x 6 px rectangle, which we will color using #DD674B and then position onto the resulting shape as seen in the reference image.
Step 6
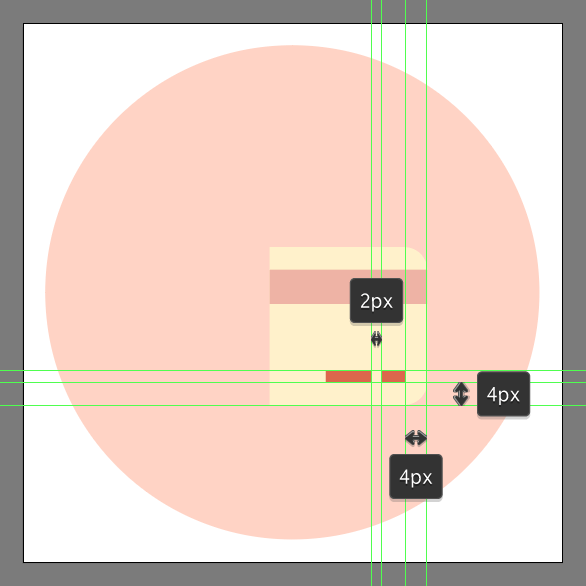
Create the little text lines using an 8 x 2 px rectangle (#DD674B) followed by a slightly narrower 4 x 2 px one (#DD674B), which we will distance at 2 px from one another, grouping (Control-G) and then positioning them onto the lower right-corner of the card.
Once you’re done, make sure you select and group all of the card’s composing shapes using the Control-G keyboard shortcut.
Step 7
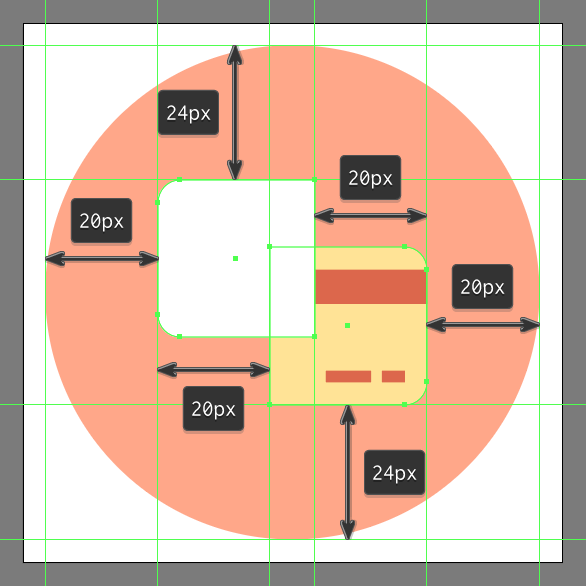
Add the main shape for the folded dollar bill using a copy (Control-C > Control-F) of the card, which we will vertically reflect (right click > Transform > Reflect > Vertical) and then position onto the background’s left side as seen in the reference image.
Step 8
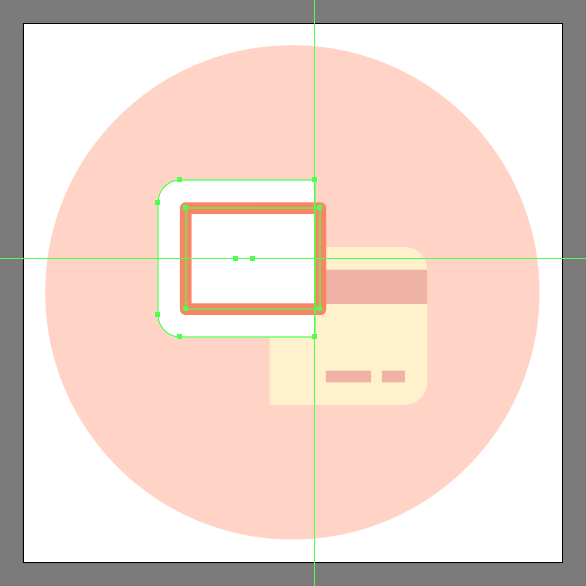
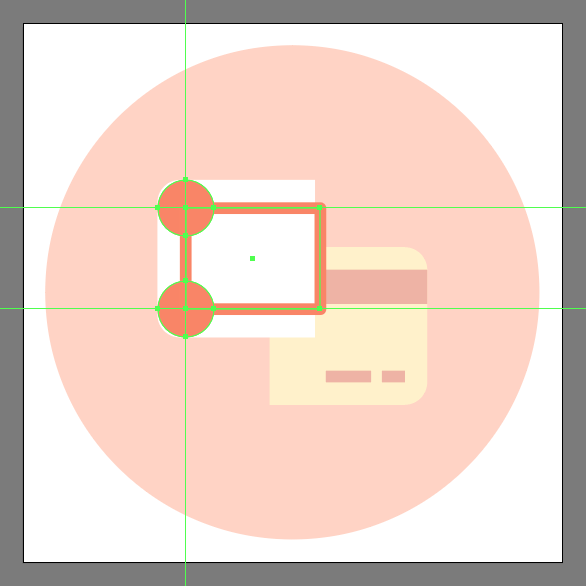
Start adding details to the bill, by creating the frame using a 24 x 18 px rectangle with a 2 px thick Stroke (#F98667) and a Round Join, which we will center align to its right edge, making sure the path’s right edge falls outside of it.
Step 9
Create the corner cutouts using two 10 x 10 px circles, which we will color using #F98667 and then position to the center of the frame’s left anchor points.
Step 10
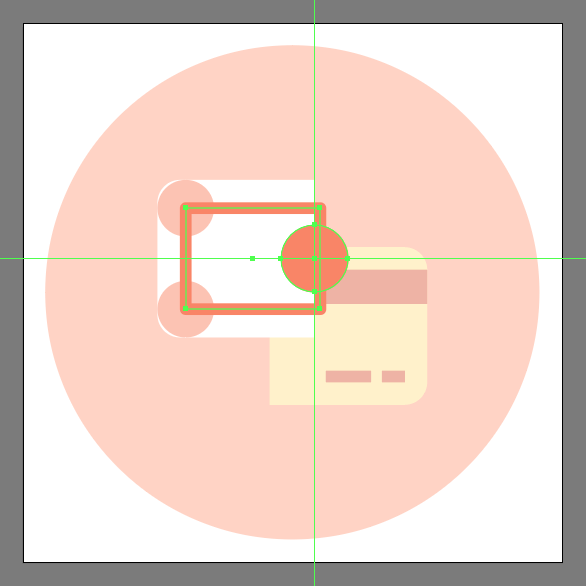
Add the bill’s inner detail using a 12 x 12 px circle (#F98667), which we will align to the frame’s right edge, making sure to position it so that its center overlaps the bill’s outer edge.
Step 11
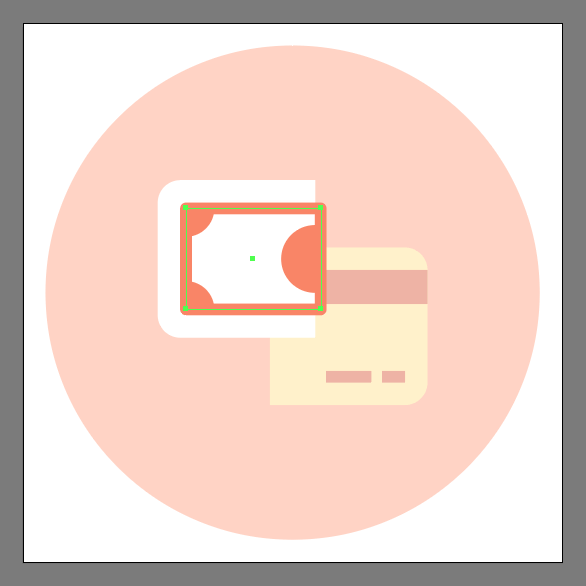
Since we want the circles to remain confined to the surface of the frame, we’re going to mask them by first creating a copy (Control-C) of the larger path, which we will paste in front (Control-F), and then with all four shapes selected simply right click > Make Clipping Mask.
Step 12
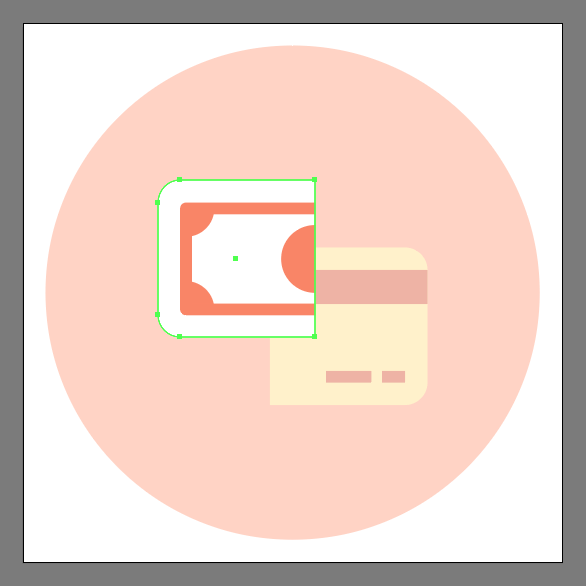
As you can see, the resulting mask did the job, but we’re going to need to make some further adjustments in order to get the perfect result, since the right section of the frame needs to remain within the surface of the bill. To fix this, we’re going to create a second clipping mask using the shape of the bill as the mask.
Step 13
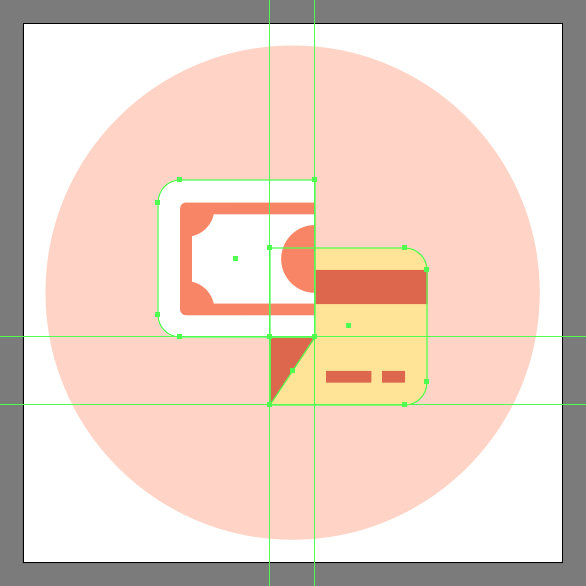
Add the fold section using an 8 x 12 px rectangle (#DD674B), which we will adjust by removing its bottom-right corner by simply clicking on it using the Delete Anchor Point Tool (–), positioning the resulting shape as seen in the reference image.
Step 14
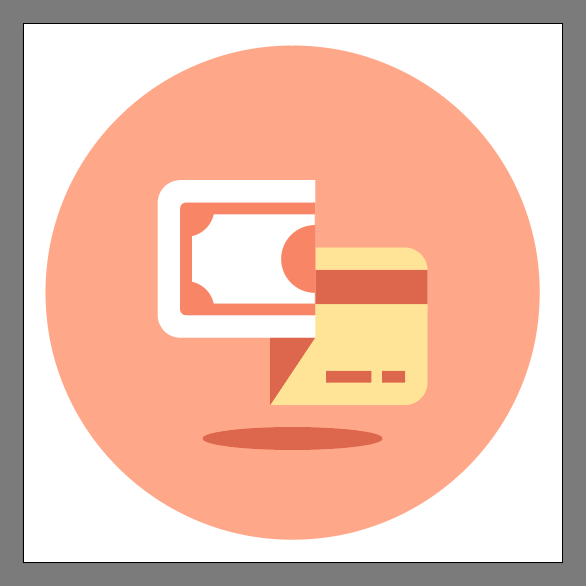
Finish off the payment icon, and with it the project itself by adding the lower shadow using a 32 x 4 px ellipse (#DD674B), which we will position at a distance of 4 px from the credit card’s bottom edge.
![]()
Awesome Job!
As always, I hope you had fun working on the project and most importantly managed to learn something new and useful during the process.
That being said, if you have any questions feel free to post them within the comments section and I’ll get back to you as soon as I can!
Author: Andrei Ștefan
Just another coffee addict / pixel grinder, creating colorful projects one pixel at a time.


Thanks-a-mundo for the blog.Really looking forward to read more. Awesome.
awsome man thank u