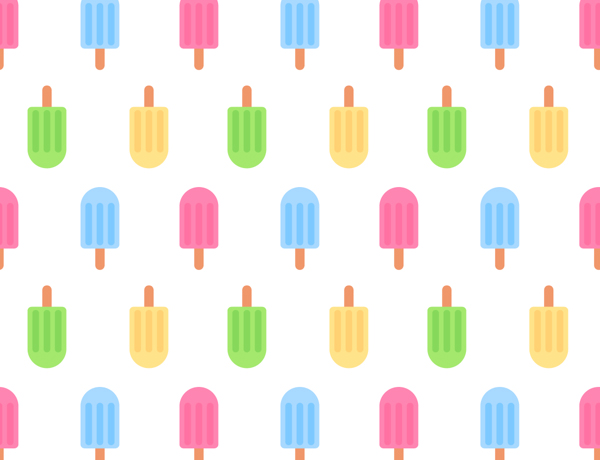
 Summer is officially here! The best way to fight the summer heat is with a handful of delicious ice cream. While we won’t be learning how to make ice cream, we will be learning how to illustrate it. In this tutorial, we’re going to create a colorful ice cream seamless pattern using simple geometric shapes and handy functions in Adobe Illustrator. Let’s get cool!
Tutorial Details:
- Program: Adobe Illustrator CS6-CC
- Difficulty: Beginner
- Topics Covered: Shape Building, Align Panel, Pattern Tool
- Estimated Completion Time: 15 Minutes
Final Image: Ice Cream Seamless Pattern
Step 1
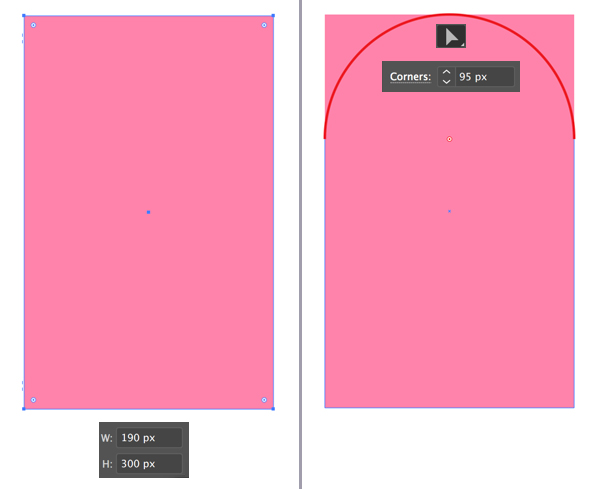
Take the Rectangle Tool (M) and make a 190 x 300 px pink rectangle for the fruit ice. Then switch to the Direct Selection Tool (A) and select both top corners of the shape. Once you see a circle marker of the Live Corners next to each selected corner, pull either of them down, making the top corners rounded.
We can also edit the radius of the Corners manually by setting the exact value in the control panel on top.
Step 2
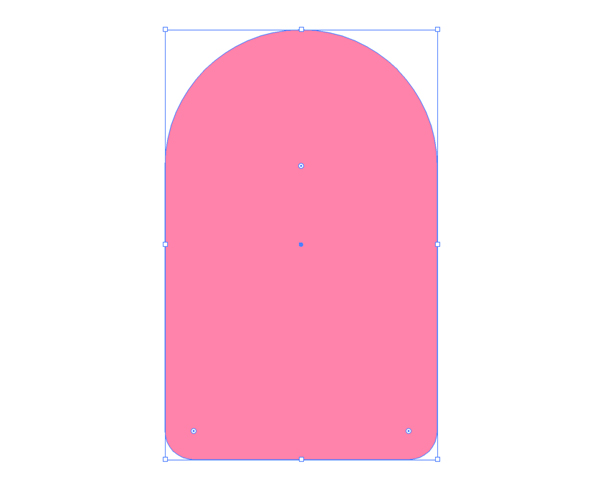
Let’s make the bottom corners slightly rounded as well, but not as much as the top of the shape.
Step 3
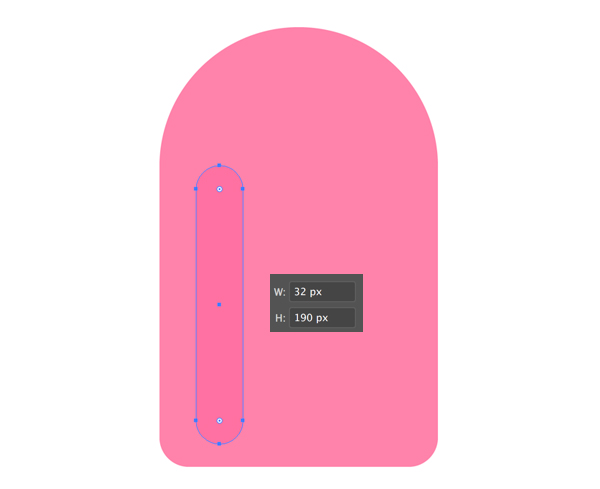
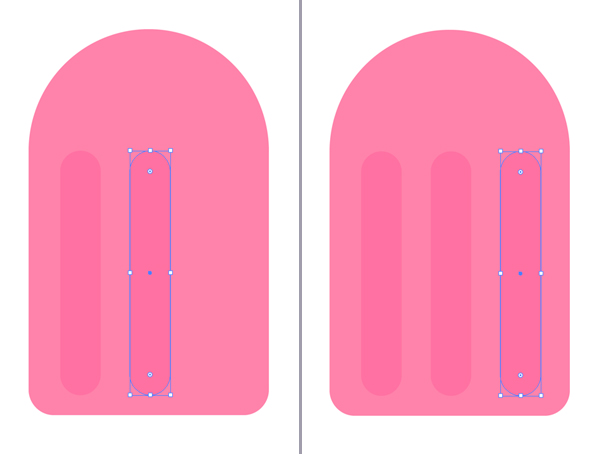
Continue using the Rectangle Tool (M) or grab the Rounded Rectangle Tool (in the same drop down menu) to create a 32 x 190 px shape with fully rounded corners.
Make the shape a bit darker, forming a deepening on the surface of the ice.
Step 4
Now switch to the Selection Tool (V), hold down Alt-Shift and move the rounded rectangle to the right to create a copy. Then press Control-D to repeat the last action, creating a third copy.
Step 5
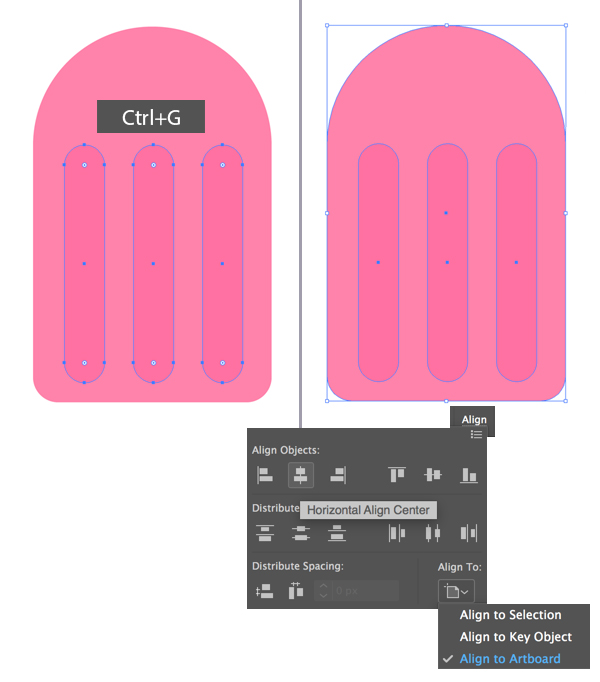
We need to make sure that all the elements are perfectly centered. Let’s select the dark rounded rectangles and Group (Control-G) them.
Now select everything (Control-A) and open the Align menu in the control panel on top or from Window > Align.
Set Align to Artboard and click Horizontal Align Center. Now everything should be centered to the middle of our canvas.
Step 6
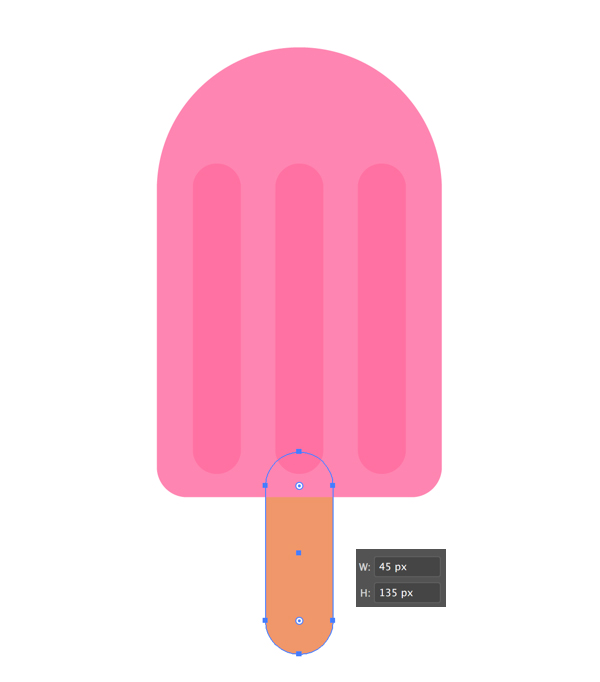
Let’s add a wooden stick to the bottom of our ice cream. Grab the Rounded Rectangle Tool and make a 45 x 135 px light-brown shape. Keeping the shape selected, press Shift-Control-[ to Send to Back.
Step 7
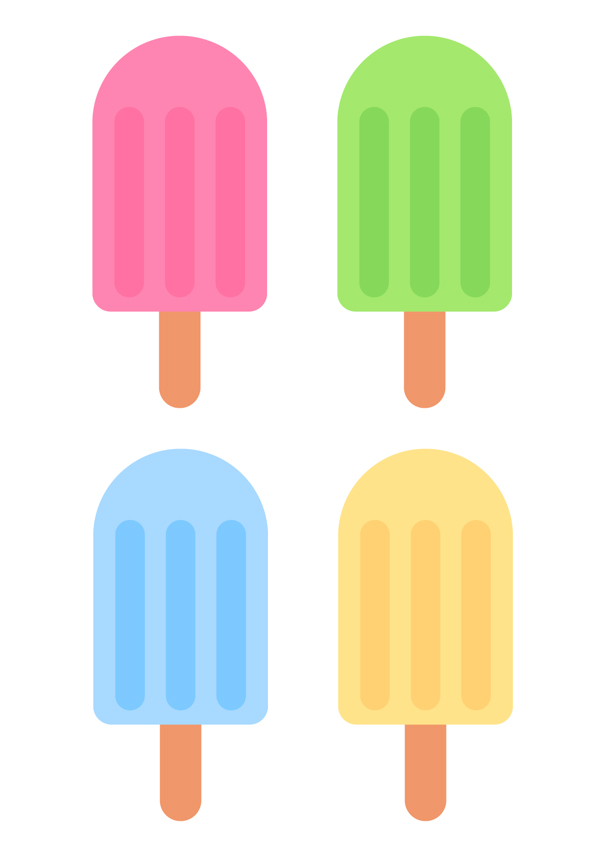
Great! Now that our ice cream is ready, we can Duplicate it (Control-C > Control-V) a couple of times and vary the colors of the icy parts.
Step 8
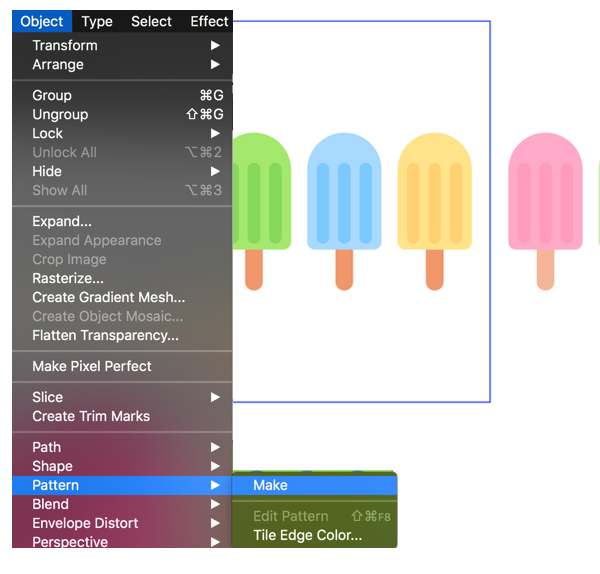
Let’s create a pattern! Select all the created ice creams and go to Object > Pattern > Make.
Step 9
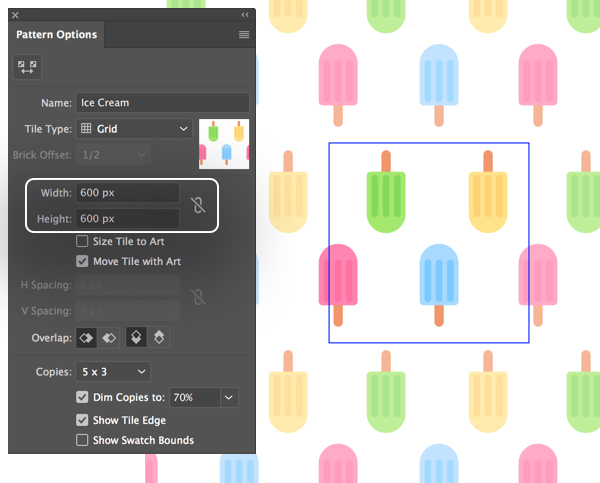
From here, in the Pattern Options window we have some Tile settings that can make our pattern even more unique, so don’t hesitate and try them out! But as for this tutorial, we’re going to use the basic ones.
Let’s set the Width and Height of the Tile box to 600 x 600 px and leave everything else by default.
Move the ice creams and rotate them, looking for an interesting composition. You will see dimmed copies of the original objects around the Tile box. That really helps to visualize how our pattern will look like after it is ready.
Don’t be afraid to try various options – you will be able to return to the edit mode at any moment.
Once you’re happy with the result, click the Done button in the top panel.
Step 10
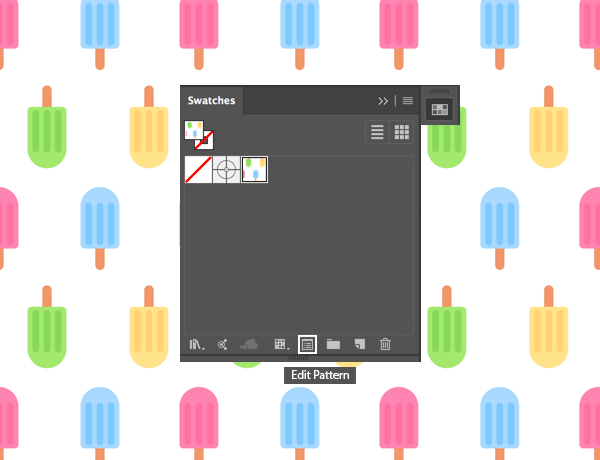
Now we can find our pattern in the Swatches panel (Window > Swatches). As you select it, press the Edit Pattern button in the bottom of the panel if you want to change something or add more details.
Otherwise, create any geometric shape (for example, a rectangle) and click our pattern in Swatches to apply it.
Voila! Our Ice cream Seamless Pattern is Finished!
Good job, guys! This ice cream seamless pattern will look great both on fabric and in digital version as a background for a blog.
I hope you’ve enjoyed following this tutorial and will create more colorful summer patterns!
Stay cool!
Author: Yulia Sokolova
2D/3D artist and tutorial instructor, focusing on character creation, icons, lettering design, and illustrations.



Learned some new stuff with very detailed information.