

For a while, it seemed liked every client wanted grungy graphics. This might sound familiar, “I like it, but can we grunge it up more”. Don’t get me wrong, having some grunge can create a great deal of depth to a design or illustration, but there can be to much of a good thing. This is the technique I use because it is quick and consistent, making it easy to create grunge text vectors.
Notes: Grunge Text Vectors
This tutorial was created with Illustrator CS3. You should be alright if you have Illustrator CS2.
I suggest having the Raster Effects at 300 dpi. This will generate the best quality in the effect. You can change this by going Effect > Document Raster Effects Settings and chose 300 dpi.
Creating Grunge Text Vectors
With your text selected, go Effect > Distort > Glass. In the options, use the following settings.
- Distortion: 15
- Smoothness: 1
- Texture: Blocks
- Scaling: 200%
That’s it! You can still edit the text without loosing the effect. You can change the font, color, kerning, or whatever! Moreover, you can edit the Effect by selecting Glass in the Appearance panel.

Tracing Image: Grunge Text Vectors
If you want to incorporate the grunge text vectors with other elements, it is a good idea to trace the image as a vector. Currently, if you place the text over an element that isn’t white, you will see white in the text instead negative space.
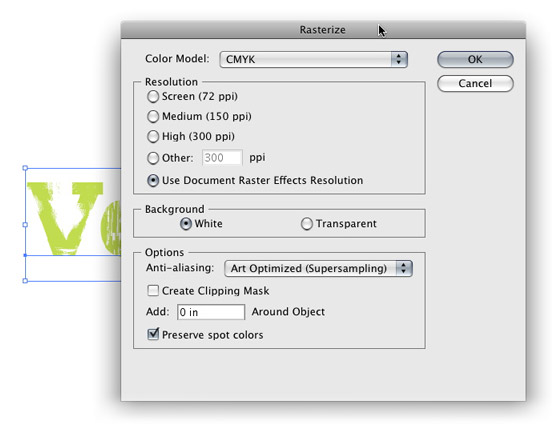
First you will have to rasterize the image. Right now, the text is essentially vector art masking out a raster image. Both need to be rasterized before converting to vector. With the grunge text selected, go Object > Rasterize. Keep all the options the same, except change the Resolution to Use Document Raster Effects Resolution.
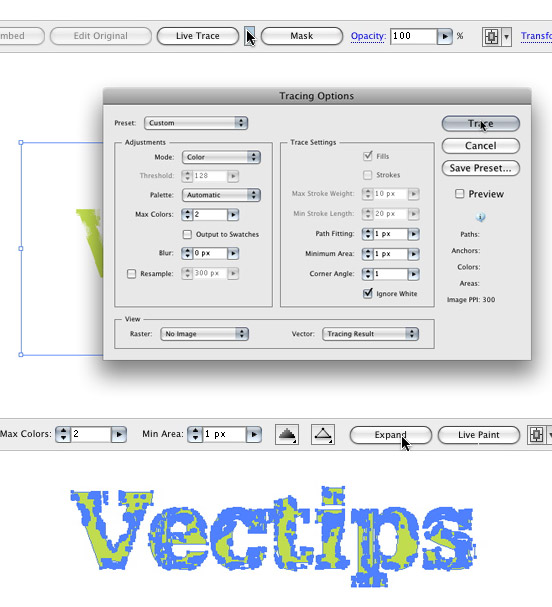
With the new image selected, the Control Panel defaults to the Live Trace options. Click the arrow beside the Live Trace Button and select Tracing Options. Or you can go Object > Live Trace > Tracing Options. You don’t have to change all the options, just the ones below.
- Mode: Color (if you text is color)
- Max Colors: 2 (if you text is color)
- Path Fitting: 1px
- Minimum Area: 1px
- Corner Angle: 1
- Ignore White: Check this box
It is not a bad idea to save a preset in the Tracing Options. It makes it easy to recall these setting.
Press the Expand button on your tool bar, and now you have grunge text vector art!
Experiment
Try this technique on objects other that type to get more grunge text vector effects. You can even create your own texture and load it in the Glass effect where you previously chosen Blocks, pretty cool!


Really quick and easy solution to a common request. I like the simple part of the tutorial and then the little advanced part. I like the quick tutorials like this. Thanks!