Hey everyone! Today we will be creating a nice Japanese style cherry blossom scene in Adobe Illustrator using the Blob brush, Eraser and the Ellipse tool. So let’s get started!
Tutorial Details
-
- Program Adobe Illustrator CS4 +
- Difficulty Beginners / Intermediate
- Topics Covered Blob Brush, Eraser, Ellipse Tool
- Estimated Completion Time 1.5 – 2 hours
Final Image
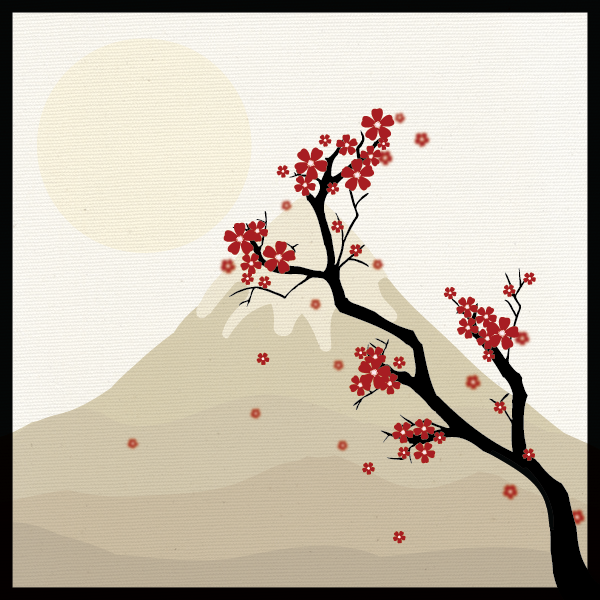
Below you can see the final image for this project.
Step 1
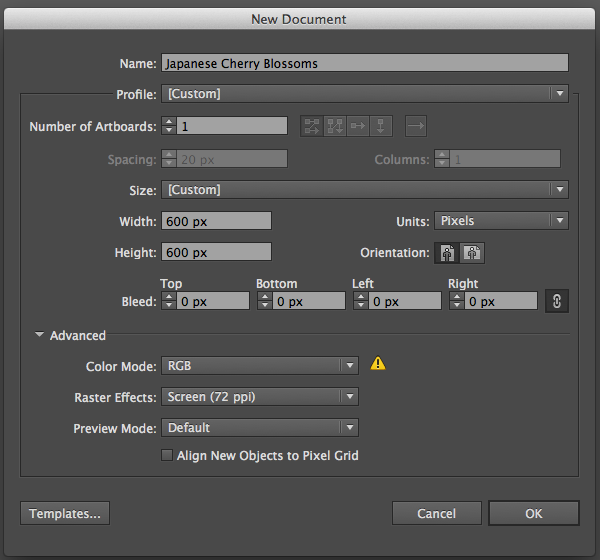
Create a new document 600×600 pixels wide and click OK
Step 2
We will be starting with the cherry blossom tree branch.
First set your fill color to black and no stroke.
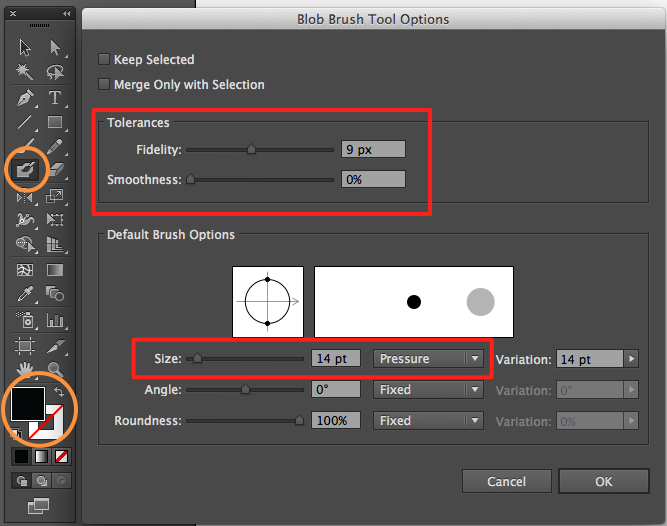
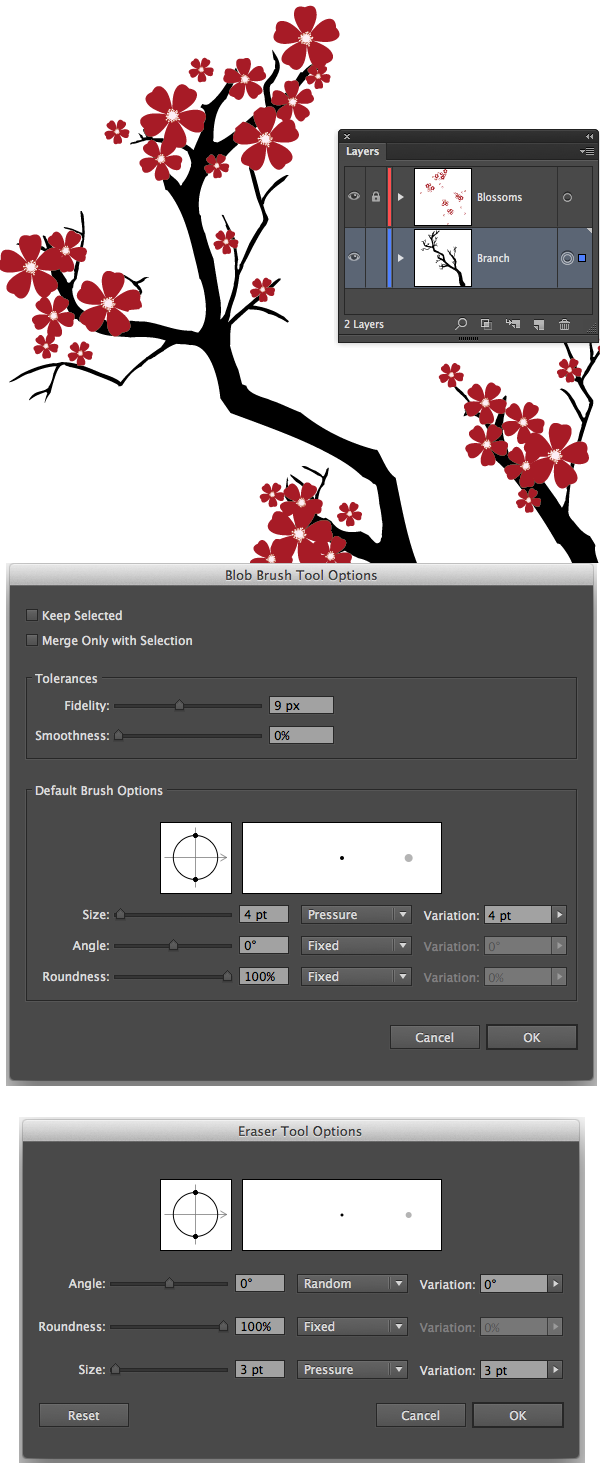
Choose the Blob Brush tool (Shift + B), double click on the tool to open up the Blob Brush Tool Option panel. Here you have a lot of controls to play with. For me the values in the image below worked well.
I am using a pen tablet for this project so next to the Size value I chose ‘Pressure’, because Blob brush can respond to the amount of pressure I put on the pen while drawing. Of course you can use your mouse for this, in that case leave it to ‘Fixed’.
Step 3
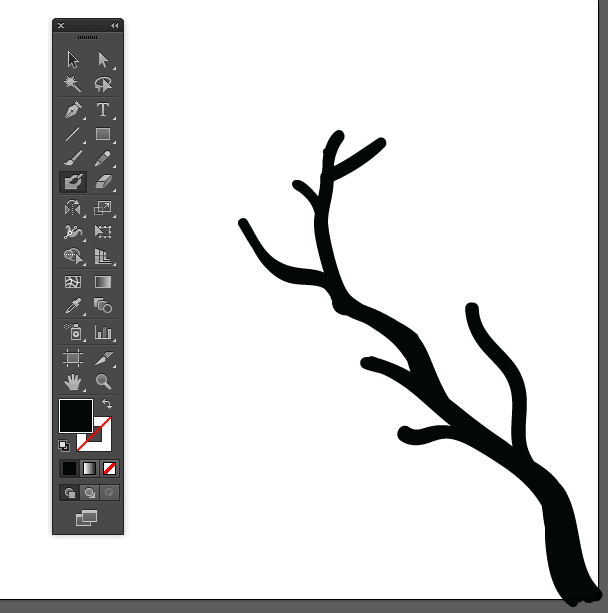
Click “OK” and start drawing the tree branch shape. At this stage it doesn’t have to look perfect, just try to create the approximate shape you want it to be.
Because the Blob Brush is an intuitive tool, you do not have to use any Pathfinder operations to join different objects, or in this case, paths. Every time you overlap one path with another, the Blob Brush tool merges those paths automatically, creating a single shape.
Step 4
Now that we have the approximate shape of the branch, we need to make it more natural and “tree-like”.
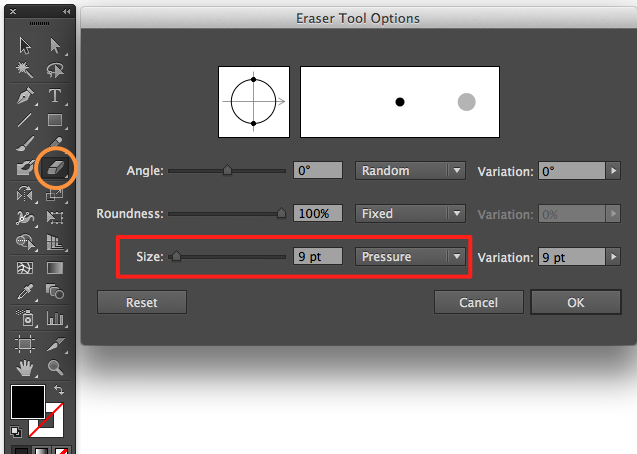
To do this, we will use the modest Eraser. Choose the Eraser (Shift + E), double click on it to modify the size of the eraser. Again since I’m working with a pen tablet, I set the size to ‘Pressure’, if you are working with a mouse, leave it to ‘Fixed’ and click “OK”.
Step 5
Now let’s make this blob shape into a natural looking tree branch.
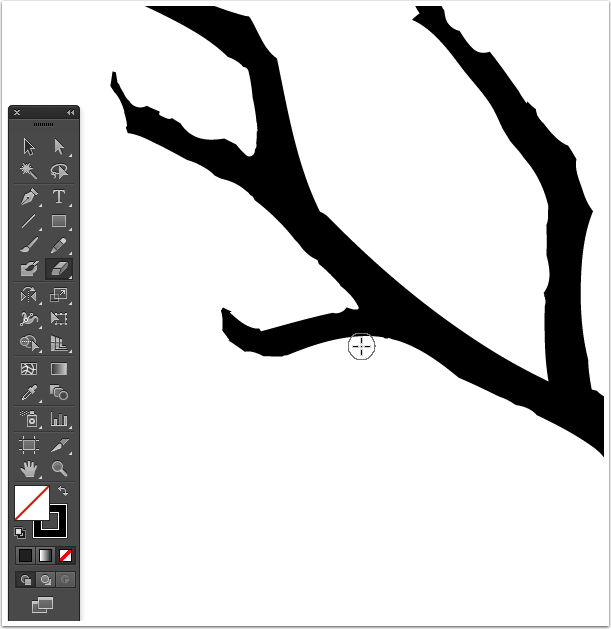
Simply start tracing the sides of your tree shape with the eraser. Take your time in this step, use short strokes to make the shape look more natural, change the size of your eraser if needed. If you erase too much simply switch back to the Blob Brush (Shift + B) to fill the shape in again.
Step 6
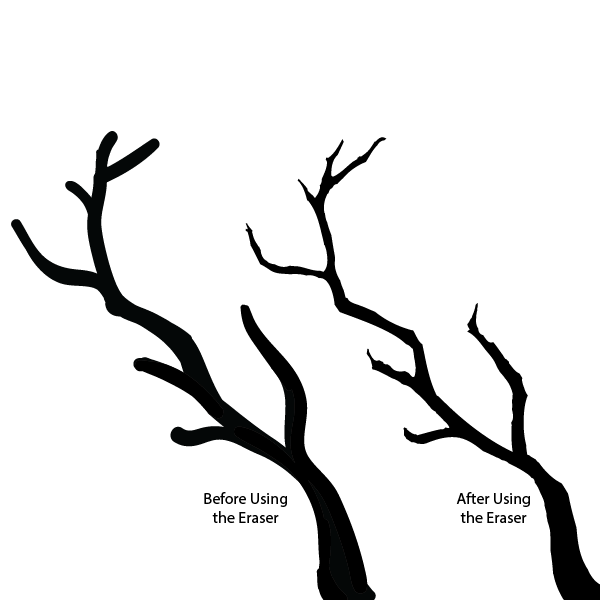
This is how my tree branch looked before I used the Eraser and after. I erased quite a lot to make the branch thinner and more fragile looking. Of course your tree branch won’t look the same as mine, but that’s the beauty of these two tools. Together they let you create unique shapes. Wasn’t hard right?!
Step 7
Our branch is ready. Now we have to make the cherry blossoms.
Create a new layer for the blossoms.
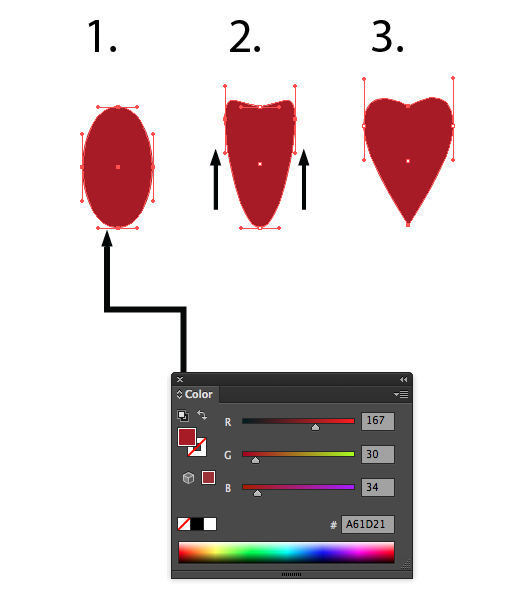
Now select the Ellipse tool (L) and draw an oval (1.). With the Direct Selection Tool (A) select the anchor points on each side of the oval and move them a few clicks upward using your arrow keys (2.) Finally select the Convert Anchor Point Tool (click and hold the Pen tool to reveal it or use the Shift + C keyboard shortcut.) With the Convert Anchor Point Tool simply click the top and bottom anchor points to convert them from smooth to corner (3.). This shape we just made will be the cherry blossom petal.
Step 8
Now we will rotate and duplicate the petal to make a flower blossom.
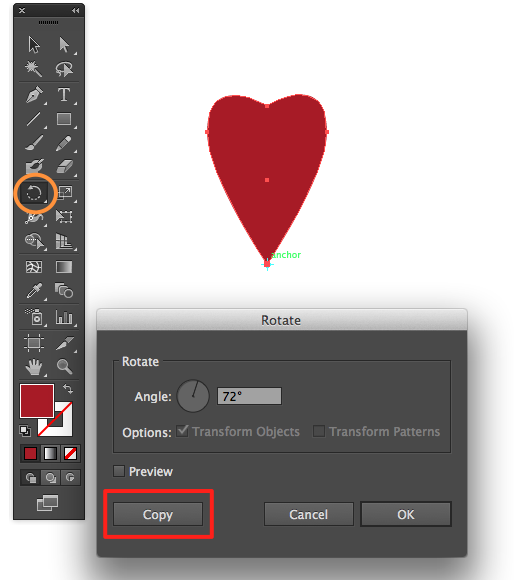
Select the petal which the Selection Tool (V), now choose the Rotate Tool (R) and with the Rotate tool active Option/Alt click on the base of the petal to place the rotation centre there.
The rotate panel will pop up. Set the angle to 72˚ (360˚/ 5petals =72˚) and click ‘Copy’ to copy and rotate the shape at the same time.
Step 9
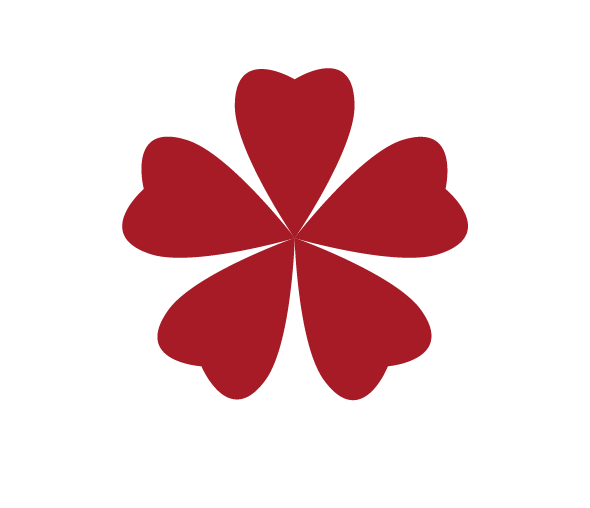
Without deselecting the new shape, hit Command + D three times to repeat the last operation and you will create a flower.
Step 10
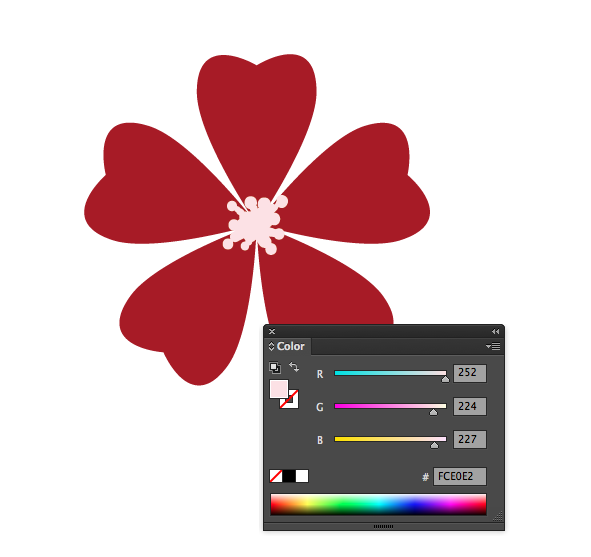
The blossom is almost done. All we need is to draw the “eye” of the flower. For this we will use the good old Blob brush again. Set the size to something small (in my case 1pt). I didn’t worry too much about any details, I just drew in few strokes and dots in the center of the flower because we will reduce the size of the blossom to plant on the branch and the small details will not be visible anyway.
When you are done, select all the petals and the center of the flower and group it (Command + G) to make it easier to handle in the next step.
Step 11
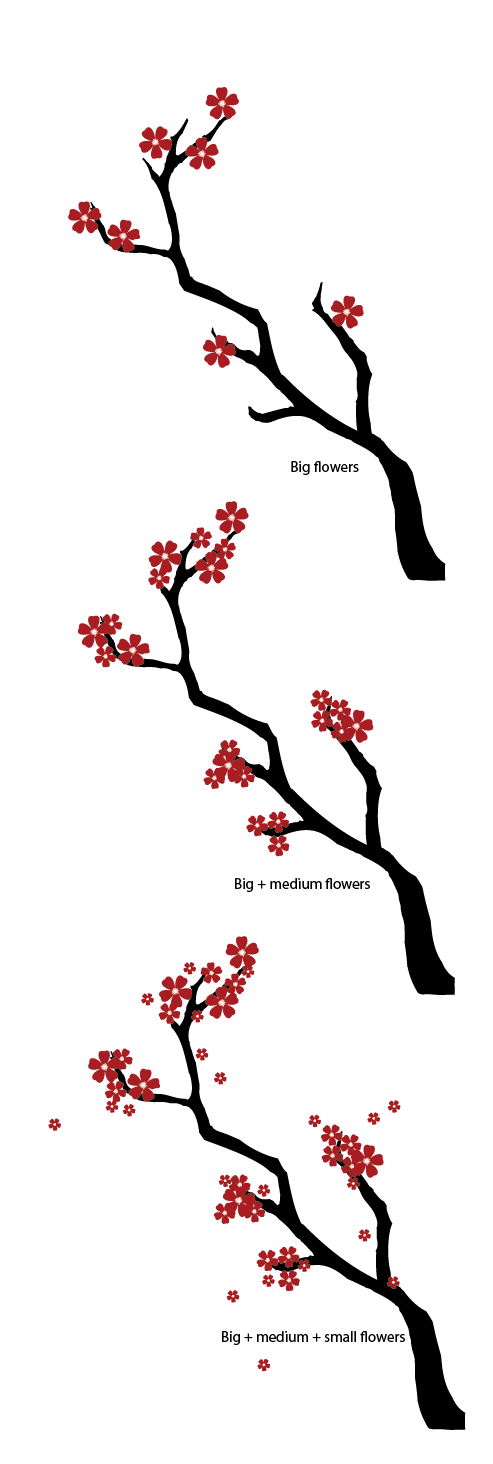
Now the fun part – we need to make out tree branch blossom. Take your blossom, and plant it on the branch. With the Selection tool (V) active Option/Alt drag the flower from one place to other to copy it. Rotate it and change the size of the flowers to make the branch look more interesting! I ended up using three size variations for my tree.
Step 12
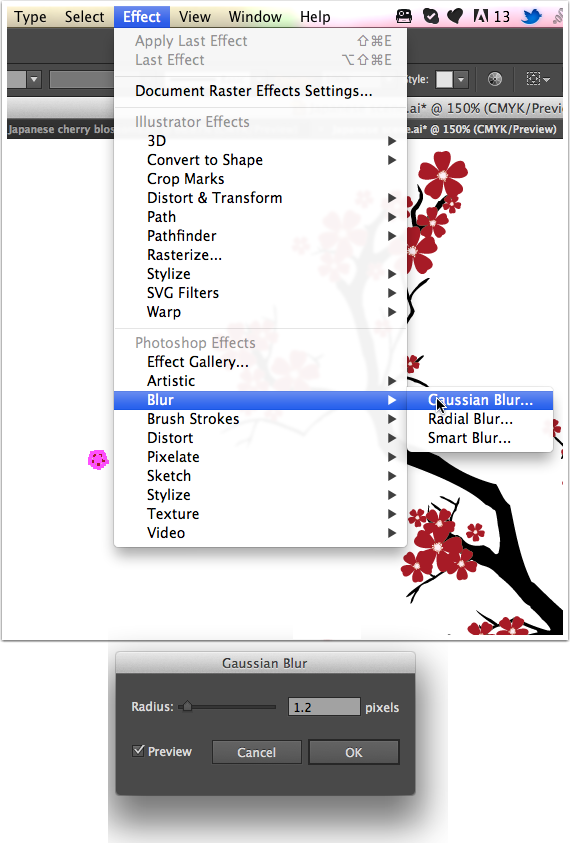
To add more interest to the composition, select one of your flowers (the smallest one), go to Effect > Blur > Gaussian Blur and set the blur radius to 1.2 and fit “OK”. Distribute these blurry flowers here and there as if they are flying around in the wind.
Step 13
Some flowers of mine don’t have anything to hold on to. So now we can add a bit of detail to the tree, like smaller, thiner branches.
Lock your flower layer so that you wouldn’t accidentally erase parts of the flowers. Go back to your black tree branch layer and using the Blob Brush (Shift + B) and Eraser (Shift + E) lets draw in small branches. In my case, I set the Blob Brush to 5pt size and Eraser to 3pt size, the rest of the settings stayed the same as previously.
Step 14
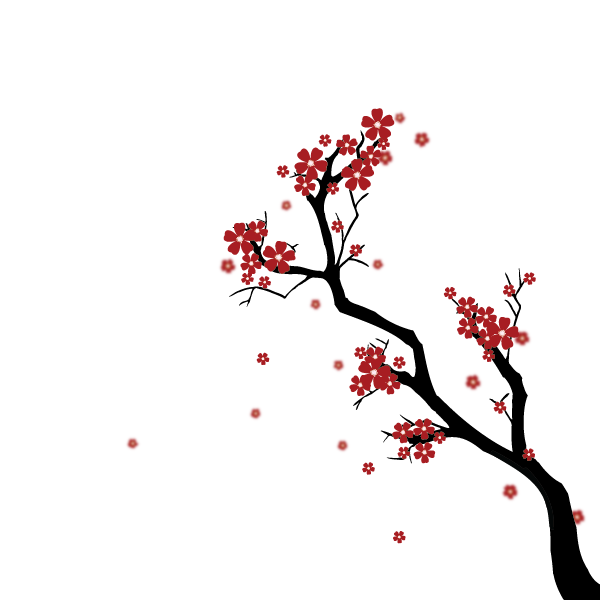
This is how my cherry blossom branch turned out.
Step 15
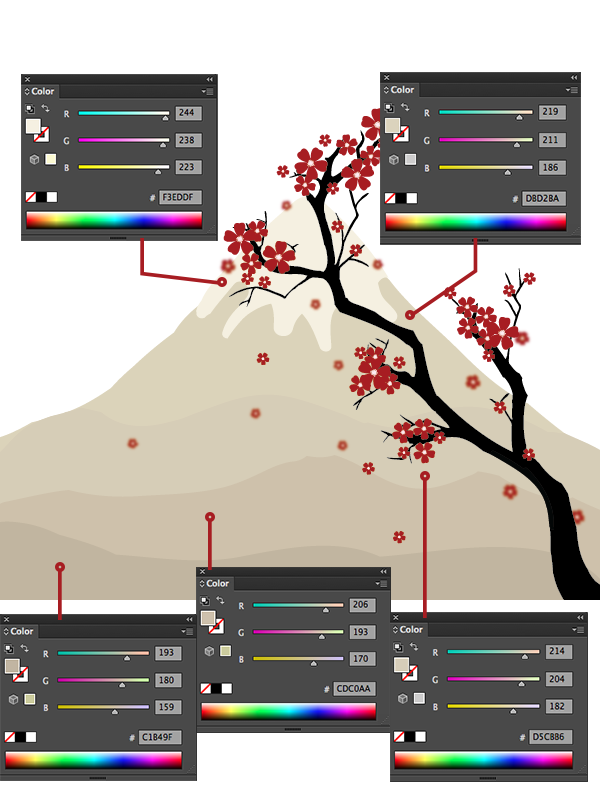
The only thing that is left is the background. Lets make a simple Japanese inspired scene.
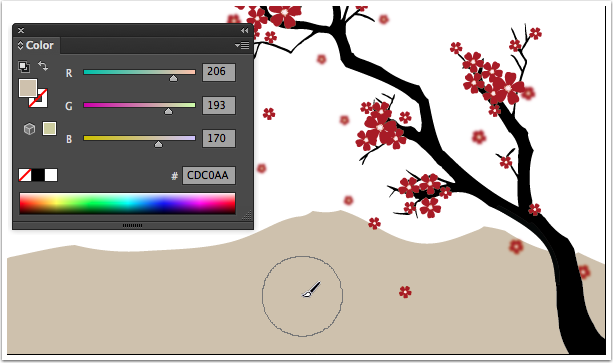
Lock both the flower and tree layers. Make a new layer for the background. I used the Blob brush for this job as well. Set the size to something big, like 80pt and start coloring in the background.
Step 16
I built up my background with creme-colored paths. To achieve this, color in one path with the Blob Brush, then lock this path so that is can’t be modified, change the color of the brush and color in the next path and so on.
Step 17
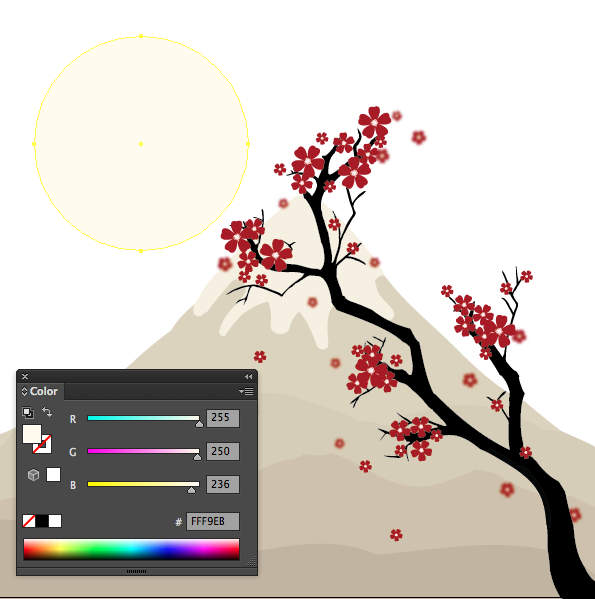
Add a sun in the background using the Ellipse tool (L). At the moment it’s hard to see, but we will fix that in the next step.
Step 18
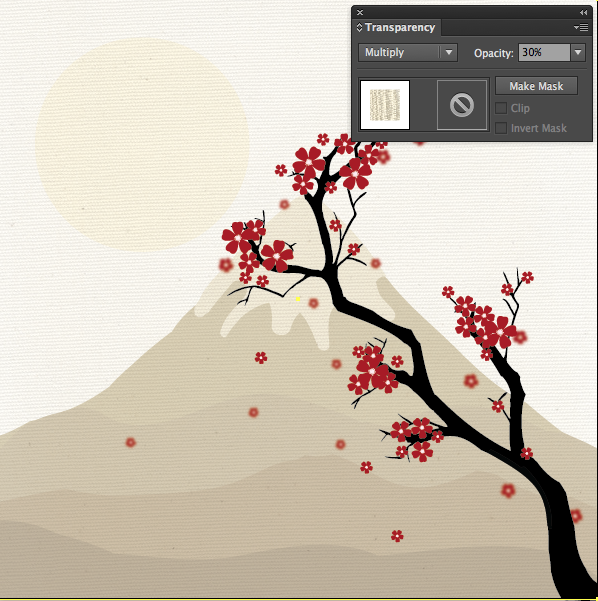
We are almost done, the last thing is to add a nice texture. I used this canvas texture by John Kelly, you can download it here.
Place the texture in Illustrator (File > Place). Position it between the tree and the background. (1.) Select the Rectangle tool (M), make sure both the fill and stroke is empty. Draw a 600×600 pixels wide rectangle (the same size as your artboard)(2.) Now select both the canvas texture and the invisible rectangle you just drew and right-click your mouse and choose “Make Clipping Mask”. That way you can mask away the unwanted pieces of the texture. (4.)

Step 19
Set the textured background to Multiply and 30%.
Final Step
As a final touch I drew a black stroke around my artwork using the Rectangle tool (L), so that the artwork your look as if in a black frame and that’s it. Now you have a nice Japanese inspired cherry blossom scene made in Illustrator!
Hope you enjoyed it, till next time!

Tutorial by Tanita Makena
Follow me on Dribbble: dribbble.com/tanita
Follow me on Twitter: @SilentTani


Great article. It was beneficial. Thanks for sharing.
Hi Tanita,
love your tutorial will surely try this cherry blossom scene tuts in my free time, a very ultimate guide for beginners.
Thanks a lot.
Only wanna comment on few general things, The website design is perfect, the articles is very fantastic.
E bellissimo
Hey i need to know how to start to made cover with illustrator
This is really great, I just followed it though step by step as part of trying to improve my illustrator skills. The next one I’m going to try is the lightsaber one I’ve just seen. Thanks!
Very creative. I am so happy to read and see this tutorial. It is extremely impressive and a great guidance to the junior level designers as well as internees.
good try it into vediotutorials
When I try to pain in the background, it paints over my tree. I locked both of my other layers…is there something that I’m possibly missing?
Thanks so much for this tutorial! I completed the entire thing and it looked exactly like yours! Thank you for your awesome step by step instructions and creativity!
good job
It’s soft and cute. Thanks for this tuts, i’ll try to create this object.
This awesome tutorial. A simple that easy to follow.
Slick Tut Tanita!
I’m really glad to see you making new Vectip tutorials – and this one is just up my street to try. ^^ I only found this site during the hiatus, so really looking forward to what you come up with next now it’s active again. Thank you.
Thanks Harriet glad you like the tutorial!
Hi, your tuts are awesome men, I love all your ideas and Tuts,
Thanks for your time
Maikel,
sorry for my english, I speak spanish..take care
Thanks Maikel, glad you like it 🙂