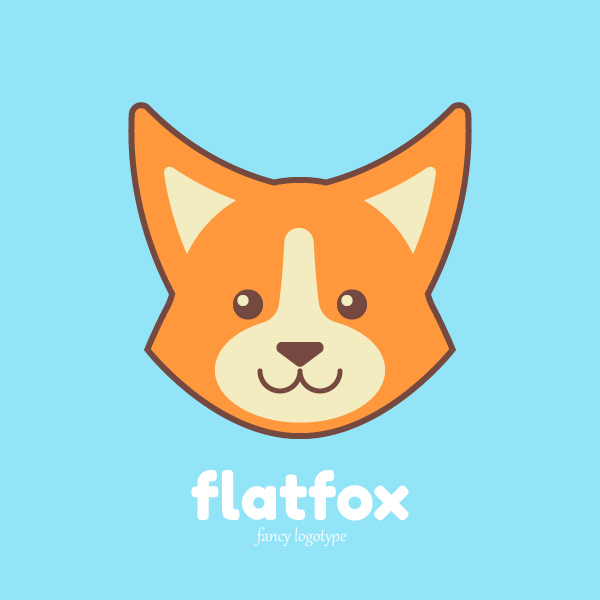
 In this tutorial, we’ll go through a fun and easy process of working with simple shapes and warp effects to create this fancy fox logotype! We’ll be modifying and transforming objects, using various tools and functions of Adobe Illustrator, so you don’t need to draw anything by hand or use a graphic tablet. Ready to try? Let’s start!
Tutorial Details
- Program: Adobe Illustrator CS6-CC
- Difficulty: Intermediate
- Topics Covered: Geometric shapes, Warp Effects, Pathfinder panel, Reflect Tool, Offset Path
- Estimated Completion Time: 20 Minutes
Final Image
Step 1
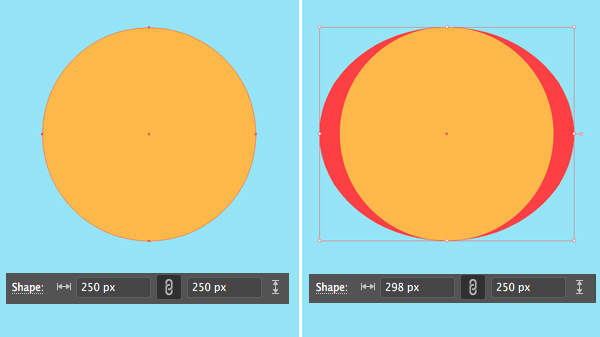
Take the Ellipse Tool (L) and let’s start forming the fox logotype’s head from a 250×250 px orange circle.
Copy (Control-C) the circle and Paste in Back (Control-B). Select the bottom copy, hold down Alt and make it wider (the copy is marked with red color in the image below).
Step 2
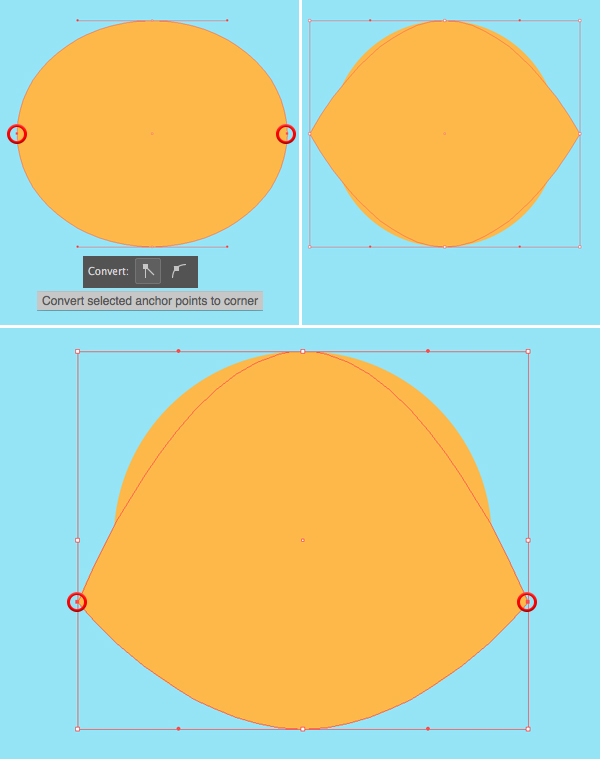
Select both left and right anchor points with the Direct Selection Tool (A) and Convert to Corner from the control panel on top, making the shape pointed.
Drag the points down, forming fluffy cheeks.
Step 3
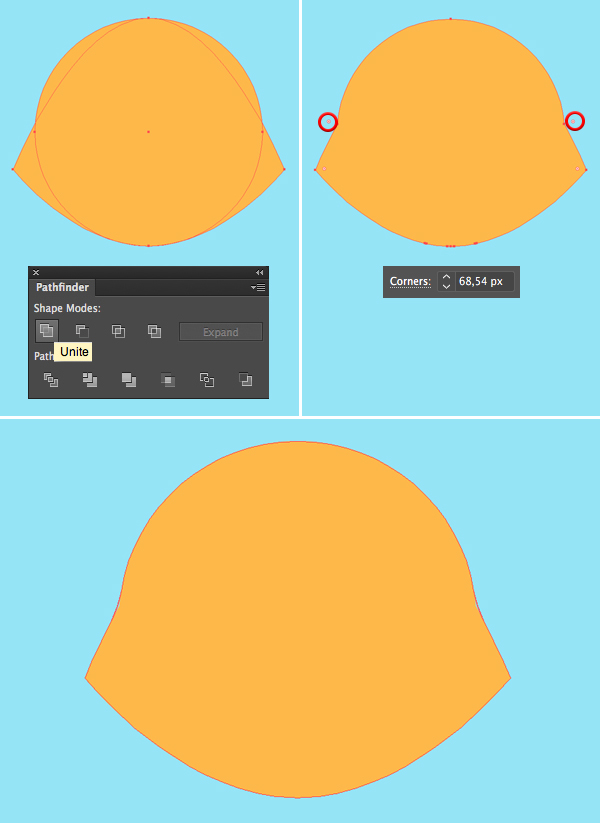
Select both shapes and Unite them in the Pathfinder.
Now that we merged both shapes, let’s make the points above the cheeks smoother. Select them with the Direct Selection Tool (A) and drag the tiny circle markers of the Live Corners, this way smoothing the line.
Step 4
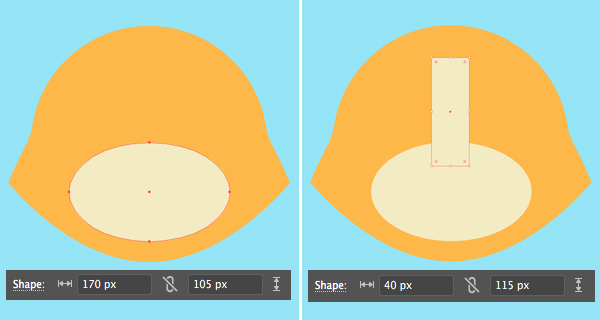
Make a 170×105 px light-yellow ellipse for the muzzle. Use the Rectangle Tool (M) to add a 40×115 px shape on top of the ellipse. You can use the Align panel to align all the shapes to the Horizontal Center of the Artboard.
Step 5
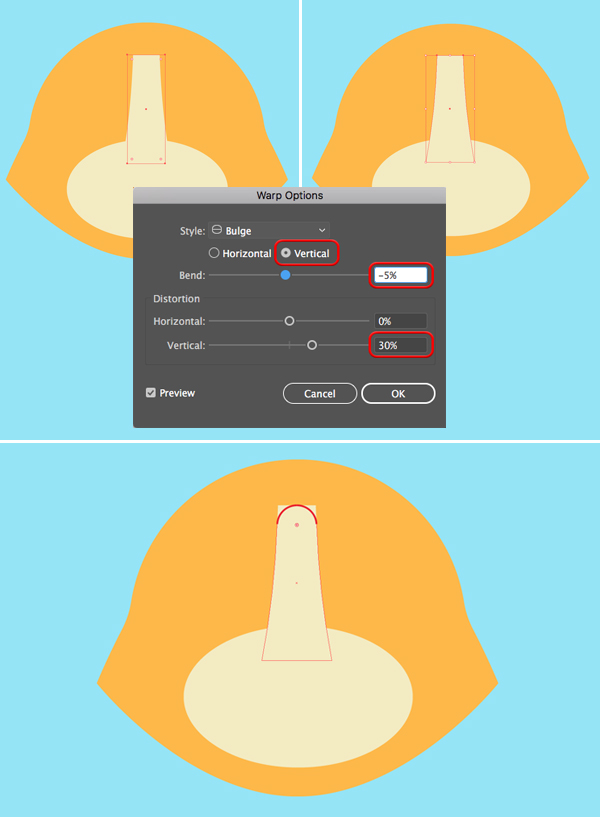
Select the rectangle and go to Effect > Warp > Bulge. Set the Vertical Bend value to -5% and Vertical Distortion to 30%, making the bottom part of the shape wider.
Object > Expand Appearance to apply the effect.
Select both top anchor points of the shape with the Direct Selection Tool (A) and pull the circle marker of the Live Corners to make the top of the shape fully rounded.
Step 6
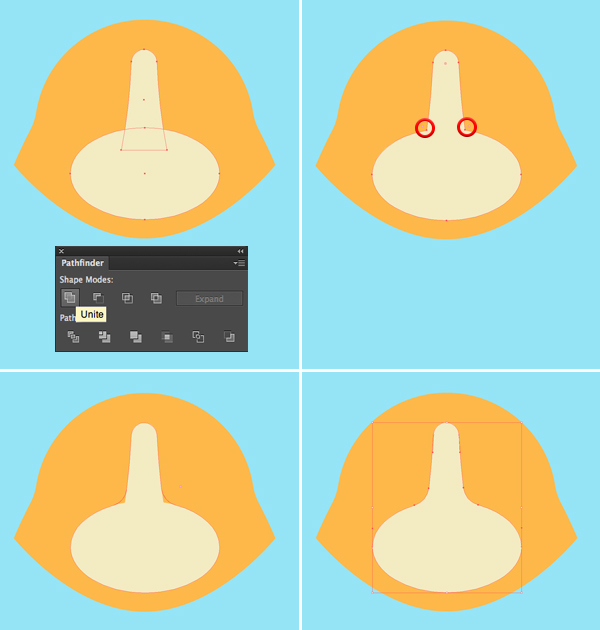
Now let’s merge the elements of the muzzle. Select both shapes and Unite them in the Pathfinder.
Use the Direct Selection Tool (A) to select the anchor points marked with red circles in the screenshot below and make the corners rounded.
Step 7
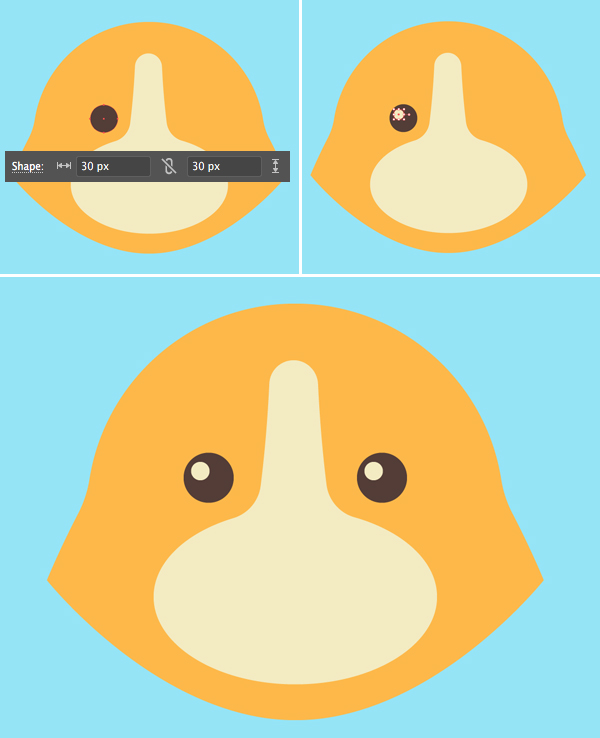
Now we can add the eyes. Use the Ellipse Tool (L) while holding Shift to make a 30×30 px dark-brown circle. Add a tiny white circle on top for the highlight. Group (Control-G) both elements and drag the eye to the right while holding Alt-Shift to make a copy for the second eye.
Step 8
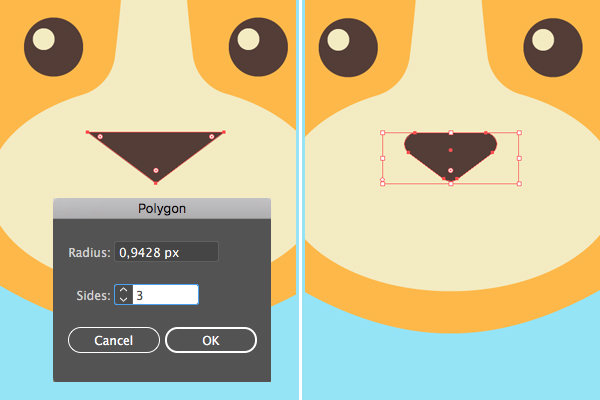
Move on the add a nose for your fox logotype. Take the Polygon Tool and single-click anywhere on the Artboard to open the options panel. Set the number of sides to 3. Make a small dark-brown triangle and turn in upside down, placing it in the center of the muzzle.
Select the whole shape with the Direct Selection Tool (A) and make the corners rounded.
Step 9
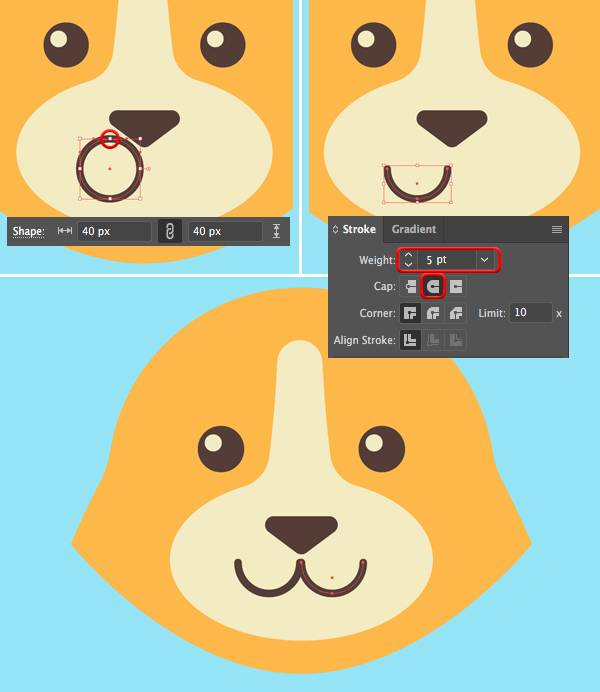
Now let’s add a smiling mouth. Make a 40×40 px circle with brown Stroke and no Fill. Select its top anchor point with the Direct Selection Tool (A) and delete it by pressing the Delete key (or Backspace if you’re on Mac), this way splitting the circle apart. Open the Stroke panel (Window > Stroke) and set the Weight to 5 pt, Cap to Round Cap.
Select the semi-circle, hold Alt-Shift and drag to the right, creating a copy to form the second part of the mouth.
Step 10
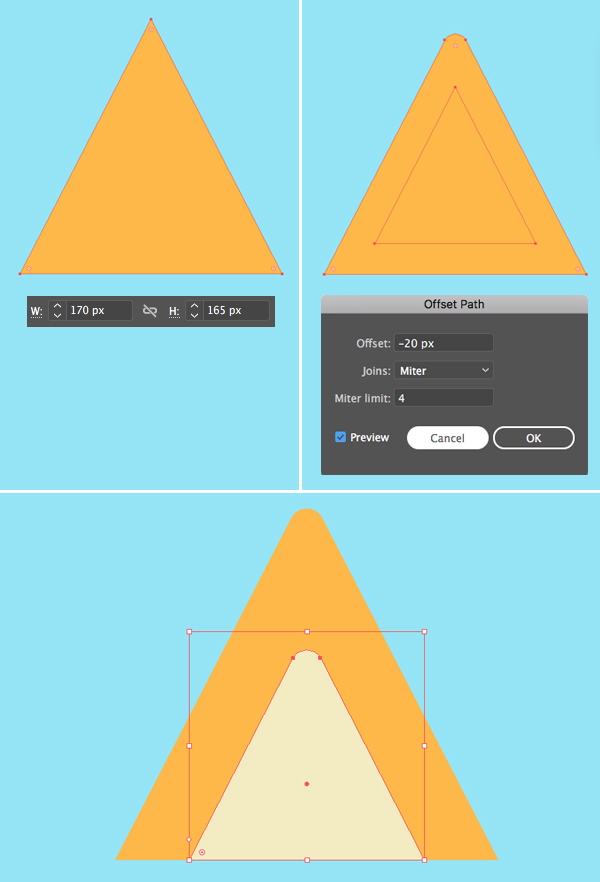
Take the Polygon Tool and let’s make another triangle for the ear. Create a 170×165 px orange shape and make its top point smooth and rounded.
Keeping the shape selected, go to Object > Path > Offset Path and apply -20 px Offset value. Fill the created inner shape with light-yellow color and move it down, to the bottom edge of the ear (we can simply select both shapes and click Vertical Align Bottom in the Align panel).
Step 11
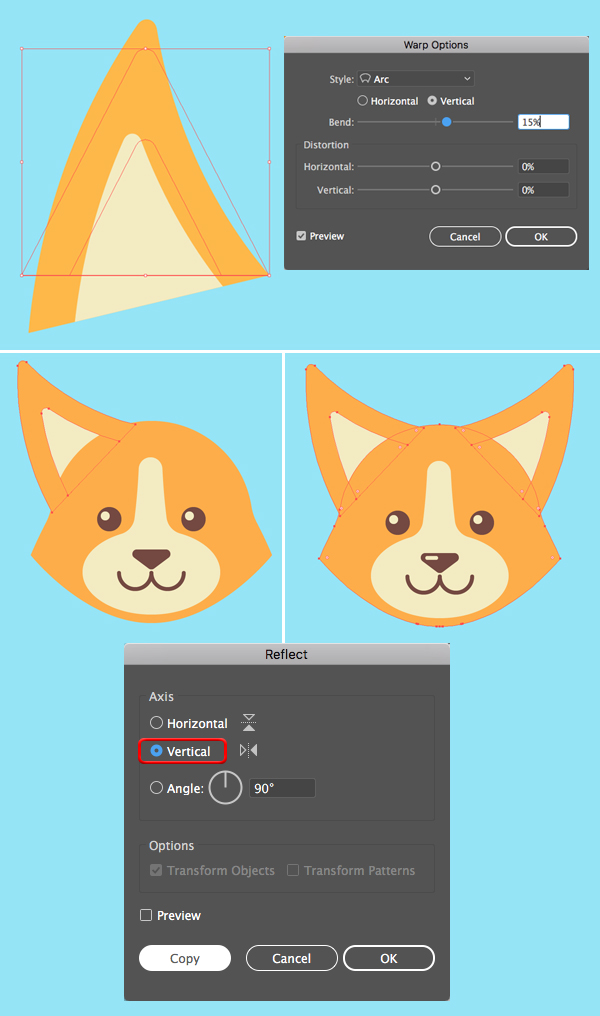
Group (Control-G) both elements of the ear and go to Effect > Warp > Arc. Set the Vertical Bend value to 15% and click OK.
Object > Expand Appearance to apply the effect. Now we can rotate the ear, resize it and attach it to the left side of the head.
Select the ear and double-click the Reflect Tool (O) to open the options window. Select the Vertical Axis and click Copy to create a mirrored copy of the ear for the opposite side of the head.
Step 12
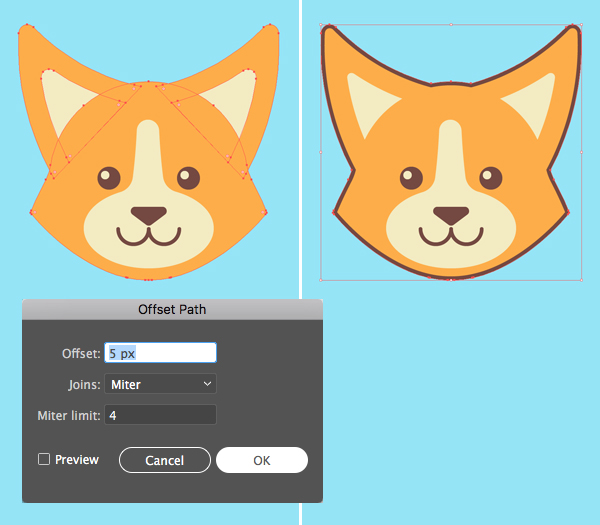
We’re almost there! Just a few final touches to make. Group all the elements of the head and apply Object > Path > Offset Path with 5 px Offset value. Click the OK button and while the created offset shapes are still selected, click Unite in the Pathfinder to merge the shapes. Change the fill color of the merged shape to dark-brown, creating an outline for your fox logotype.
What Does the Fox Say?
Great job, guys! Our fox logotype is finished! Now we can add some text to make the logo look completed.
I hope you’ve enjoyed following this tutorial and learned some new tips and tricks that can be useful for your future designs.
Have fun!



Thanks for all your hard work on this website. Ellie really likes getting into investigations and it’s easy to understand why. I notice all of the dynamic way you give simple tips and tricks through the website and even welcome contribution from others on the area then our own daughter is without question becoming educated a whole lot. Enjoy the remaining portion of the new year. You are doing a stunning job.
What does the fox say?