

Announce a contest or shop giveaway’s results in style with these folded, dimensional prize tag vectors. In this tag vectors tutorial you’ll skew objects with the Shear Tool, create custom brushes, use radial gradients in the place of drop shadows, and alter an object’s Blending Mode to render objects and strokes within the image.
Tutorial Details: Prize Tag Vectors
- Program: Adobe Illustrator CC
- Difficulty: Intermediate
- Topics Covered: Shear Tool, Blending Modes, Custom Brushes
- Estimated Completion Time: 30 Minutes
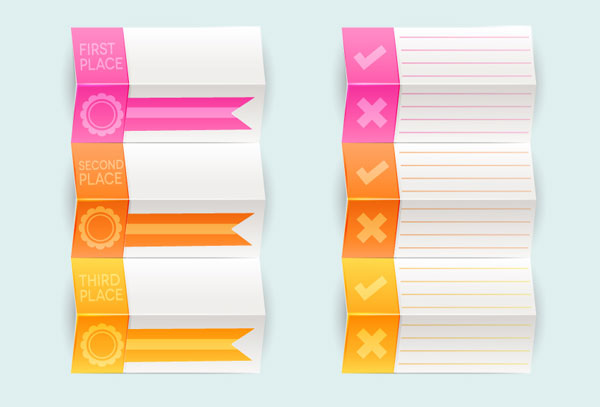
Final Image: Prize Tag Vectors
Step 1: Prize Tag Vectors
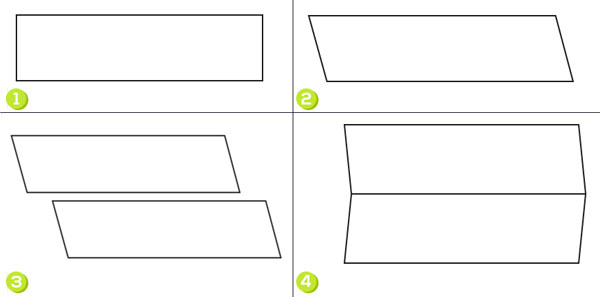
Start with a horizontal rectangle drawn with the Rectangle Tool (M)Shear Tool to skew the rectangle to the left. Copy (Control-C) Paste (Control-V) the rectangle. Flip the object over a horizontal axis.
Step 2
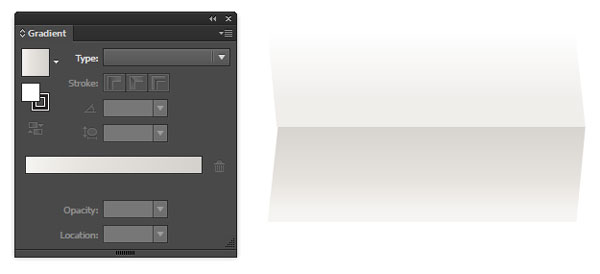
Apply a Linear Gradient to each rectangle, each going from light gray to a darker gray. The top shape should be lighter than the bottom. Make sure the top shape’s gradient goes from light to dark and the bottom shape’s gradient goes from dark to light. I used shades of gray from the default swatches in the Swatches panel.
Step 3
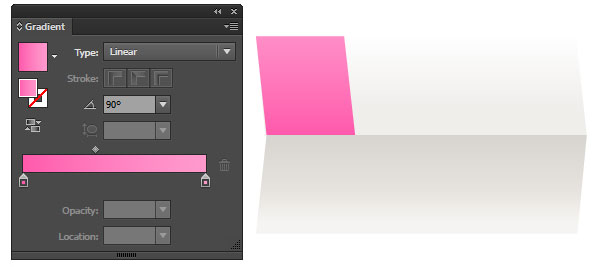
Draw a smaller rectangle and match the skew angle with the Shear Tool. It should measure between 1/4 to 1/3 of the full rectangle’s size. You can choose whatever color scheme you want, of course. I opted for pink for the first set of tags. Apply a Linear Gradient that goes from light pink to dark pink.
Step 4
Copy and Paste the smaller tag vector on the bottom rectangle. Alternative to changing the colors used in the bottom tags, you can Copy and Paste the full bottom rectangle, change the color to dark gray, set the Blending Mode to Multiply in the Transparency panel, and reduce its Opacity to 40%.

Step 5
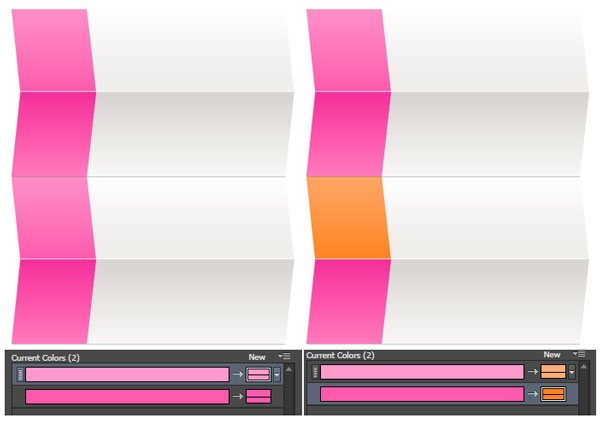
Group (Control-G) your two tag vectors together. Copy and Paste them directly below the first group. Easily change colors of select groups by going to Edit > Edit Colors > Recolor Artwork. This allows you to easily create variations and sets of tags for various uses.
Also note the 1 pt weight stroke of white and gray drawn with the Line Segment tool (\) placed between each fold in the tag design.
Step 6
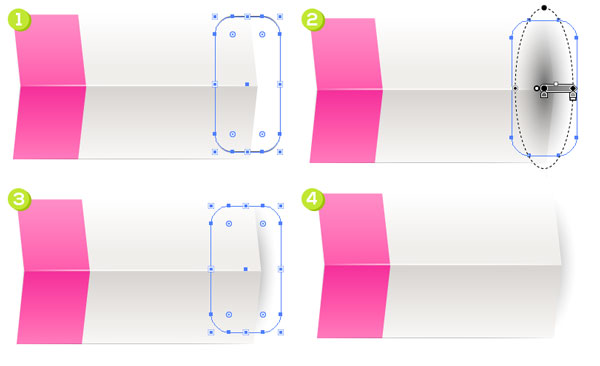
To add dimension, draw a rectangle with the Rounded Rectangle Tool
Apply a Radial Gradient with the Gradient Tool (G) that goes from gray at 100% Opacity in the center to gray at 0% Opacity Use the Gradient Tool to adjust the radius and angle of the gradient so it squishes inward, is in the center of the rectangle, and is positioned vertically. Place it beneath the tag designs in the
Layers panel.
Step 7: Prize Tag Vectors
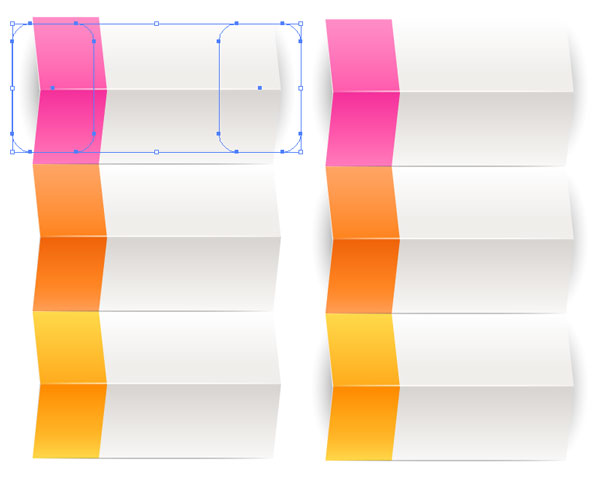
Copy and Paste the Radial Gradient shadow shapes behind each tag on both the left and right sides.
Step 8
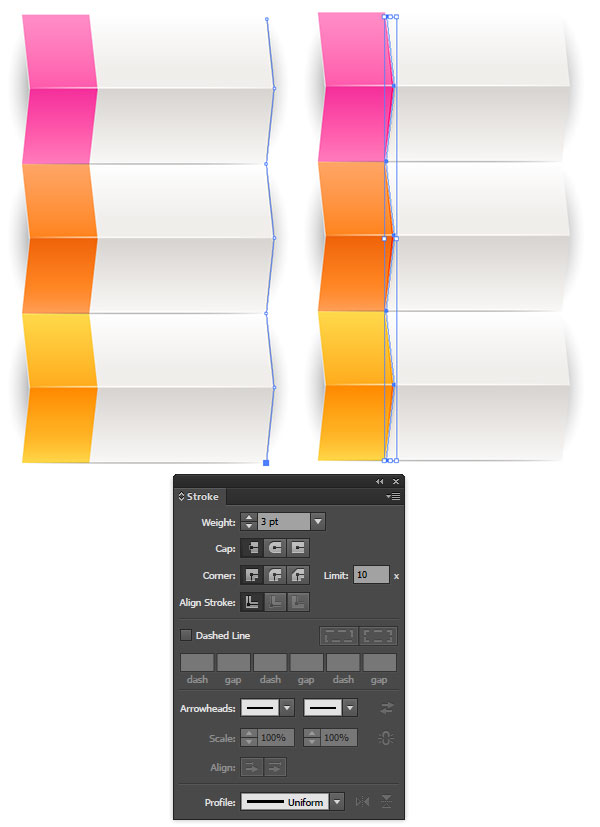
Use the Pen Tool (P) to trace the right edge of the tag vectors design. Set the stroke Weight to 3 pts, the fill color to a Linear Gradient of gray at 0% to 100% to 0% Opacity in the Gradient panel, and the Blending Mode to Color Burn in the Transparency panel. Place this path between the colored and light gray portion of the tag design so that the stroke overlaps both.
Step 9
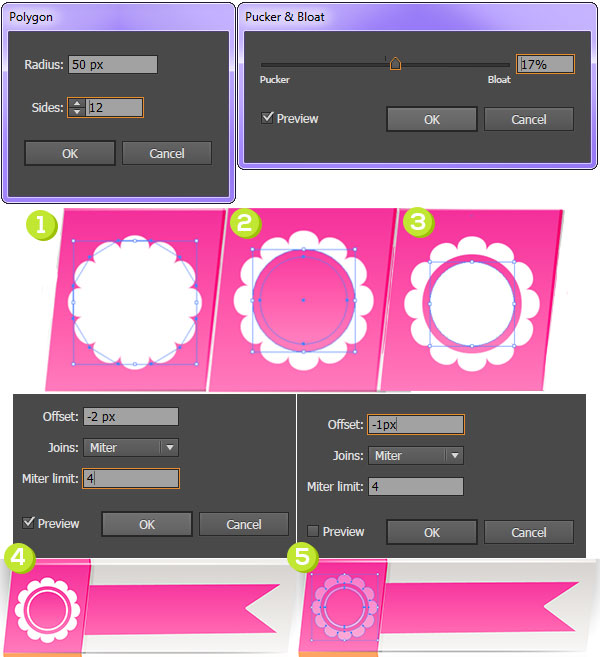
The tags themselves need some designs. Let’s try a simple ribbon badge design. Use the Polygon Tool to draw a 12-Sided shape Under
Effect > Transform & Distort > Pucker & Bloat, set the Bloat to 17%. Draw a circle in the center of the polygon with the Ellipse Tool (L). Offset (Object > Path > Offset Path) the circle by-2 px. Then, Offset the newly created smaller circle by -1 px. Select the first circle drawn and the polygon and hit Minus Front in the Pathfinder panel. Select the second two circles drawn and hit Minus Front in the Pathfinder panel. Group together the badge design components, set the fill color to white, and set the Blending Mode to Soft Light. Draw lines, ribbon tails, etc with the Pen Tool in the body of the tag design.
Step 10
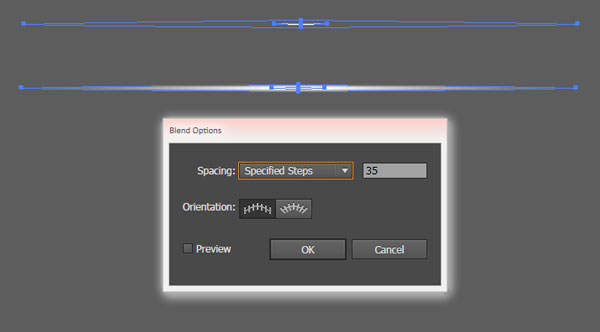
Let’s create a simple custom brush. Draw a long narrow ellipse with the Ellipse Tool and use the Anchor Point Tool (Shift-C) to convert the right and left anchor points to points. Use the Selection Tool (V) to squish the shape down so it’s very thin. Offset the shape so you have a smaller version in the center of the squished ellipse.
Set the Opacity of the larger shape to 0%. Set both of the shapes’ fill colors to white. Select both shapes and use the Blend Tool to create a simple and smooth blend of 35 Steps or so.
Step 11
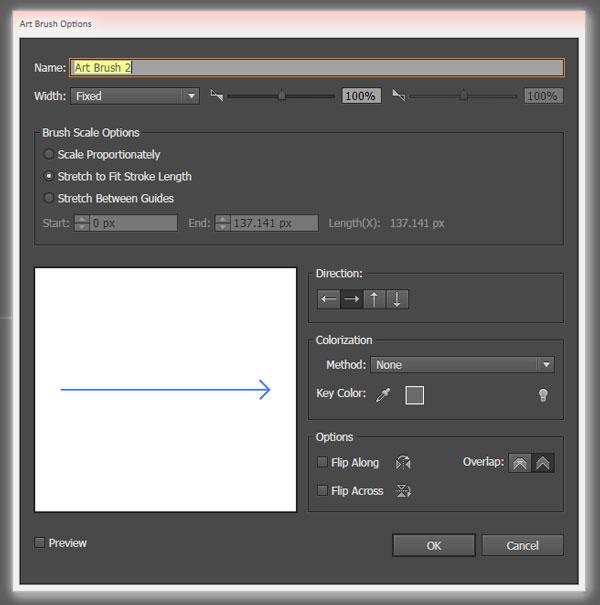
Select your newly created blend group and in the Brushes panel, create a New Brush. Select Art Brush and make sure Sretch to Fit Stroke Length is selected as well as the arrow following the length of the blend created (see panel below).
Step 12
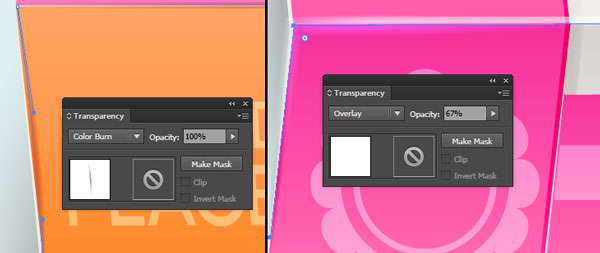
Use the Paintbrush Tool (B) to draw highlights and shadows with your new brush. For shadows, use the Recolor Artwork option to change the fill colors from white to gray and set the Blending Mode to Color Burn. For highlights, set the Blending Mode to Overlay with the Opacity reduced to 67% or so.
Conclusion: Prize Tag Vectors
There you have it: quick and easy prize announcement tag vectors perfect for online communities, print media, and interaction through social media. Easily change colors, shapes, and details within the tag designs to suit your website and contest needs. Show off your tags in the comment section below!
Author: Mary Winkler
Mary works under the brand Acrylicana® designing apparel, jewelry, and illustrating for companies like Disney, Jakks Pacific, Envato, and more. Check out Acrylicana.com for more artwork, tutorials, and more.


Oh Make sure the top shape’s gradient goes from light to dark and the bottom shape’s gradient goes from dark to light.
Another great tutorial! Thanks for Your effort to teach us those useful tricks.