
 Let’s prepare for the celebration of the upcoming 2018 year and learn how to design a festive postcard that we can send to our friends and colleagues! We’ll be using simple shapes along with some fancy effects of Adobe Illustrator to create a festive look and add a glossy sparkling effect to the whole composition.
Let’s get started!
Tutorial Details
- Program: Adobe Illustrator CS6 – CC
- Difficulty: Intermediate
- Topics Covered: Shape Building, Blending Modes, Gradients, Effects
- Estimated Completion Time: 20 minutes
Final Image: Festive 2018 New Year Card

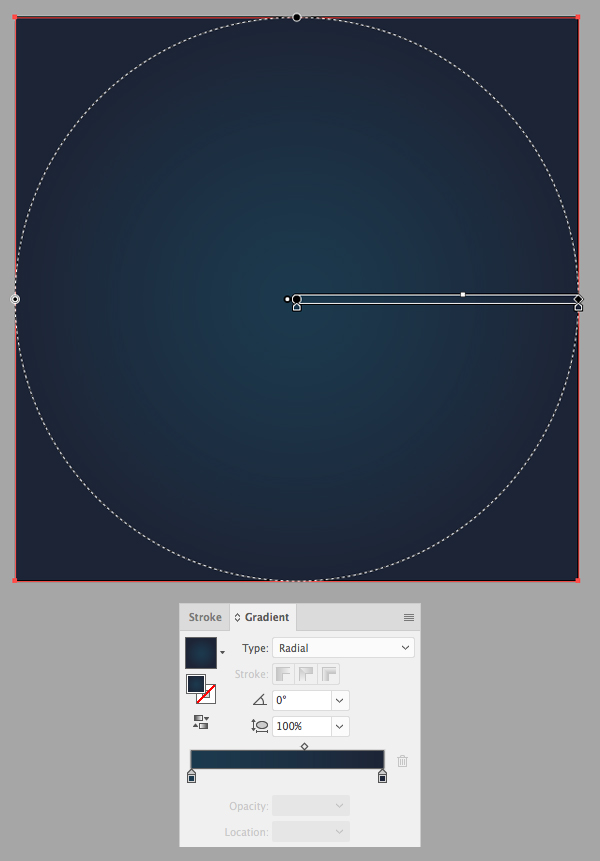
Step 1
Take the Rectangle Tool (M) and let’s start by creating a deep dark background from a 600 x 600 px rectangle. Open the Gradient panel (Window > Gradient), set the Type to Radial and apply dark-blue color for the center and darker blue (almost black) for the outer edges.
Step 2
Take the Type Tool (T) and type ‘2018’. You can use any font to your liking. I’m using the Fredoka One free font. Adjust the size of the text to make it big enough and use the Align panel (Window > Align) or the control panel on top to align it to the center of the Arboard.

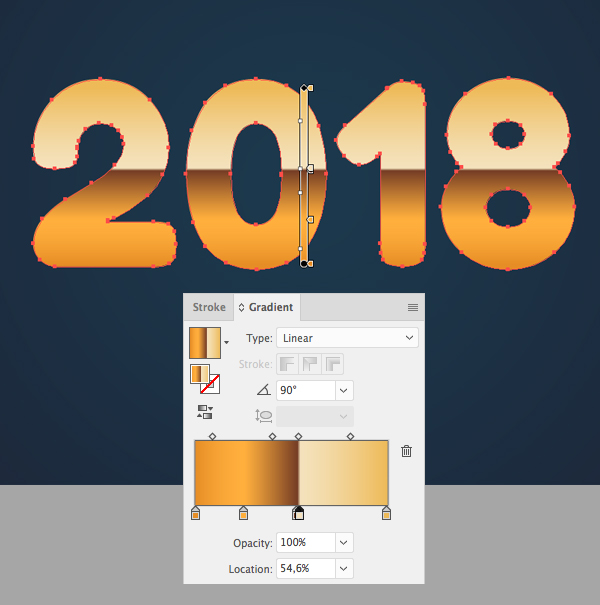
Step 3
Go to Object > Expand to turn our text into curves. Not let’s head to the Gradient panel and turn our boring letters into golden pieces!
Step 4
Let’s make our golden letters somewhat more dimensional. Select the group and go to Object > Path > Offset Path. Set the Offset value to -5 px, leave all other options as default and click OK to create a new shape inside of each figure.

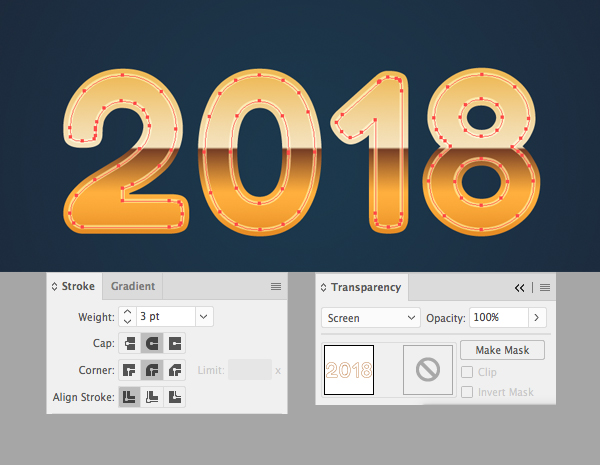
Step 5
Keeping the new shapes selected, set the Fill color to none and the Stroke color to dark-yellow in the Color panel.
Head to the Stroke panel (Window > Stroke) and set the Weight to 3 pt, making the line thicker. Then open the Transparency panel (Window > Transparency) and set the Blending Mode to Screen. Play with the Opacity if you feel like the outline is too bright.
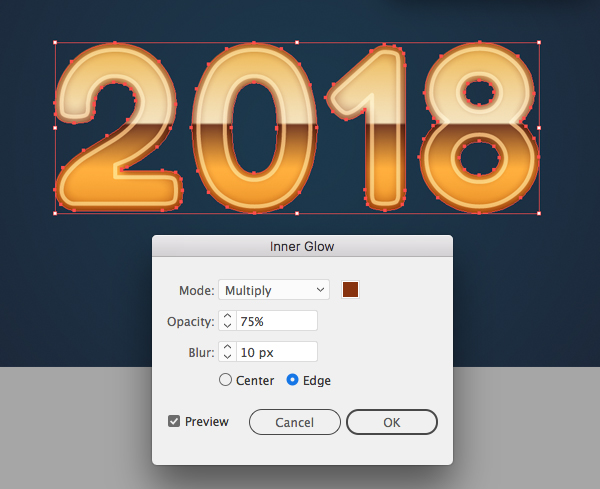
Step 6
Now let’s add some effects! Select the golden base of our figures and go to Effect > Stylize > Inner Glow. Set the Mode to Multiply and select a dark-brown color in the square on the right.
Next, set the:
- Opacity to 75%,
- Blur to 10 px,
- Edge
and click OK to apply the created effect, adding depth to the figures.
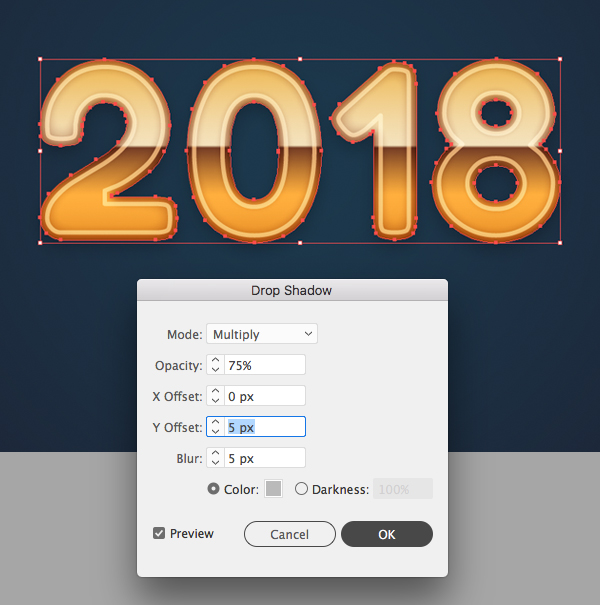
Step 7
Now we’ll put a gentle shadow beneath the figures.
Keeping the golden elements selected, go to Effect > Stylize > Drop Shadow.
Set the:
- Mode to Multiply,
- Opacity to 75%,
- X Offset to 0 px,
- Y Offset to 5 px,
- Blur to 5 px.
Set the Color to light-grey and click OK to apply the shadow effect.
Step 8
1) Let’s create some decorative elements for our postcard. Take the Ellipse Tool (L) and start with a 20 x 50 px oval. Use the Gradient Tool (G) and fill the shape with a vertical linear gradient from blue on top to darker blue in the bottom.
2) Now let’s take the Direct Selection Tool (A) and select the top and bottom points of the shape. Head to the control panel on top and click Convert selected anchor points to corner, turning the ellipse into a pointed leaf.
3) Let’s Copy (Control-C) the leaf and Paste in Front (Control-F). Select the left anchor point with the Direct Selection Tool (A) and hit the Delete key (Backspace on Mac) to delete the left half of the shape.
4) Fill the remaining half with dark-blue color and switch the Blending Mode to Screen in the Transparency panel, turning the shape into a highlight.
Finish up with the leaf by Grouping (Control-G) its elements. 
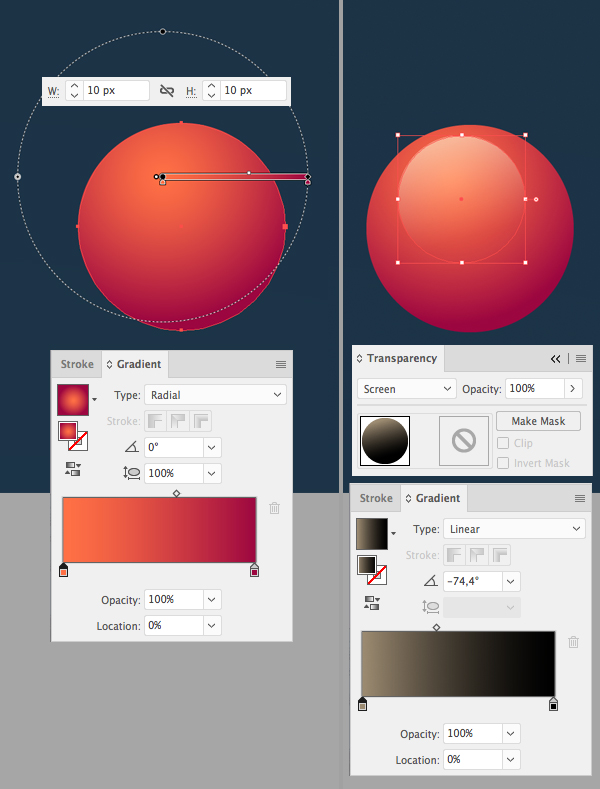
Step 9
Now let’s make a berry. Take the Ellipse Tool (L), hold down Shift and create a 10 x 10 px circle. Fill the circle with a radial gradient from orange in the center to dark-red at the edges. Use the Gradient Tool (G) to move the center point to the top left part of the berry.
Create a smaller circle on top and fill it with linear gradient from dark-yellow to black. Switch it to the Screen Blending Mode, turning the circle into a highlight to make the berry glossier.
Group (Control-G) the elements of the berry.
Step 10
Now let’s attach the created elements to our figures. Hold Alt and drag the leaf to create a copy. Let’s place it beneath the figure ‘2’ by pressing Shift-Control-[ or drag it down manually in the Layers panel.
Continue adding copies of the leaf beneath the golden figures. Rotate and resize them, adding variety to the composition.

Step 11
We can make the illustration more interesting by placing some leaves in-between the figures. Just rearrange the elements in the Layers panel, placing the leaves inside the ‘2018’ group.
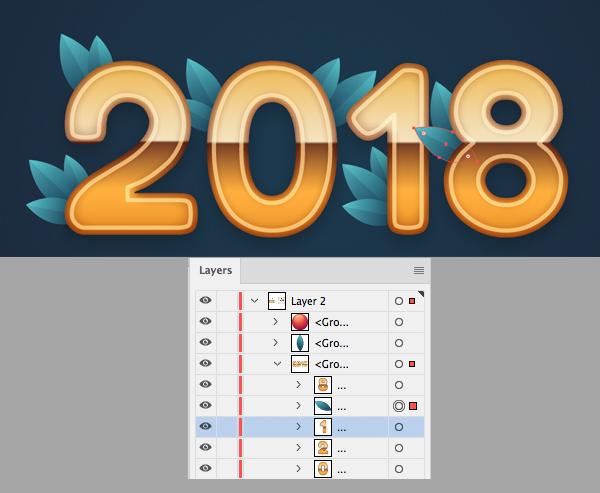
Step 12
Continue by adding the berries here and there, varying the size of the elements.
Use the Type Tool (T) to add some text beneath the ‘2018’. I’m using the same font and same golden linear gradient to make a ‘Happy New Year’ message.

Step 13
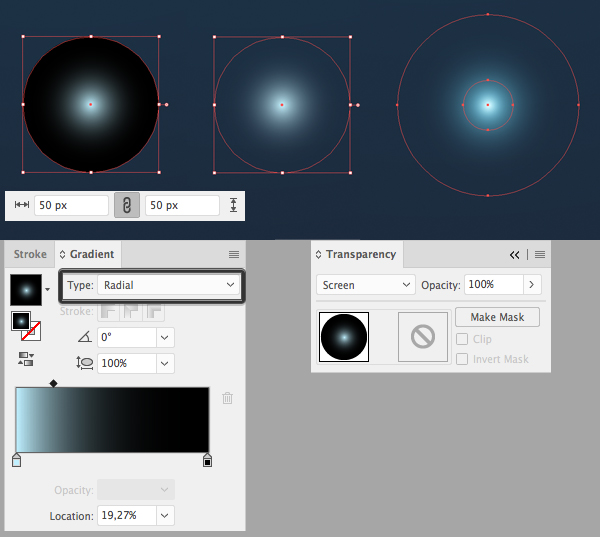
Now let’s create some glowing sparks for a festive holiday look!
Use the Ellipse Tool (L) to create a 50 x 50 px circle. Fill it with radial gradient from light blue in the center to black at the edges. Switch the Blending Mode to Screen to make the black part transparent.
We can make the spark brighter by placing a smaller copy on top.
Step 14
Create sparkles of different colors and place them here and there on the berries and other elements of the card to make it more detailed and vivid.

Congratulations! Our Festive 2018 New Year Card is Finished!
Great work, my friends! I hope you’ve enjoyed following this tutorial and now you’re prepared for New Year! Use these simple tips and tricks to make more festive postcards.
Have fun!


Thank you for your post.Really looking forward to read more. Will read on
Thank you for explaining the process. I have done it.
Very nice