
In this warm and sunny tutorial we will design an elegant summer pattern. We’ll be manipulating with the most useful tools of Adobe Illustrator and learn how to draw seamless textures with tropical vibes. Are you ready? Let’s start!
Tutorial Details
- Program: Adobe Illustrator CS6 – CC
- Difficulty: Intermediate
- Topics Covered: Shape Building, Paintbrush Tool, Brushes Panel, Pattern creation
- Estimated Completion Time: 20 minutes
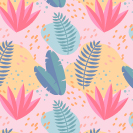
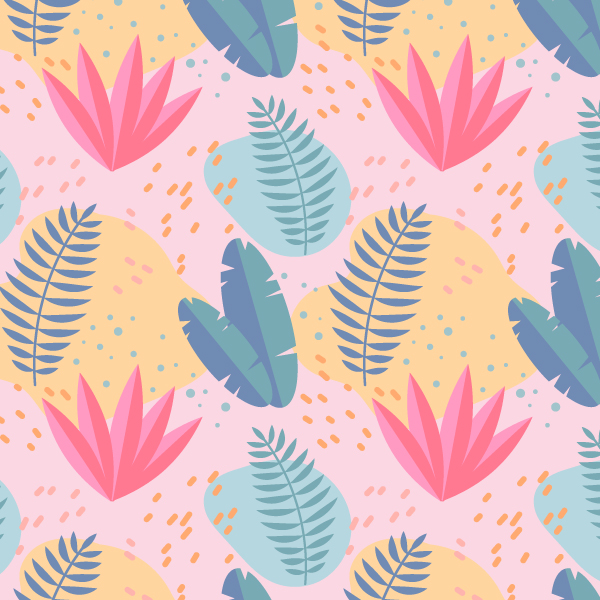
Final Image: Tropical Summer Seamless Pattern
Step 1
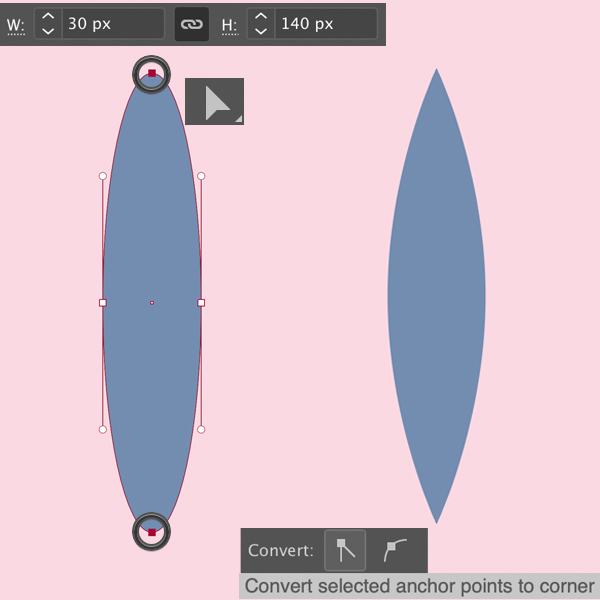
Let’s begin with the first element that will be a part of our future seamless pattern. Take the Ellipse Tool (L) and make a 30 x 140 px blue shape. Switch to the Direct Selection Tool (A) and select the top and bottom anchor points.
In the control panel on top click the Convert selected anchor points to corner button. This way we make the tips of our shape sharp.
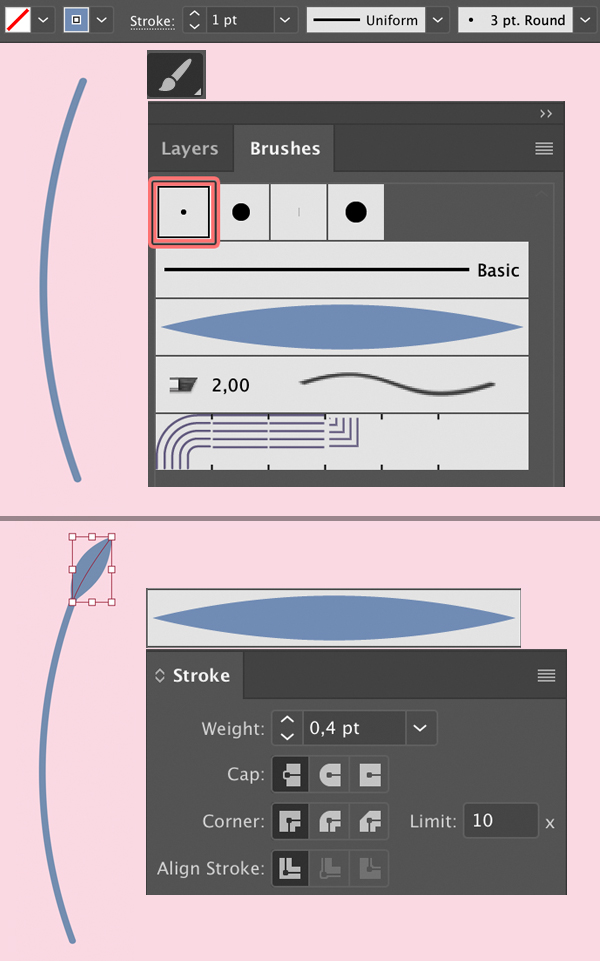
Step 2
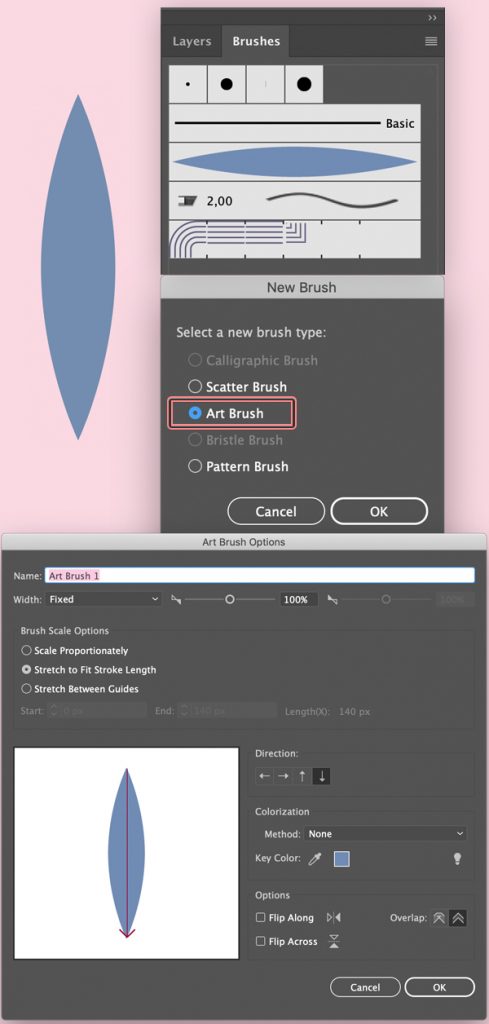
Now let’s create a custom brush that we’ll be using for the leaves of the foliage. Open the Brushes panel (Window > Brushes) and drag and drop the created shape onto the panel. Select the Art Brush in the New Brush panel and click OK.
Leave all the settings as default in the Art Brush Options window. You can always adjust these settings at any moment by double-clicking your newly created brush in the Brushes panel.
Step 3
Our leaf brush is ready, but first of all we need to create a stem. Press B to switch to the Paintbrush Tool and select a basic Round brush in the Brushes panel. You can adjust its settings either in the Stroke panel (Window > Stroke) or in the control panel on top. Set the Stroke to 1 pt and the color to blue. Draw an arched line for the stem.
Now it’s time to use our leaf brush! Select it in the Brushes panel and make a short stroke on top of the stem. If you’re not happy with the shape of your leaf (it might seem too wide or too thin), try adjusting the Weight of the stroke in the Stroke panel. In my case, for example, I set it to 0,4 pt.
You can also adjust the length and the shape of the stroke itself by moving its anchor points with the Direct Selection Tool (A).
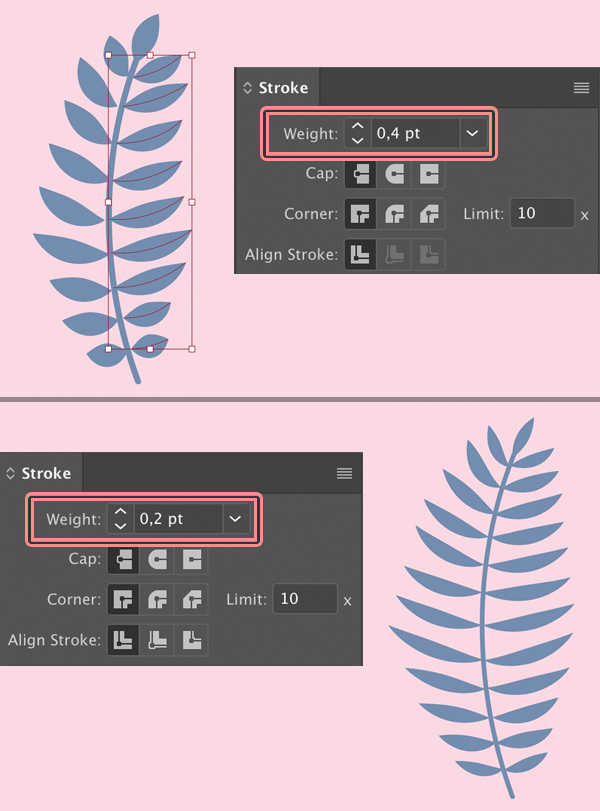
Step 4
Continue using the leaf brush to draw more leaves along the steam. Try to make the middle leaves longer.
When all the leaves are ready, I’m trying different Weight settings to see which one look better. I’ve decided to set the Weight to 0,2 pt, making the leaves slightly thinner.
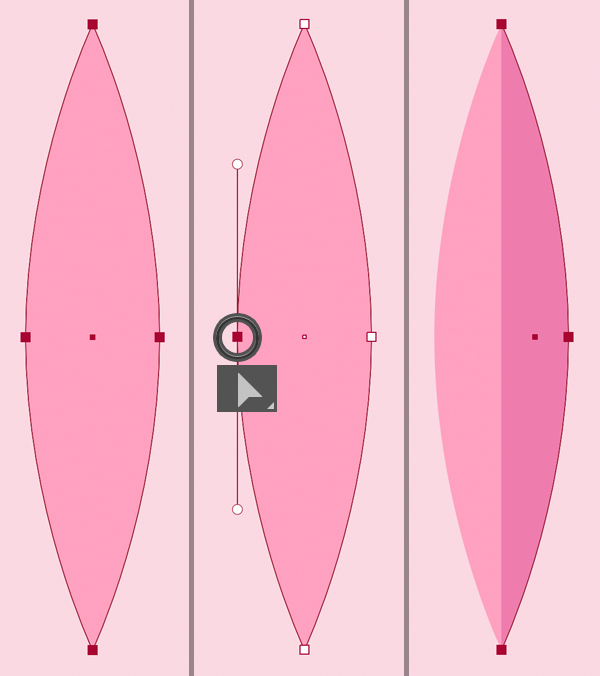
Step 5
Let’s use the same shape as we created in the first step to create another plant. Start by Duplicating (Control-C > Control-F) the shape. Now let’s work on the top copy. Take the Direct Selection Tool (A), click the left anchor point and delete it. Make the remaining shape slightly darker.
Now we have a full leaf in the bottom and a darker half of it on top. Group (Control-G) these two elements together.
Step 6
Let’s move on to the next leaf. Take the Ellipse Tool (L) and create a 75 x 210 px blue oval.
Then use the Pen Tool (P) to draw random triangles on top of the oval. Vary their shape, size and position for a more interesting effect. Select all the triangles and press Control-8 (Make Compound Path) to unite them into one shape. Select both shapes (the oval and the triangles) and use the Minus Front function of the Pathfinder panel to cut the triangles out.
Finish up with the shape by Duplicating (Control-C > Control-F) it and deleting one half of the copy, same as we did in the Step 5 to create a two-coloured tropical leaf.

Step 7
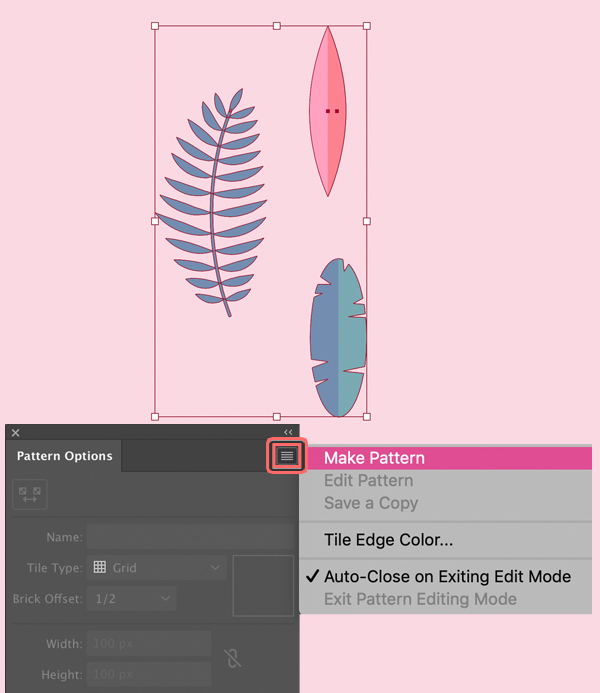
Now that we have some elements, we’re ready to start designing our tropical seamless pattern! Remember that you can always add more elements and edit your pattern any time, so don’t put yourself in any boundaries and unleash your creative freedom!
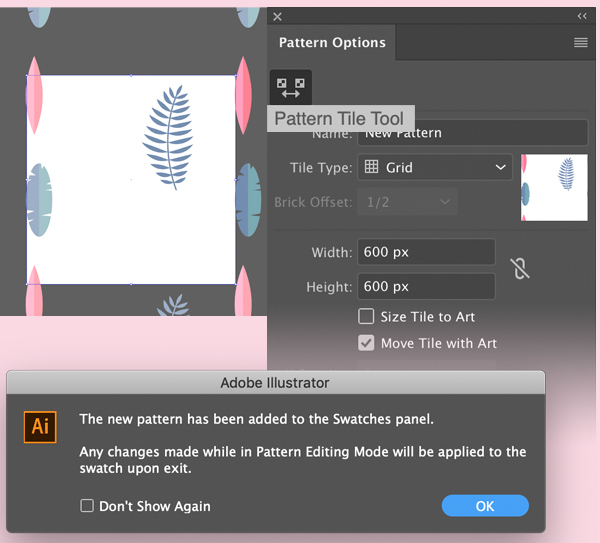
Select your leaves, open the Pattern Options window (Window > Pattern Options) and click the menu icon in the top right corner. Click Make Pattern.
Step 8
Once the pattern is created, you will see a pop-up message that informs you that you can find your pattern in the Swatches panel.
And now the magic begins! You will see a blue bounding box around the selected objects – those are the edges of your pattern. Let’s use the Pattern Tile Tool and set the edges to the same size as the Artboard (600 x 600 px).
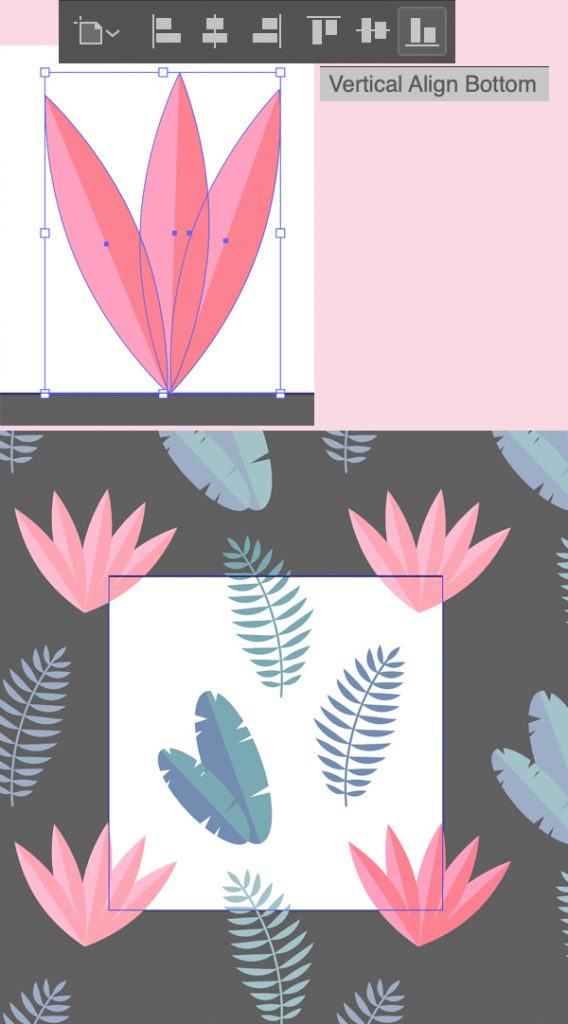
Move the leaves around the canvas to find a better position for each element. You will see semi-transparent copies around the canvas. This option of the Pattern Tool is great in the way that you can change and adjust your pattern with real-time preview, making it look balanced and harmonious.
Step 9
Let’s add some more elements. Duplicate the pink leaf a few times and gather the copies, creating a large fan-shaped leaf. You can Align the leaves to Bottom from the control panel on top.
Add more copies and position them nicely on the canvas, forming a rhythmical pattern. You can use the Rotate Tool (R) and the Reflect Tool (O) to add more variation.
Step 10
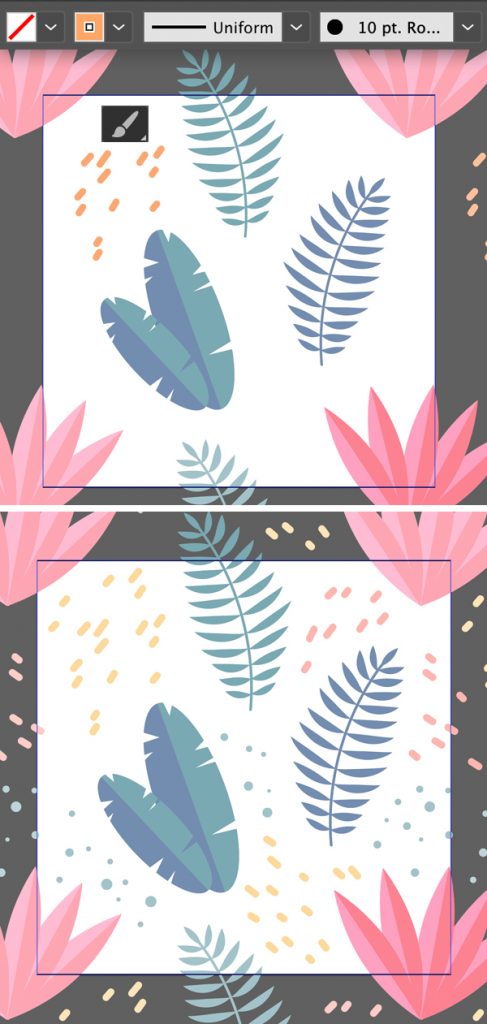
Let’s use the Paintbrush Tool (B) to fill the blank spaces. Use a thicker brush to draw short strokes. Vary the color and direction of the strokes to make the composition look more interesting.
Use the Ellipse Tool (L) while holding down Shift to speckle some small dots here and there.
You can add any other shapes to your liking – stars, triangles, wavy lines, etc. Don’t use too many colours though. Stick to a limited palette to make your pattern more elegant.
Step 11
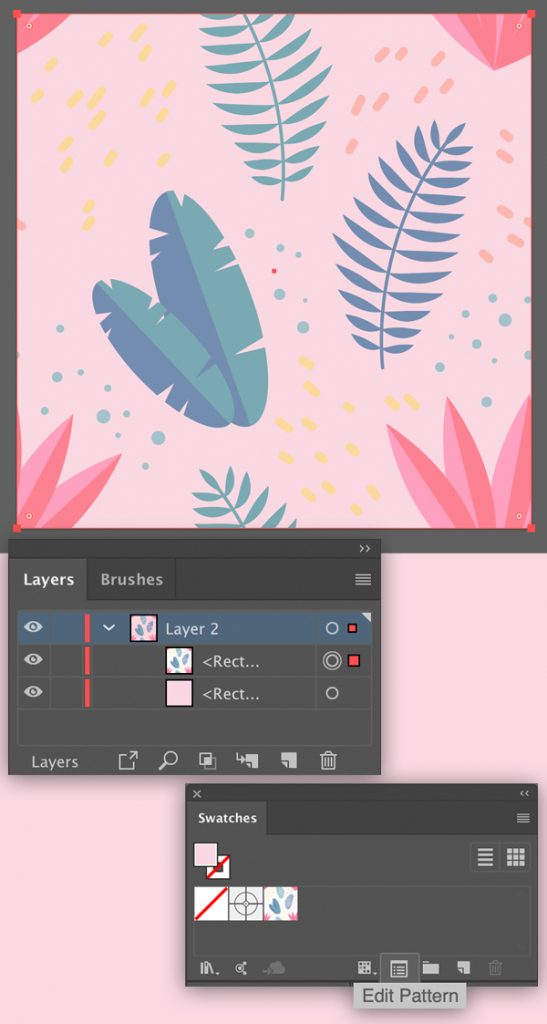
Once you’re happy with your pattern, click Done on top. Now we can create any shape and apply our pattern by selecting it in the Swatches panel.
I usually create two rectangles. The bottom one is for the background color and the top one is for the pattern. This way I can easily change the background to find a better option.
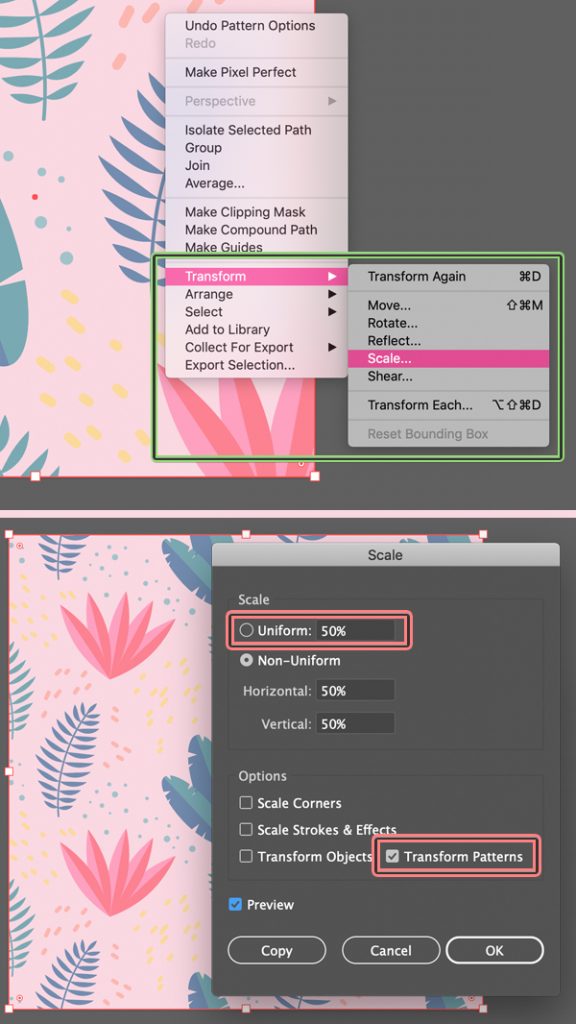
Step 12
Don’t worry if your pattern appears too large or too tiny when applied to a shape of a certain size. We can easily adjust the scale of the pattern without changing the size of the shape itself.
Keeping the shape with the pattern selected, click the right mouse button > Transform > Scale… (or find the Scale Tool (S) in the Tools panel and double-click it).
Set the Uniform Scale to 50% and remember to uncheck all the boxes except the Transform Patterns box. Click OK – and there you have it!
If you want to make the scale larger, set it to more than 100% (for example, 150%).
Tip: You can also use the Move tool to move the elements of the pattern along the horizontal or vertical axis without changing the position of the shape. If you want to try how it works, select the shape, right mouse button > Transform > Move… (or press Enter). Remember to check the right box so that you move only the elements without moving the shape itself.
Step 13
Let’s click the Edit Pattern button in the bottom of the Swatches panel and add a few more elements to our seamless pattern. Use the Pencil Tool (N) to draw a yellow blob and press Shift-Control-[ to Send to Back. If you see that the blob is covering other elements on the opposite side of the canvas, remember to set the Overlap to Right in Front or Bottom in Front.

Step 14
This is how the pattern looks now! Feel free to add more blobs and adjust the colours of the elements to achieve the best result. You can make a copy of your seamless pattern in the Swatches panel by dragging and dropping your swatch above the New Swatch icon and continue experimenting with the copy.
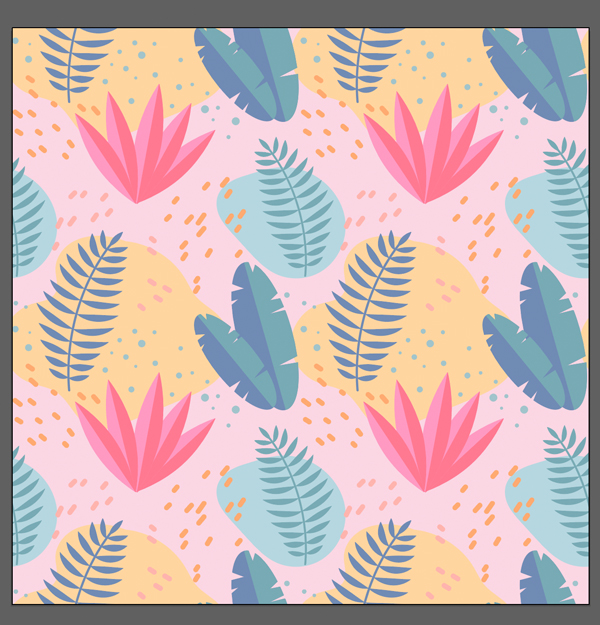
Feel the Summer Vibes! Our Tropical Seamless Pattern is Completed!
Great work! I hope you’ve found this tutorial useful and discovered something new. You can use such seamless patterns for clothes design, website backgrounds, apparel and many more.
Have fun!
Author: Yulia Sokolova
2D/3D artist and tutorial instructor, focusing on character creation, icons, lettering design, and illustrations.


I simply wanted to thank you so much yet again. I’m not certain what I might have undertaken in the absence of those pointers provided by you regarding my area of interest. It previously was the daunting concern in my opinion, however , being able to see your professional mode you dealt with it made me to weep with fulfillment. I’m thankful for this assistance and even wish you realize what a powerful job that you’re getting into instructing the mediocre ones via a web site. More than likely you have never come across all of us.