Are you ready for an exciting adventure with dungeons, dragons and treasures? Wait, it might be dangerous! First of all, you need an enchanted sword. Accept this quest and I will show you how to forge this fantasy sword icon in Adobe Illustrator using the sacred knowledge of geometric shapes, Path functions, the Pathfinder Panel and a bit of magic. Follow me!
Tutorial Details
- Program: Adobe Illustrator CS6 – CC
- Difficulty: Intermediate
- Topics Covered: Scissors Tool, Offset Path, Pathfinder panel, Shape Building
- Estimated Completion Time: 20 minutes
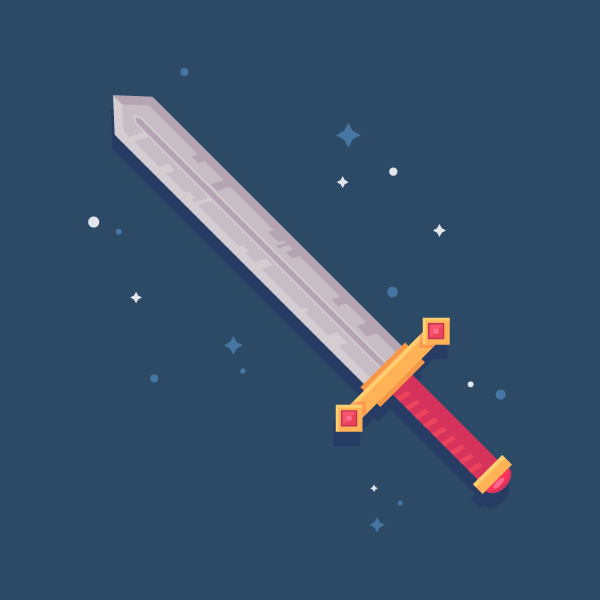
Final Image: Fantasy Sword Icon
Step 1
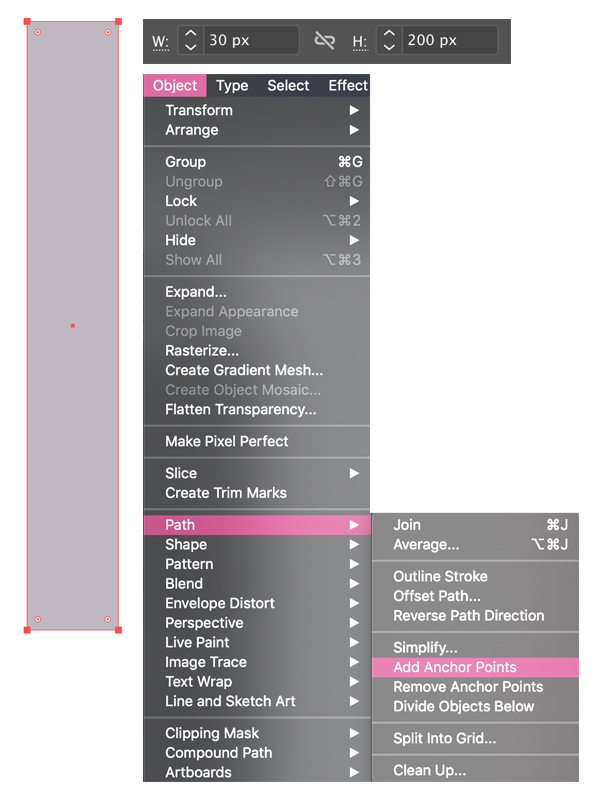
Take the Rectangle Tool (M) and create a 30 x 200 px steel grey shape for the blade of our fantasy sword icon.
We need some additional anchor points to change its shape. Go to Object > Path > Add Anchor Points. This will add a point in the center of each side, so that we get four new points in total.
Step 2
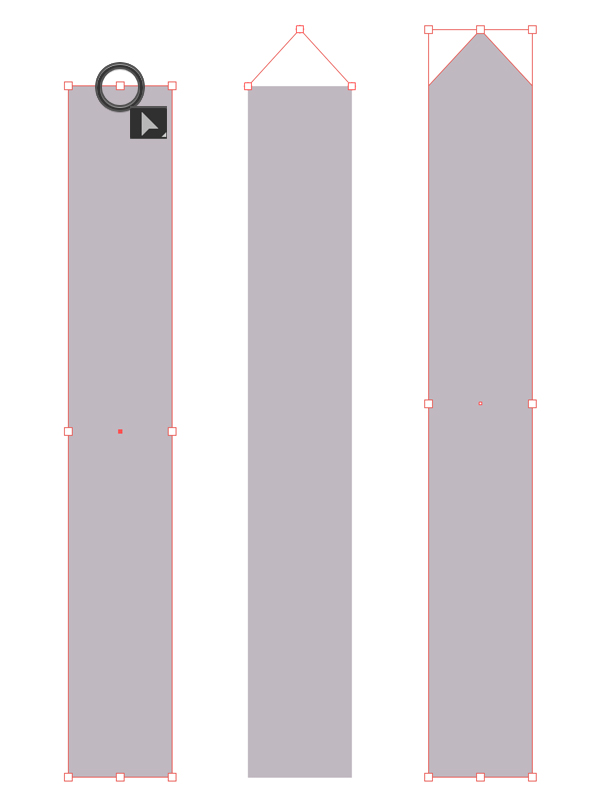
Switch to the Direct Selection Tool (A), grab the middle point on the top edge of the shape and drag it up a bit, creating a sharp triangular tip of the fantasy sword icon’s blade.
Step 3
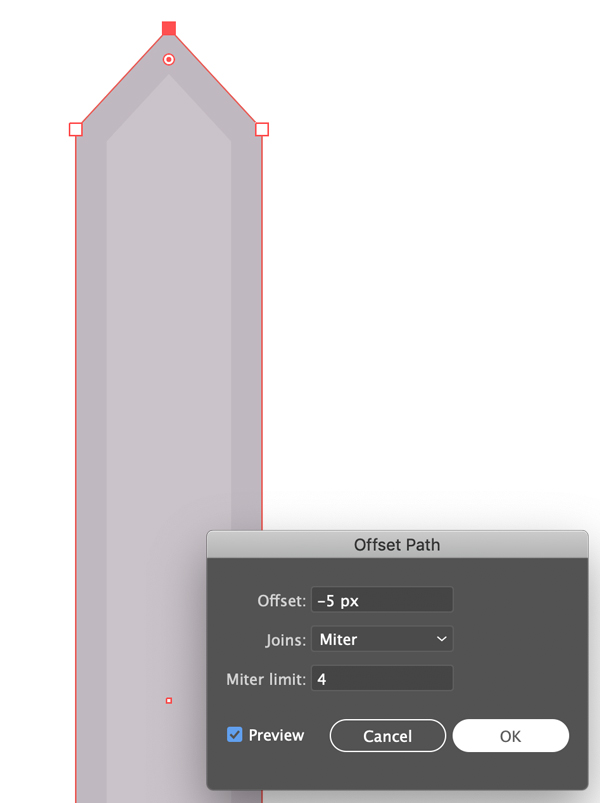
Let’s make the blade of the fantasy sword icon more dimensional. Keeping the shape selected, go to Object > Path > Offset Path and set the Offset value to -5 px, leaving all other options as default.
Fill the inner shape with a lighter grey color.
Step 4
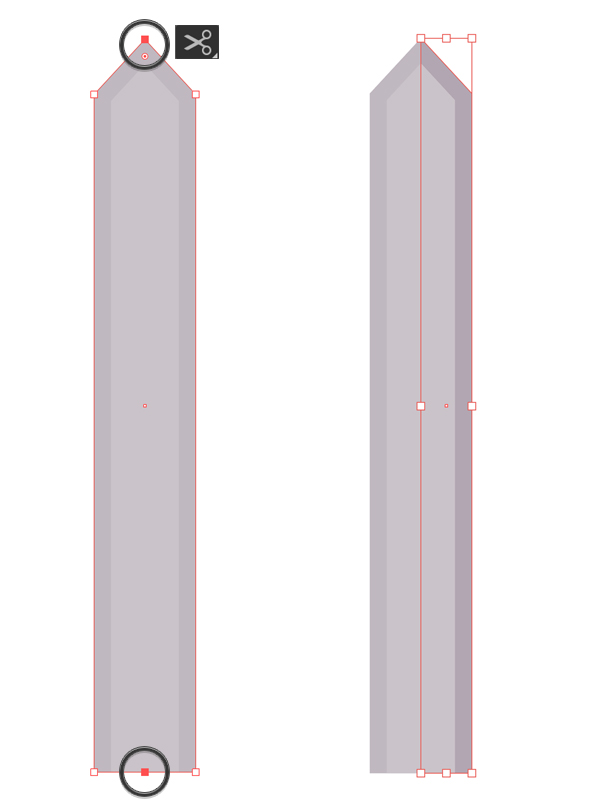
Now let’s select the larger shape and split it into two parts to create a proper shadow. Take the Scissors Tool (C) and click the middle anchor points on the top and bottom edges of the fantasy sword icon’s shape. It seems that nothing has changed but if you select the shape with the Selection Tool (V), you will see that now we have two separate halves instead of one entire blade. We can apply a darker shade of grey to the right half now.
And we can also Close Path of each half by pressing Control-J, this function will connect two anchor points to form an edge.
Step 5
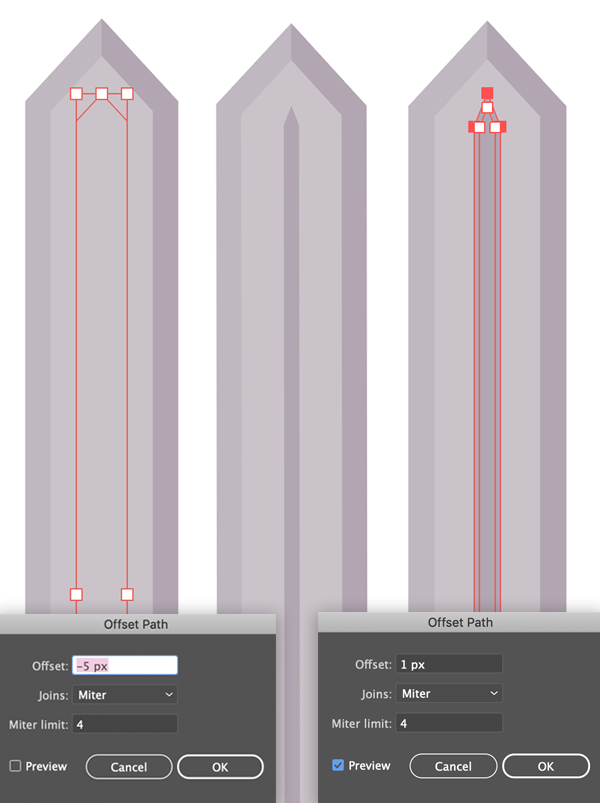
Now let’s create a fuller – a notch along the center of the blade.
Select the inner grey shape and apply Object > Path > Offset Path, setting the Offset value to -5 px. I squashed the created shape even more to make it narrower. Make the new shape darker and apply Offset Path once again with 1 px Offset value, creating a subtle highlight around the fuller.
Step 6
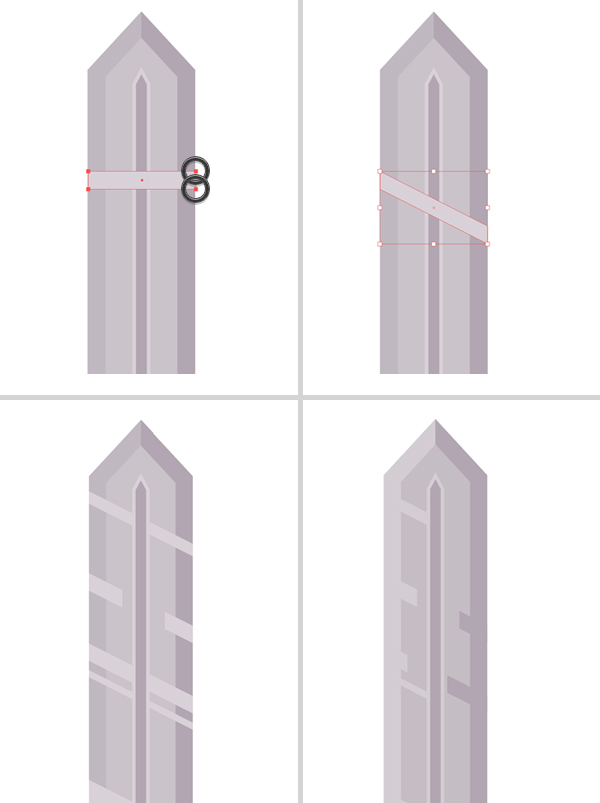
Let’s add more highlights across the blade of our fantasy sword icon. Create a rectangle of the same width as the blade (30 px). Use the Direct Selection Tool (A) to select its top and bottom anchor points on the right side and move them down, making the shape skewed.
Keeping the shape selected, press Shift-Alt and drag it down to create a copy. Make more copies, varying the width of each shape and the distance between the copies. Use the Eraser Tool (Shift-E) to erase some pieces of the shapes, this way adding even more variety to the design.
I’ve ended up rearranging the colors a bit at this step. As you can notice from the last image, now the left edge of the blade of the fantasy sword icon has the lightest grey color.
Step 7
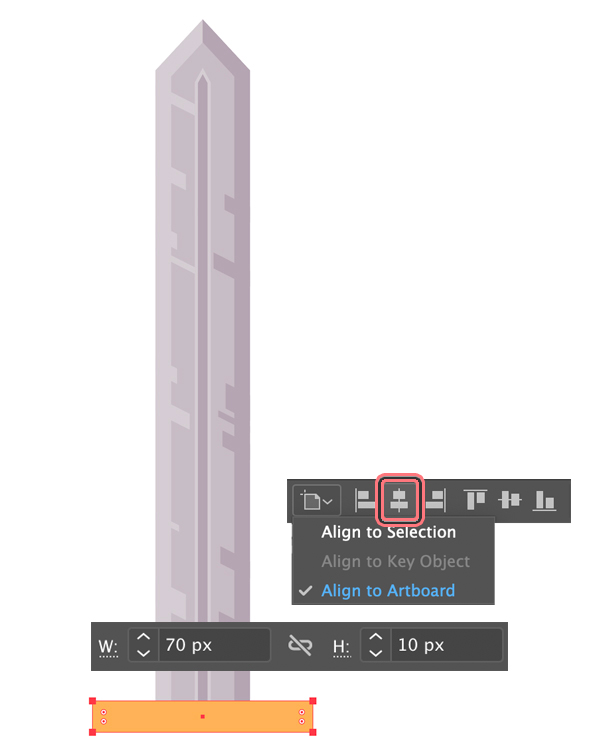
Now let’s Group (Control-G) all the elements of the blade and create a golden guard of our fantasy sword icon. Use the Rectangle Tool (M) to create a 70 x 10 px yellow shape.
Place it in the bottom of the blade and center it using the Horizontal Align Center button in the control panel on top (or in Window > Align).
Step 8
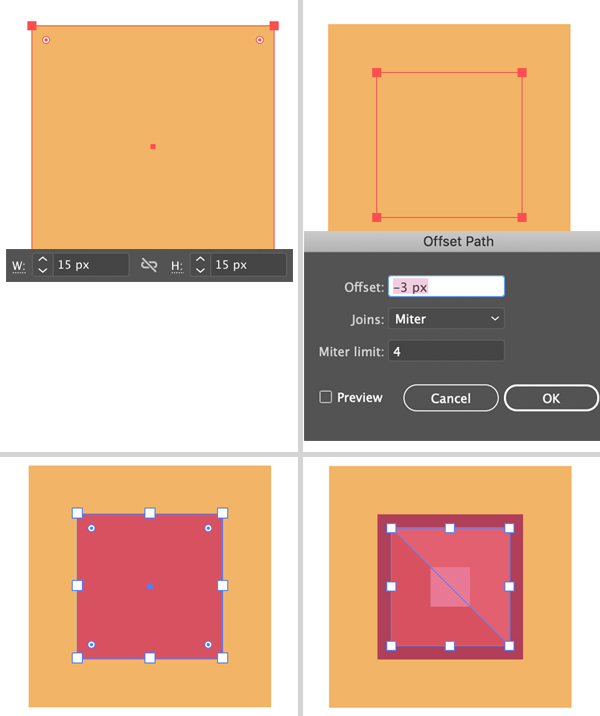
Let’s create some decorative elements for the guard. Use the Rectangle Tool (M) and hold down Shift to create a 15 x 15 px square. Use the Offset Path function with -3 px Offset value to create a smaller square on top. Fill it with red color, depicting a ruby.
Then we can add another smaller square of a lighter red color, making the ruby more dimensional. We can split it into two triangular parts, using the Scissors Tool (C) and finish up with by placing a tiny pink square on top.
Don’t forget to Group (Control-G) all the shapes once you’ve finished in order to keep everything neat and organized.
Step 9
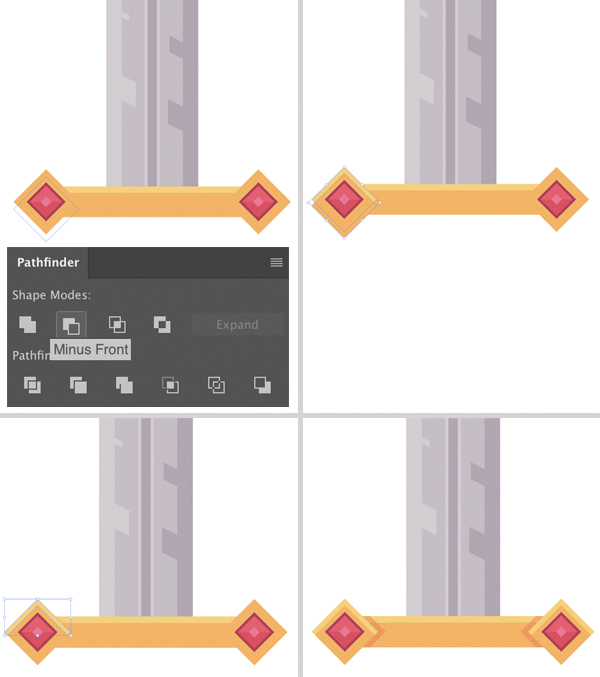
Let’s rotate the created square 45 degrees and decorate the guard with the rubies that we’ve created.
We also need to add some subtle highlights to the golden parts of the guard. Select the yellow square and duplicate it twice (Control-C > Control-F > Control-F). Drag one of the copies down a bit, as shown in the image below. Then select it together with another copy and use the Minus Front function of the Pathfinder panel (Window > Pathfinder) to cut the shapes, so that we have only a thin rim along the top edge. Now we can fill it with a lighter yellow color and add a same highlight to the horizontal part of the guard.
We can also add subtle shadows of a darker orange color beneath each square, using the same technique.
Step 10
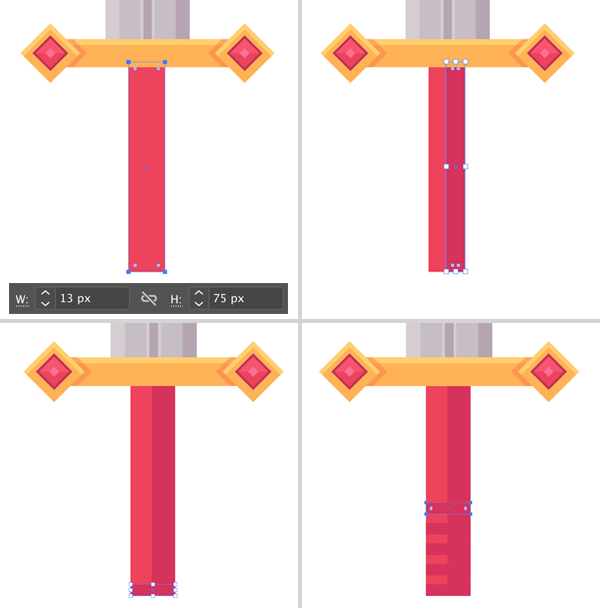
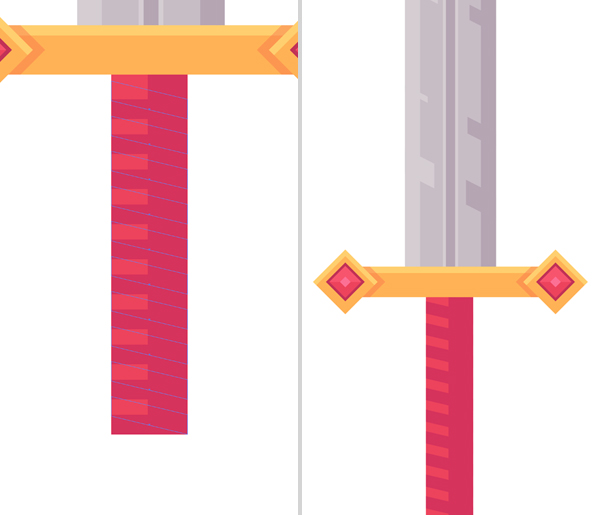
Take the Rectangle Tool (M) and create a 13 x 75 px red shape for the grip. Split it into two halves, making one half darker than the other.
Then create a 13 px wide stripe in the bottom of the grip. Press Shift-Alt and drag the stripe up, creating a copy. Add more copies by pressing Control-D multiple times to repeat the last action.
Step 11
Skew the stripes, depicting a striped texture of the grip.
Step 12
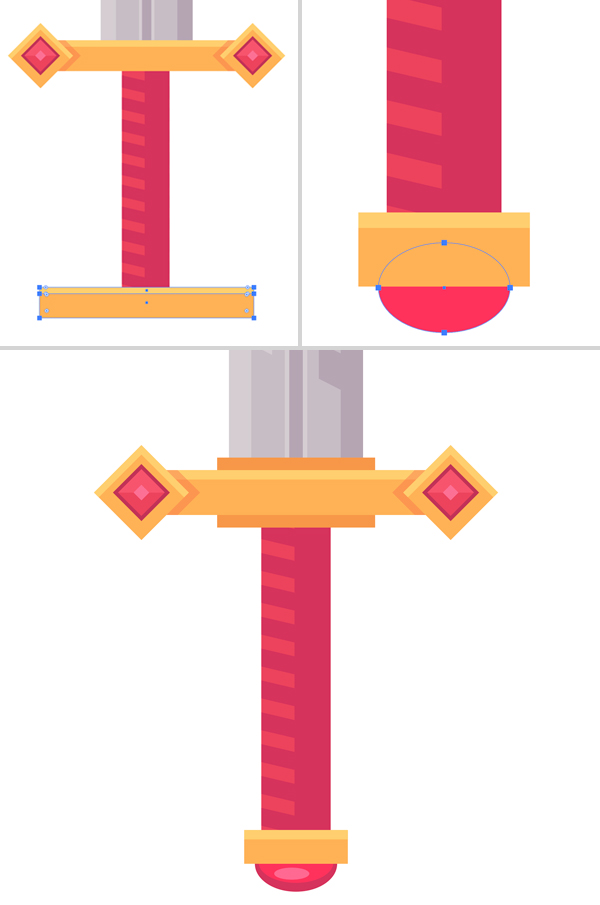
Duplicate the horizontal element of the golden guard and move it down, to the bottom of the grip. Shrink the shape, making it much shorter. Use the Ellipse Tool (L) to decorate the bottom part with a shiny rounded ruby. You can Send the ruby to Back by selecting the ellipses and pressing Shift-Control-[.
Step 13
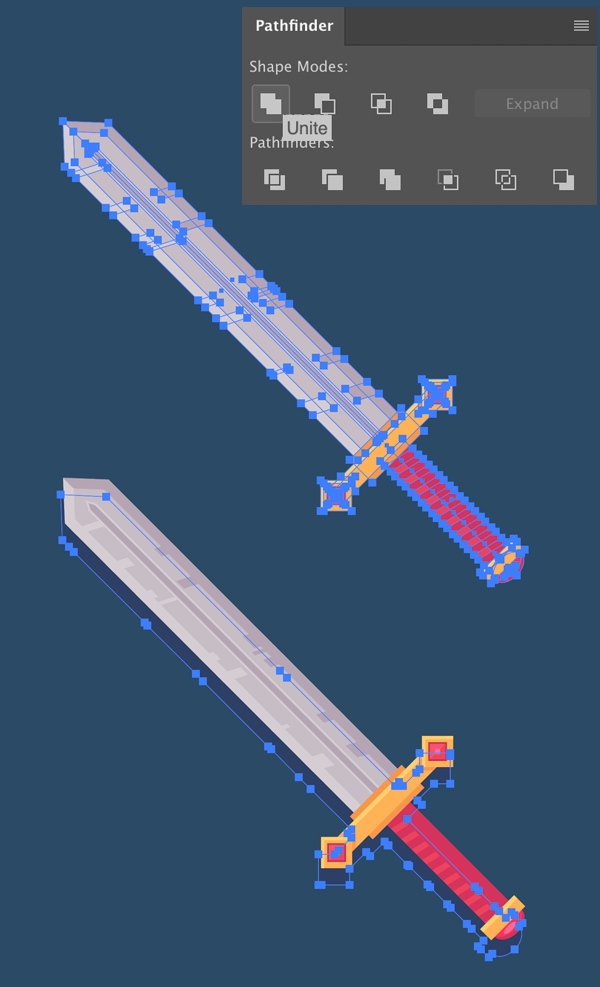
Our fantasy sword icon is almost finished! Let’s Group (Control-G) all the elements and rotate it to about 45 degrees for a better composition. I’ve also added a dark-blue square to the bottom to create a nice contrasting background.
Let’s add a simple shadow beneath the sword. Duplicate (Control-C > Control-B) the entire sword group. Select the bottom copy of the sword and press Unite in the Pathfinder panel to merge all the elements in one, creating a silhouette shape. Move the shape down a bit, as shown in the image below, and fill it with a darker blue color.
Step 14
A final touch! Let’s sprinkle some magic to enchant our fantasy sword icon. Double-click the Star Tool icon in the Tools panel (you can find it in the same drop-down menu as the Rectangle Tool (M)). Set the Points value to four and create some stars of different scale around the fantasy sword icon.
Vary the color and the position of the stars and add some circles, using the Ellipse Tool (L), making the composition more detailed.
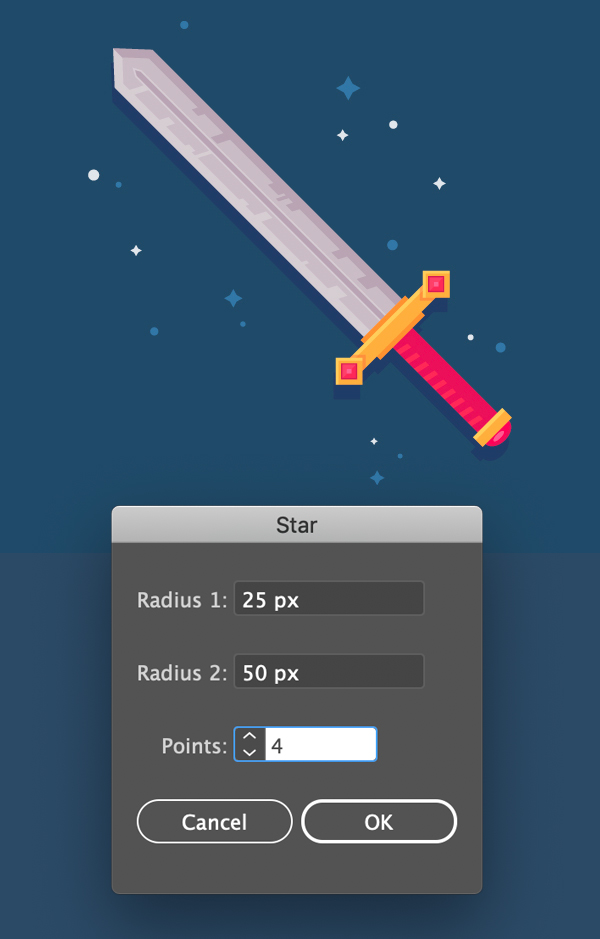
Behold! Our Enchanted Fantasy Sword Icon is Finished!
You did a really great job, my friend! Now take the sword and you’re good to go, the adventure awaits!
I hope you’ve enjoyed following this guide, learned some new tips and tricks and mastered your skills.
Happy designing!

Author: Yulia Sokolova
2D/3D artist and tutorial instructor, focusing on character creation, icons, lettering design, and illustrations.


