 In this tutorial we’ll create a simple face of a cute smiling character listening to music in wireless headphones. We will be using basic shapes and Stroke settings to depict a cute music character logo in a trendy flat style. It can be easily adjusted to your needs and used as an avatar or for branding design. Let’s get started!
Tutorial Details:
- Program: Adobe Illustrator CS6-CC
- Difficulty: Beginner
- Topics Covered: Shape Building, Stroke panel
- Estimated Completion Time: 20 Minutes
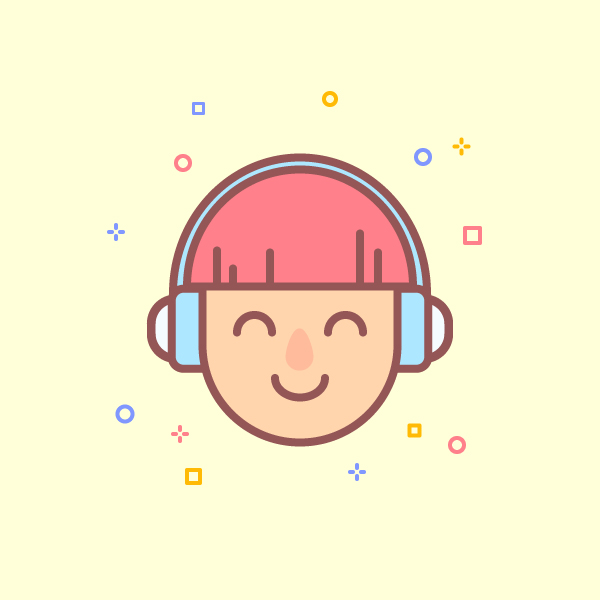
Final Image: Cute Flat Music Character Logo
Step 1
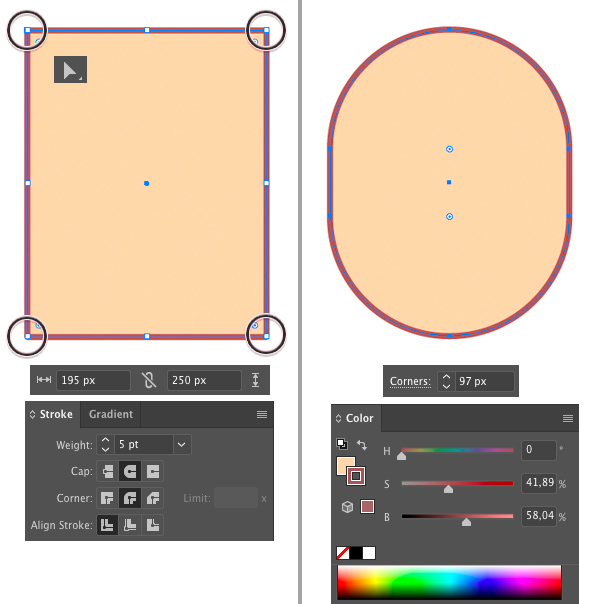
Let’s take the Rectangle Tool (M) and start by making a head from a 195 x 250 px rectangle.
Grab the Direct Selection Tool (A) and select all the anchor points of the rectangle. Pull the circle marker of the Live Corner (at either of the corners) to the center, making the shape rounded. We can also control the Corners value manually by typing the needed number in the control panel on top.
Set the Fill color to any skin color of your choice and the Stroke color to dark-brown in the Color panel.
Then open the Stroke panel (Window > Stroke) and set the Weight to 5 pt, Cap to Round Cap, Corner to Round Joint.
Step 2
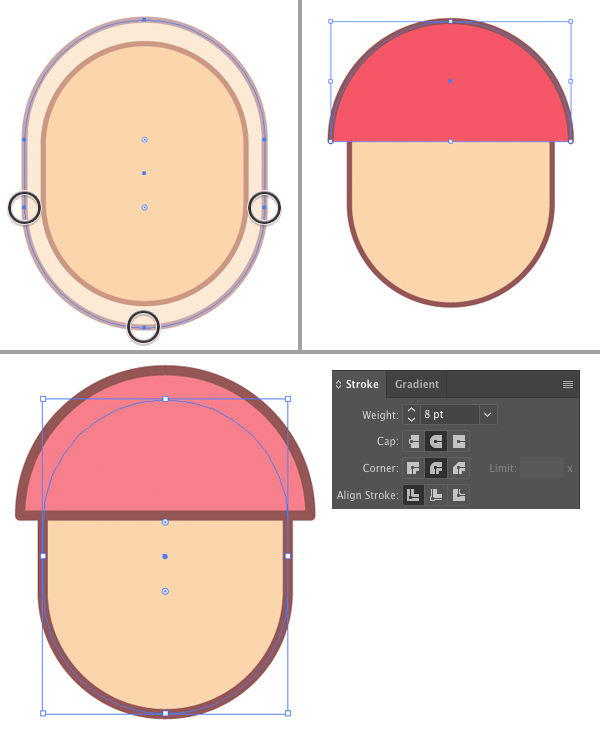
Now we’ll create the hair of the music character logo. Select the head shape that we’ve made in the previous step, Copy it (Control-C) and Paste in Front (Control-F). Scale the shape up, making it larger than the head.
Use the Direct Selection Tool (A) to select the three anchor points, marked on the screenshot below. With the points selected, hit the Delete key (Backspace on the Mac) to remove the bottom part of the shape.
Change the Fill color of the hair to your favorite bright color. Press Control-J to close the path or go directly to Object > Path > Join.
I think it would look better with a thicker outline, so I change the Stroke Weight to 8 pt.
You can use the Align function on top or open the Align panel (Window > Align) to check that everything is positioned properly by pressing Horizontal Align Center and Vertical Align Center.
Step 3
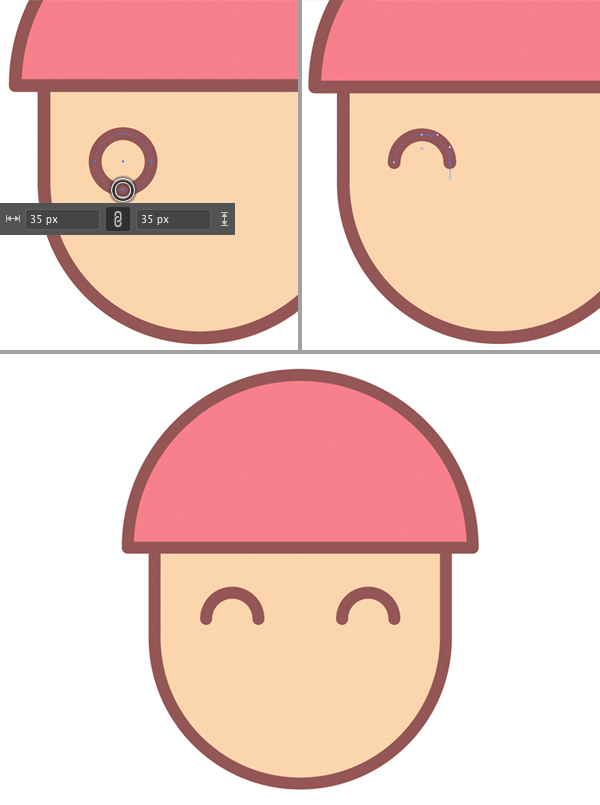
Take the Ellipse Tool (L) and let’s create the eye. Make a 35 x 35 px circle with dark-brown Stroke and no Fill.
Select its bottom anchor point with the Direct Selection Tool (A) and Delete it. This way we have only the top part of the shape left, forming a closed eye.
Select the shape with the Selection Tool (V), press Alt-Shift and drag to the opposite side of the face, creating a second eye.
We can Group (Control-G) both eyes and use the Horizontal Align Center function again to center them perfectly.
Step 4
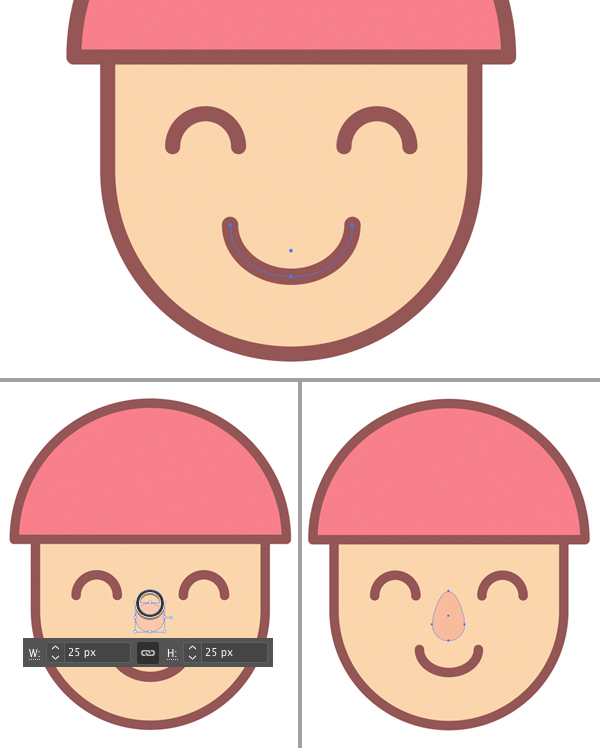
Add a half-circle for the mouth using the same method as described in the previous step.
Create a 25 x 25 px light-pink circle with no Stroke for the nose and drag its top anchor point up, using the Direct Selection Tool (A).
Step 5
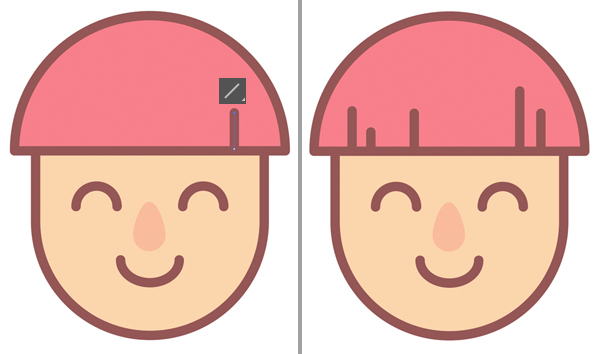
Let’s add some details to the hair. I’m using the Line Segment Tool(\) to add vertical strokes to the bangs. Vary the length of each stroke to make it look more interesting.
Step 6
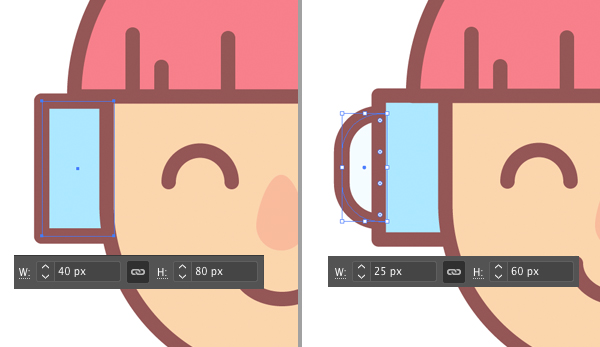
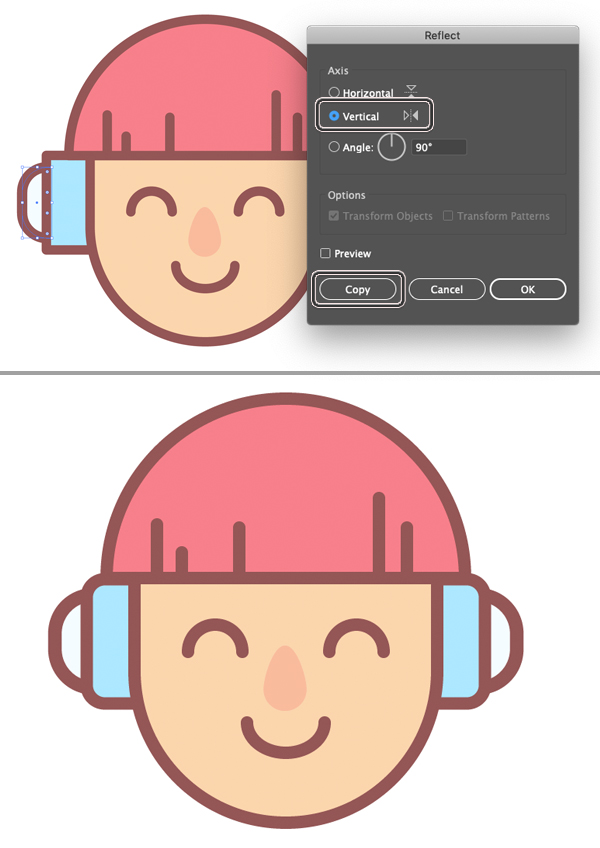
Now we’ll draw the headphones! Take the Rectangle Tool (M) and let’s make a 40 x 80 px light-blue shape with dark outline. Place the shape by the left side of the head and make it fit the space between the cheek and the bangs.
Let’s add another element to the headphones by creating a 25 x 60 px rectangle. Select its top and bottom left corners with the Direct Selection Tool (A) and make these corners rounded.
Step 7
Let’s Group (Control-G) both elements that we’ve created in the previous step and double-click the icon of the Reflect Tool (O) to open the Options window. Select the Vertical Axis and click Copy to create a mirrored group of rectangles. Move it to the opposite side of the face.
Remember to use the Align function to center the objects.
Step 8
Now we’ll create a headband from the hair shape.
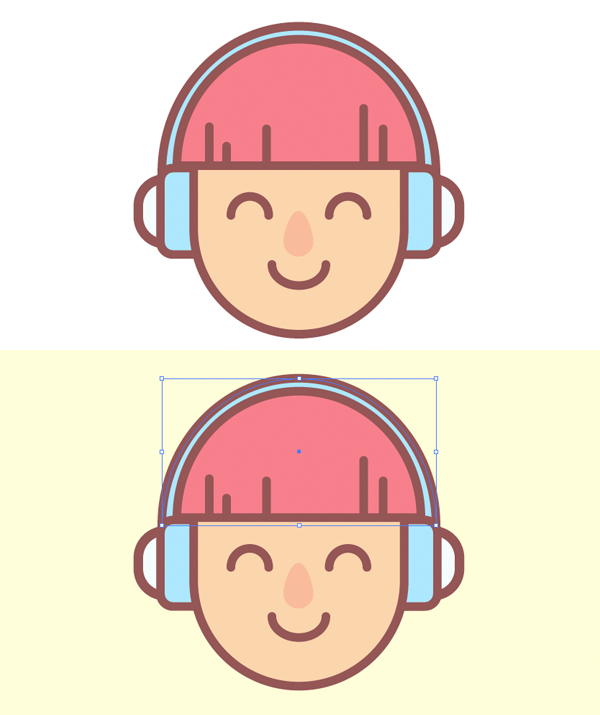
Copy (Control-C) the hair shape and Paste in Back (Control-B). Make the shape larger to make it visible around the head and fill it with the same light-blue color as we have for the headphones.
Step 9
Now we can finish up with our music character logo by adding a light-yellow rectangle for the background and speckling some simple shapes with colorful outlines around the head.
Congratulations! Our Music Character Logo is Finished!
Great work, guys! I hope you’ve enjoyed following this tutorial and discovered some new tips and tricks that will be useful for your future designs.
Have fun and stay tuned for more!
Author: Yulia Sokolova
2D/3D artist and tutorial instructor, focusing on character creation, icons, lettering design, and illustrations.



Im grateful for the blog.Thanks Again. Will read on