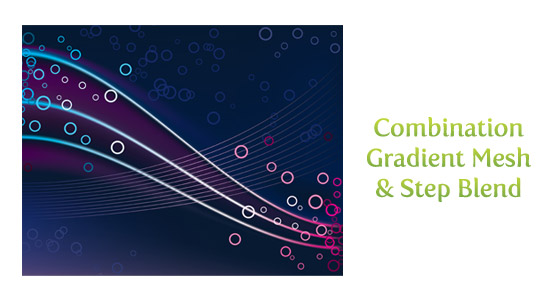
I like illustrating characters, icons, and other highly representative illustrations. I do this kind of work the majority of time in Illustrator, so it’s nice to break out and create my own abstract background vector. Abstract backgrounds are easy to create in Illustrator with a couple of simple techniques. Using Gradient Meshes, Steps Blends and Opacity Masks you can quickly create an abstract background.
Notes: 4 Ways to an Abstract Background Vector
This tutorial was created with Illustrator CS3.
Keyboard shortcuts are displayed in orange. ⌘ is displayed for the Command key (mac), with the Ctrl key being the Windows equivalent (not displayed).
Abstract Background Vector with Gradient Meshes
This is the technique that I find to produce the quickest results but has great potential for exploration.
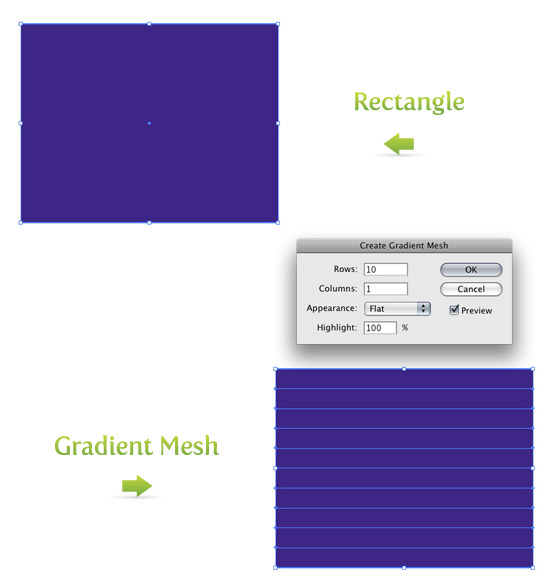
First, draw a rectangle with the Rectangle Tool (m). I start with a deep violet for the color, but use any color you like. Next, go Object > Create Gradient Mesh to bring up the Gradient Mesh dialog. In the dialog, change Rows to 10 and Columns to 1. Press Ok, and now the rectangle has ten rows separated by 11 Mesh Points on the left and right side of the rectangle.
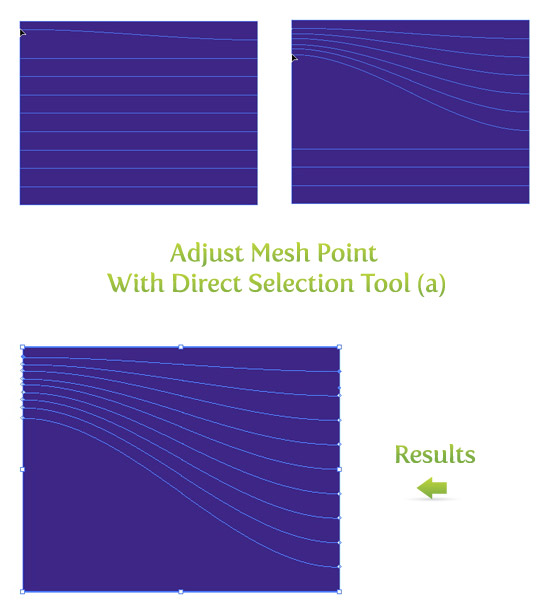
With the Direct Selection Tool (a) you can grab and drag these Mesh Points. Start with the second Mesh Point from the top left. Hold shift, and drag the point up right below the first Mesh Point. When you moved the left Mesh Point, the connected right Mesh Point did not move, creating a curve. Next, do the same for all the other Mesh Points on the left side except the bottom one. Now, You should have something similar the picture below
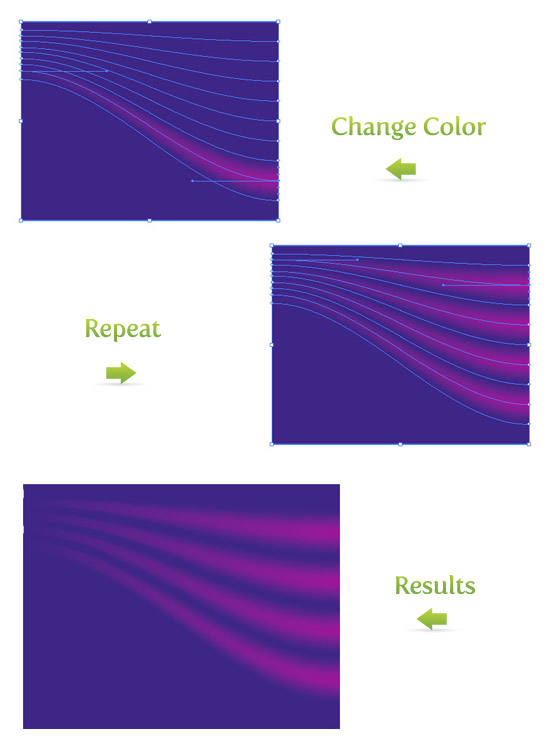
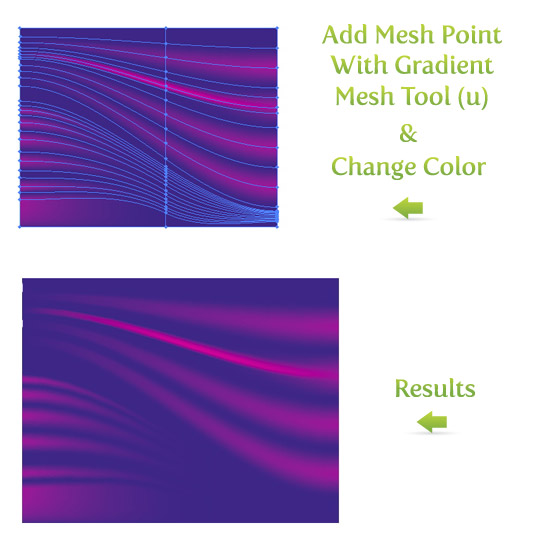
With all these Mesh Points created, we can start added some different colors. With the Direct Selection Tool (a) select the third Mesh Point from the bottom on the right side of the rectangle. With the Mesh Point selected, change the color in the Color Panel. I like using a lighter version of the background color, but again, use whatever color you want. Next, I skip the next Mesh Point above and select the following one. Change the color, and repeat until you filled all the mesh points.
This is the most basic example of using Gradient Meshes. If you want to add more Mesh Points, use the Gradient Mesh Tool (u). With this tool you can add Mesh Points anywhere on the artwork or on any non-compound objects. In the example below, I used the Gradient Mesh Tool (u) and added points on the left side of the rectangle, changed the color, added a point in the middle of one of the lines, and changed that color.
You can easily get lost in moving Mesh Points and changing colors in Gradient Meshes. Play around and see what you get!
Abstract Background Vector with Step Blends
Step Blends are another quick way to create an abstract background vector. You might have used Gradient Blends previously but maybe not Step Blends.
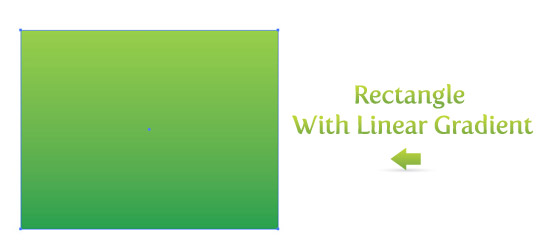
Again, start out with a rectangle, but this time make it a Linear Gradient (>). For the gradient I will use a dark and light green and adjust the gradient with the Gradient Tool (g), so the dark part of the gradient is at the bottom of the rectangle.
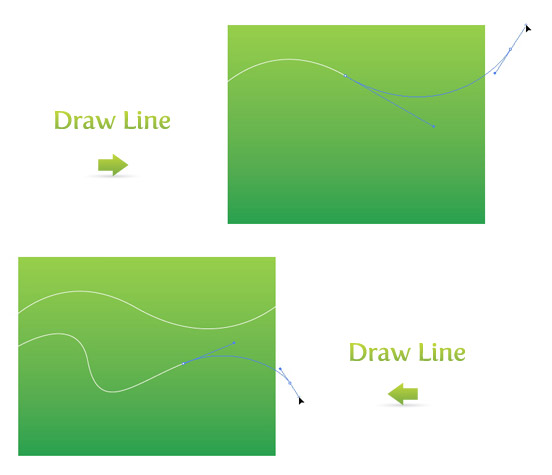
Next, use the Pen Tool (p) to draw a couple of lines. Draw the first line as a simple Bézier curve. Use the Pen Tool (p) to draw the second line, but this time,vary the curves in the line.
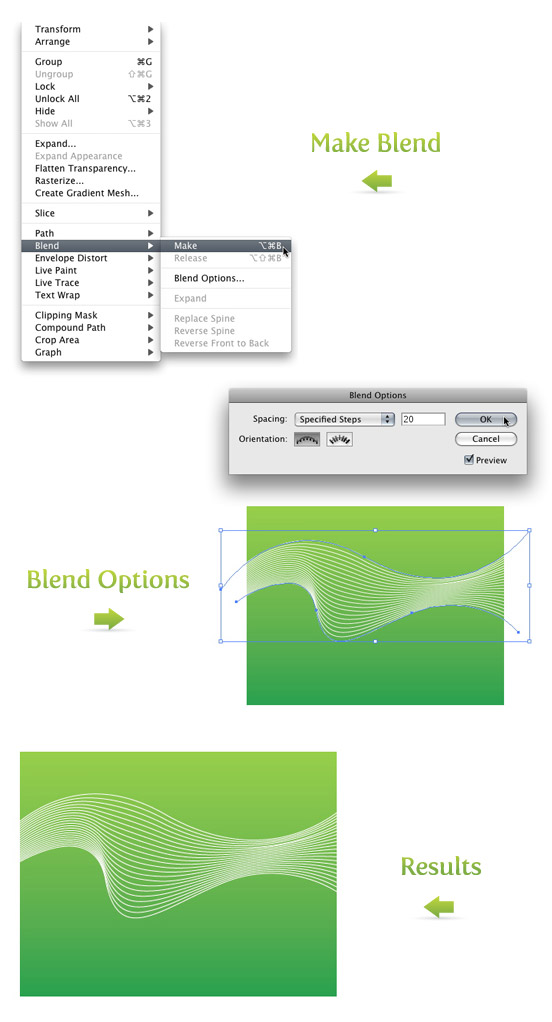
Select both lines and go Object > Blend > Make (⌘ alt/option b) to create a blend. Next go back to Object > Blend Options to bring up the Blend Options dialog. Pick Specified Steps under the Spacing drop-down menu. Depending on how your lines are spaced, pick a number that looks the best. It is a good idea to click Preview so you can see how it will look before you press Ok. You can always go back and change the number of steps if you don’t like how it looks. Just go back to Object > Blend Options to bring up the Blend Options dialog.
Combine more Step Blends to create different and more abstract background vector results. This is a fun place to experiment with transparencies and different colors.
Abstract Background Vector with Opacity Masks
In a previous tutorial Quick Reflections I talked about using Opacity Masks to create reflections. At the bottom of the tutorial I gave an example of experimenting with Opacity Masks. Next, I will talk about creating abstracts with Opacity Masks like in the experiment of the Quick Reflections tutorial.
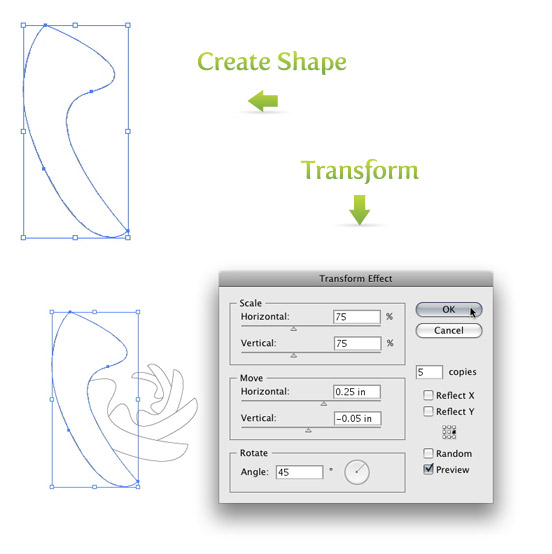
First draw a shape with your tool of choice. I drew a shape quickly with the Pen Tool (p). Next, go Effect > Distort and Transform > Transform to bring up the Transform Effect dialog. Below are the settings I used, but feel free to tweak the setting depending on your shape and how it looks.
- Scale
- Horizontal = 75%
- Vertical = 75%
- Move
- Horizontal =.25 in
- Vertical = -0.5 in
- Rotate
- Angle = 45 degrees
- Copies
- 5 copies
- 9-Point Proxy (the box with nine points above the Random checkbox)
- Check the middle right checkbox on the 9-Point Proxy
The rest of the options can stay the same and press Ok. You can always go back and edit the effect. In the Appearance Panel, you will see Transform in the list when the transformed shape is selected. If you double click Transform, it will bring up the Transform Effect dialog with the current settings, which you can edit. Once you have the effect the way you like, go Object > Expand Appearance. If you don’t expand the effect, the next time you try to rotate it, you might get some undesired results.
With the shape still selected, create a Radial Gradient from the Gradient Panel. Keep the swatches of the gradient the default Black and White and take off the stroke if there is one. Next, draw a rectangle with the Rectangle Tool (m) that encompasses the transformed shapes. Take off the stroke, fill it with a color and send the rectangle to the back (⌘ shift ] ).
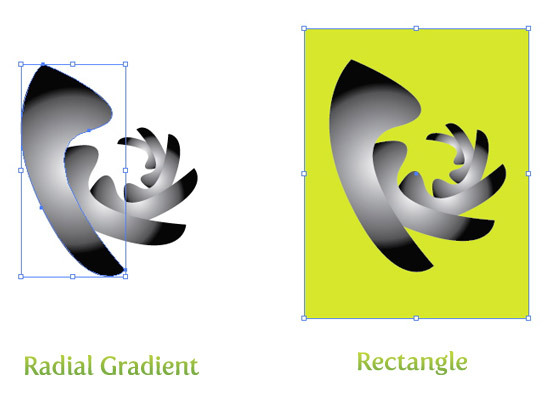
Next, select the rectangle and transformed shapes and select Make Opacity Mask from the pop-up menu of the Transparency Panel. Now you have some abstract art!

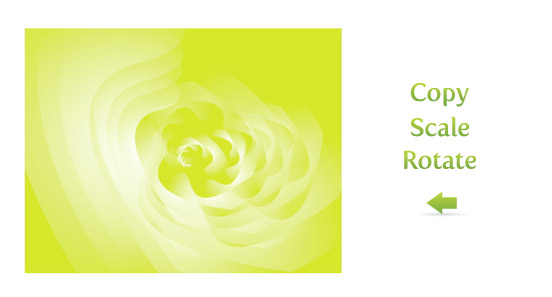
You can stop here if you like or you can take it further. Copy (c) , Paste In Front (f), scale and rotate the artwork to get some different results. In the example below I created an abstract background vector with a green color, changed the abstract to white, copied and scaled, and rotated a copies of the abstract. If you want to further edit the Opacity Mask refer to the Quick Reflection tutorial.
Abstract Background Vector with Combining
Combine some of the techniques to get different results. Abstracts are the perfect place to experiment because it is abstract!