

In this tutorial we’ll be creating a balanced and relaxing composition of two vibrant Koi carps. Apart from using simple geometric shapes, we’ll be creating our own brush and learning how to modify the elements to create flowing wavy lines. Let’s begin!
Tutorial Details
- Program: Adobe Illustrator CS6 – CC
- Difficulty: Intermediate
- Topics Covered: Shape Building, Paintbrush Tool, Curvature Tool, Effects, Gradient panel
- Estimated Completion Time: 20 minutes
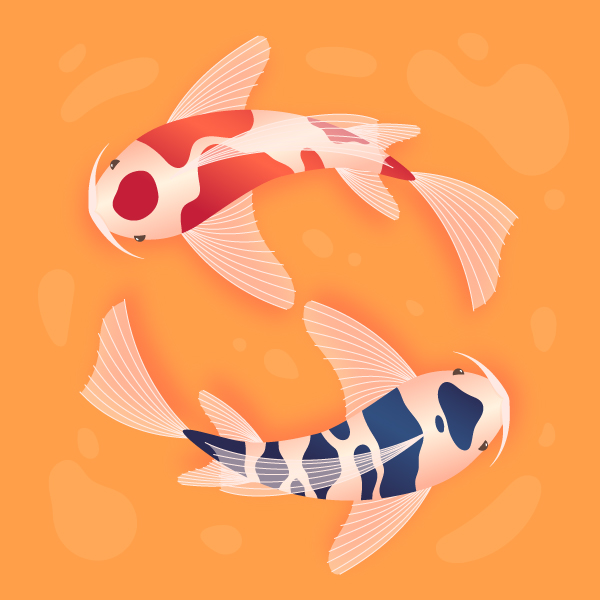
Final Image: Colorful Koi Fish
Step 1
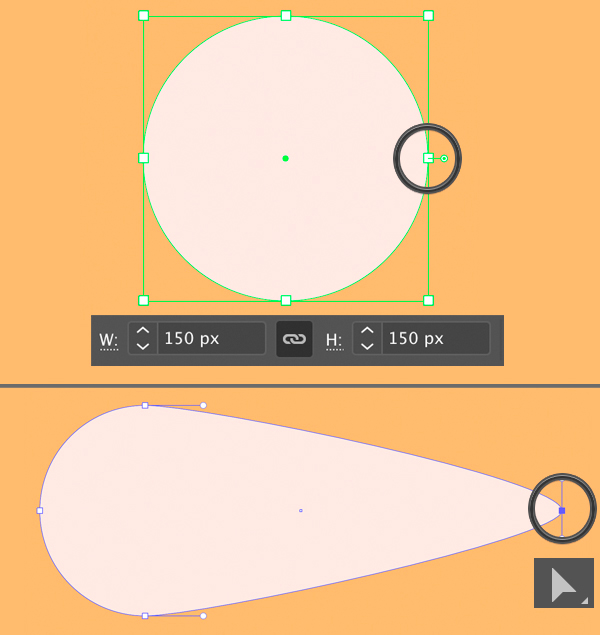
Take the Ellipse Tool (L), hold down the Shift key and create a 150 x 150 px white circle.
Switch to the Direct Selection Tool (A) and drag the right anchor point of the circle further right.
Step 2
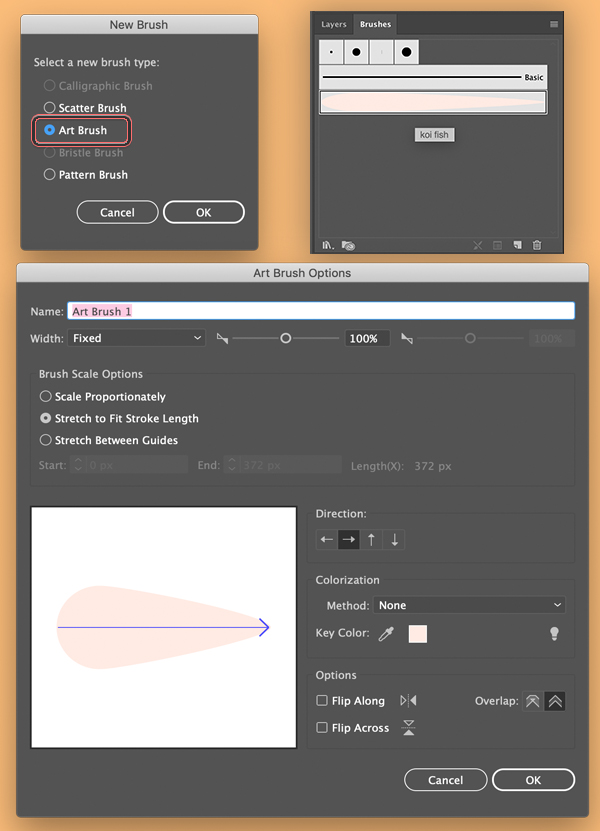
Make sure that you have the Brushes panel (Window > Brushes) opened, switch to the Selection Tool (V) and drag and drop our shape there.
Select the Art Brush in the pop-up New Brush window and leave all options as default in the Art Brush Options window. You can always return to those options later if you double-click your brush in the Brushes panel.
Step 3
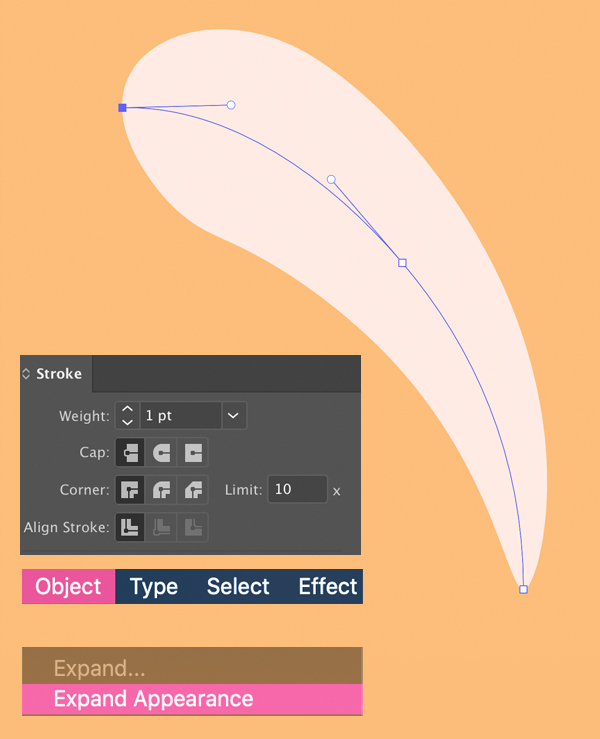
Let’s try it out! Take the Paintbrush Tool (B) and make an arched stroke for the body of our Koi fish.
Play with the Weight parameter of the stroke in the Stroke panel, if needed. This will help to adjust the thickness of the shape. In my case I left it at 1 pt.
Once you’re happy with the shape, go to Object > Expand Appearance to turn it into curves.
Step 4
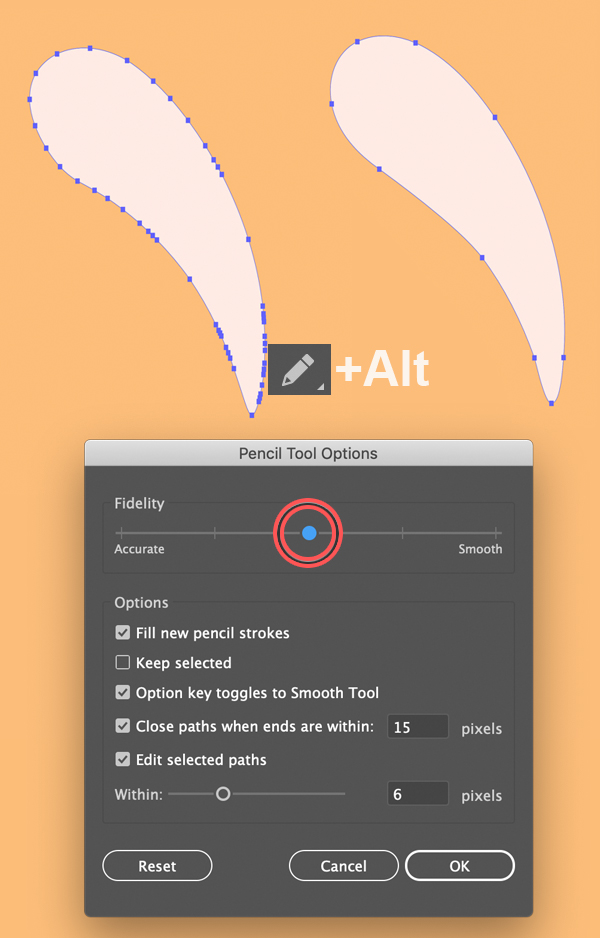
You can notice a lot of unneeded anchor points after turning a stroke into a curve. There is a simple way to clean up this mess!
Take the Pencil Tool (N), hold down Alt and make a stroke along the edges of the shape to smooth it out. You can double-click the Pencil Tool (N) icon to adjust the Fidelity of your pencil.
If you still have some unwanted points left, remove them with the Delete Anchor Point Tool (-) and adjust the points by manipulating the anchor handles with the Direct Selection Tool (A).
Step 5
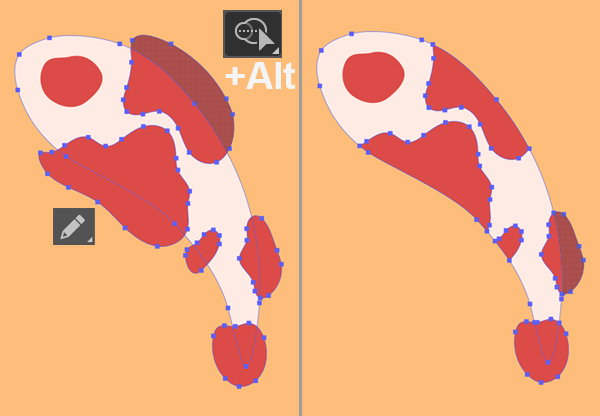
Now let’s add some bright red spots to the body of the Koi fish. Use the Pencil Tool (N) to draw some cloud-like spots here and there.
Select all the spots together with the body and let’s remove those parts outside of the edges. Switch to the Shape Builder Tool (Shift-M), hold down Alt and hover over the piece that you want to delete. Once the shape becomes grey, click it and – voila! – the piece is gone.
Step 6
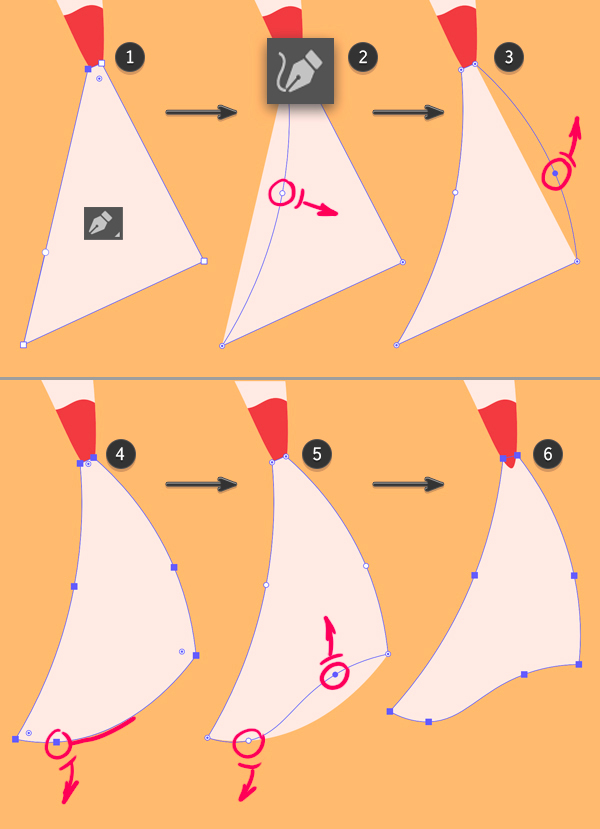
Let’s add a flowing tail to the fish:
- Start by drawing a simple triangle with the help of the Pen Tool (P). You can also use just the Polygon Tool with a three-pointed shape if you find it more comfortable;
- Now let’s take the Curvature Tool (Shift-`) and modify the shape. Click the left edge and pull it to the opposite side, making the edge slightly arched;
- Now drag the right edge to the right, making the line arched as well;
- Let’s work on the bottom edge. Drag it down, making the whole shape more rounded;
- Continue working at the bottom edge – click the edge closer to the right side and drag it up, creating a wave;
- The tail shape is ready! Send it to Back, behind the body by pressing Shift-Control-[.
Let’s move on!
Step 7
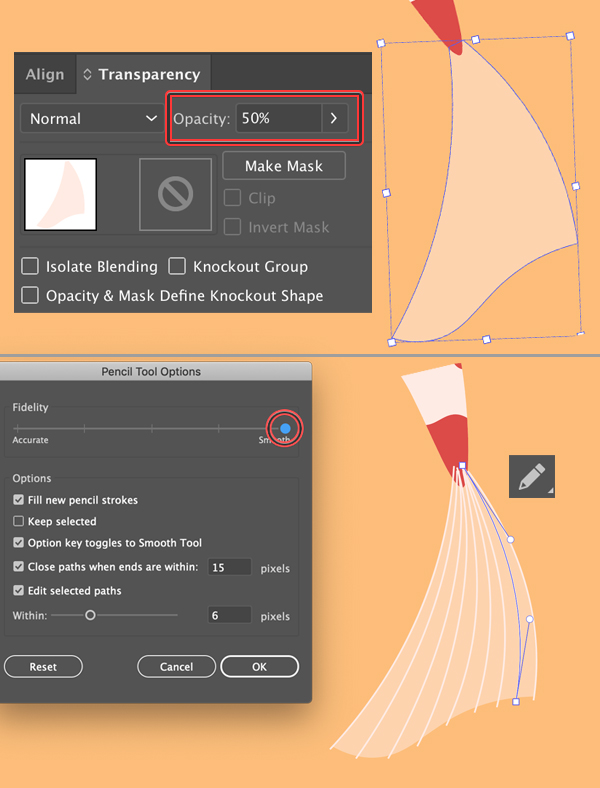
Let’s make the tail of the Koi fish semi-transparent by lowering the Opacity by 50% in the Transparency panel (Window > Transparency).
Use the Pencil Tool (N) with white Stroke to add details to the tail. Make sure that you set the Fidelity of your pencil to Smooth in order to avoid the unneeded anchor points.
Step 8
Now let’s add fins to the body of the Koi fish using the same technique as for the tail. Use the Pen Tool (P) to draw a triangle on the spine. Switch to the Curvature Tool (Shift-`) and drag the edges up and to the right to make the shape arched and to repeat the flow of the body.
The same goes for the side fin – start with a triangle and adjust the shape with the help of the Curvature Tool (Shift-`).
As for the bottom point of the side fin, I’ve made it slightly rounded by selecting it with the Direct Selection Tool (A) and pulling the circle marker of the Live Corner.

Step 9
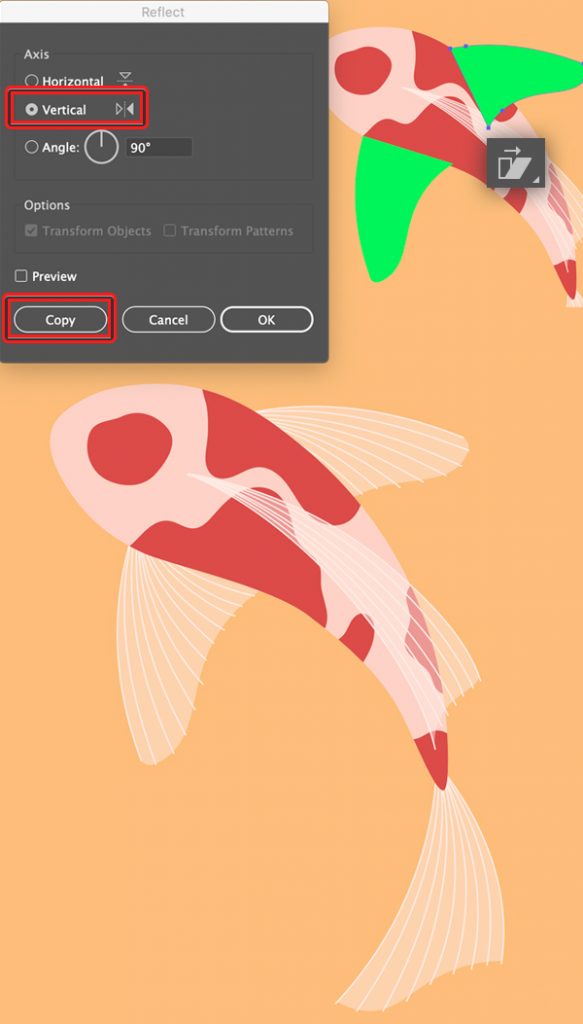
We can mirror the fin to the opposite side of the body with the help of the Reflect Tool (O). Double-click the tool, select Vertical Axis and click Copy.
Put the created copy into place and use the Shear Tool if needed to make it fit the perspective.
Finish up with the fins by making them semi-transparent and adding details. Don’t forget to Send to Back (Shift-Control-[), placing the fins behind the body shape.
Step 10
Now let’s create the eyes. Switch to the Ellipse Tool (L) and make a 15 x 15 px brown circle. Select its bottom anchor point with the Direct Selection Tool (A) and press the Delete key to remove it. Attach the created eyes to the front of the head and add tiny white highlights to make the eyes glossy.
Let’s add those barbels above the mouth that look like a moustache. Start by making a triangle and use the Curvature Tool (Shift-`) to bend the edges.
Create a mirrored copy, position it properly and Unite both shapes in the Pathfinder to merge it into one single piece.

Step 11
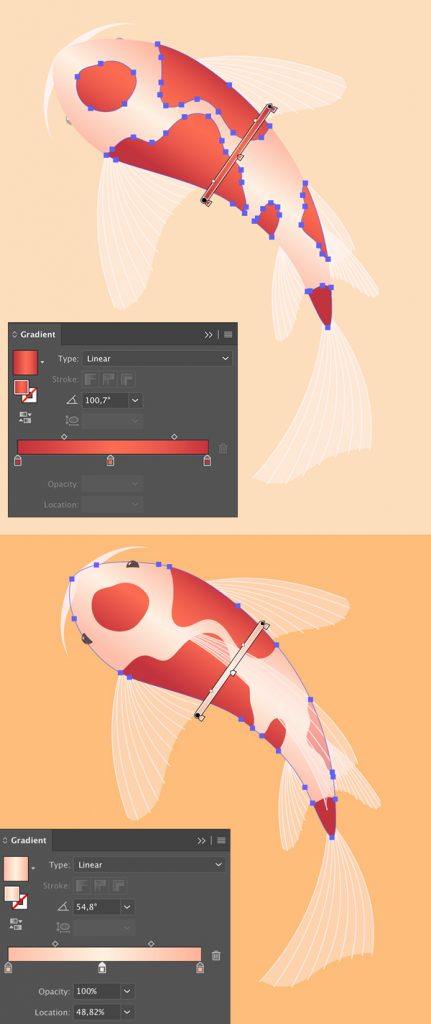
Let’s make our Koi fish slightly more dimensional and realistic by adding some gradients to it.
Start by selecting all the red spots and create a Compound Path by pressing Control-8. Now we can apply a single Linear gradient to it. Open the Gradient panel (Window > Gradient) and apply dark-red color to the sliders. Add a new slider in the middle by clicking the gradient stripe and apply a slightly brighter red-orange color to it.
Use the Gradient Tool (G) to apply a Linear gradient to the compound path, as shown in the image below.
Apply a similar gradient to the body, but this time make the colors light pink-beige.
Step 12
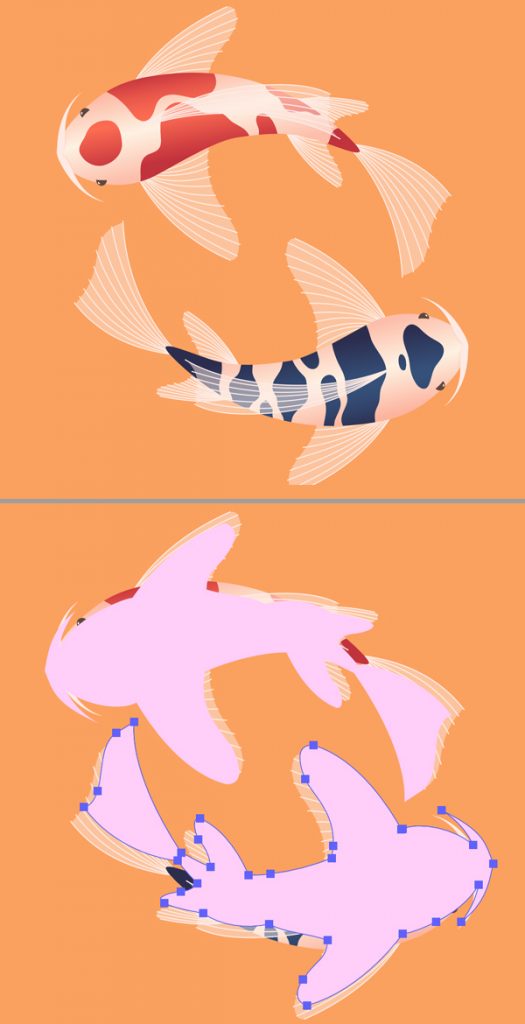
Our Koi fish is ready! Now let’s work on the composition. Duplicate (Control-C > Control-V) the fish and rotate the copy. Place the fish in a circle to balance the composition. Change the pattern and the color of the spots of the second fish to make it look more interesting.
We can create some simple shadows by drawing the silhouettes of our fish with the help of the Pencil Tool (N) or the Pen Tool (P). Once the shapes are done fill them with bright pink color.
Step 13
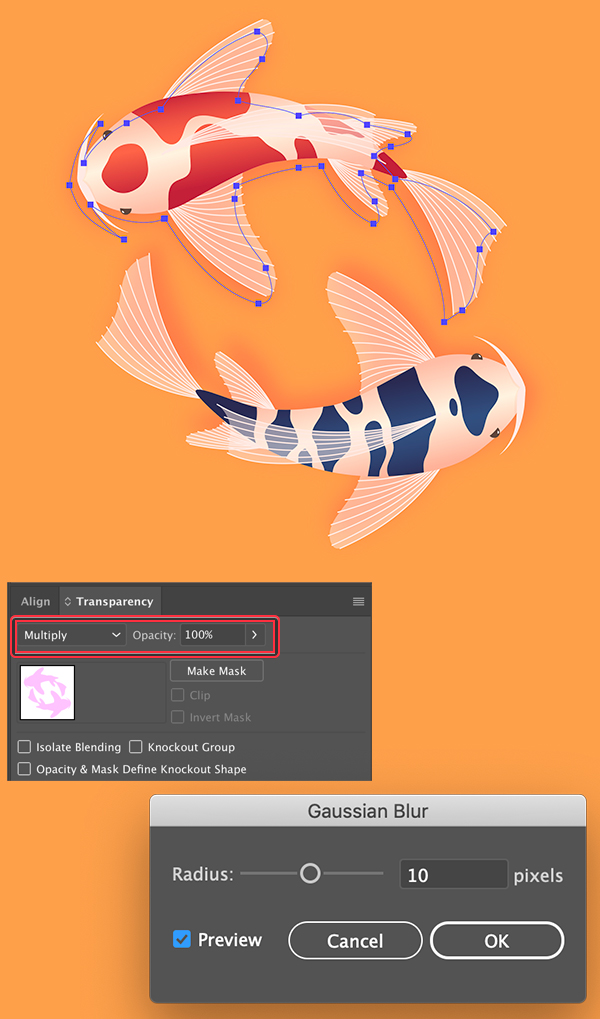
Send the shadows to Back (Shift-Control-[) and set the Blending Mode to Multiply in the Transparency panel.
Go to Effect > Blur > Gaussian Blur and set the Radius to 10 px to make the shadows soft.
Yay! Our Colorful Koi Fish Scene is Finished!
Marvellous work! You can add some minor details to the composition to your liking. I’ve used the Pencil Tool (N) to draw some lighter spots and bubbles to add a feeling of water in a circular motion.
I hope you’ve enjoyed following this relaxing tutorial and learned some new tools that will be useful for your future projects!
Happy drawing!
Author: Yulia Sokolova
2D/3D artist and tutorial instructor, focusing on character creation, icons, lettering design, and illustrations.


Thanks so much for giving everyone a very terrific chance to read from this site. It can be very great and as well , full of a good time for me and my office co-workers to visit your site more than thrice in a week to study the newest guidance you have got. And of course, I’m just always happy for the incredible inspiring ideas you give. Selected 4 points in this article are easily the best I’ve ever had.