
 Spring is finally here! Now that everything is growing and blooming, let’s dedicate this tutorial to drawing an elegant bouquet made of ornate leaves. We’ll be using simple shapes and transform effects to make the silhouettes and learn how to draw inside the objects. Let’s start!
Tutorial Details
- Program: Adobe Illustrator CS6 – CC
- Difficulty: Intermediate
- Topics Covered: Shape Building, Effects, Pathfinder panel, Draw Inside Function
- Estimated Completion Time: 20 minutes
Final Image: Leaf Composition

Step 1
Take the Ellipse Tool (L) and let’s make a 120 x 250 px green oval. Select its top and bottom anchor points with the Direct Selection Tool (A) and click Convert selected anchor points to corner in the control panel on top and make the tips pointed.

Step 2
We can use Guides to adjust the length of the anchor handles if we want to make the shape rounder. Simply turn on the Rulers (Control-R) and drag the Guide down onto the Artboard. When you’ve finished with it, click the guide and hit Delete (Backspace on Mac) to get rid of it. You can also turn it off in View > Guides > Clear Guides.
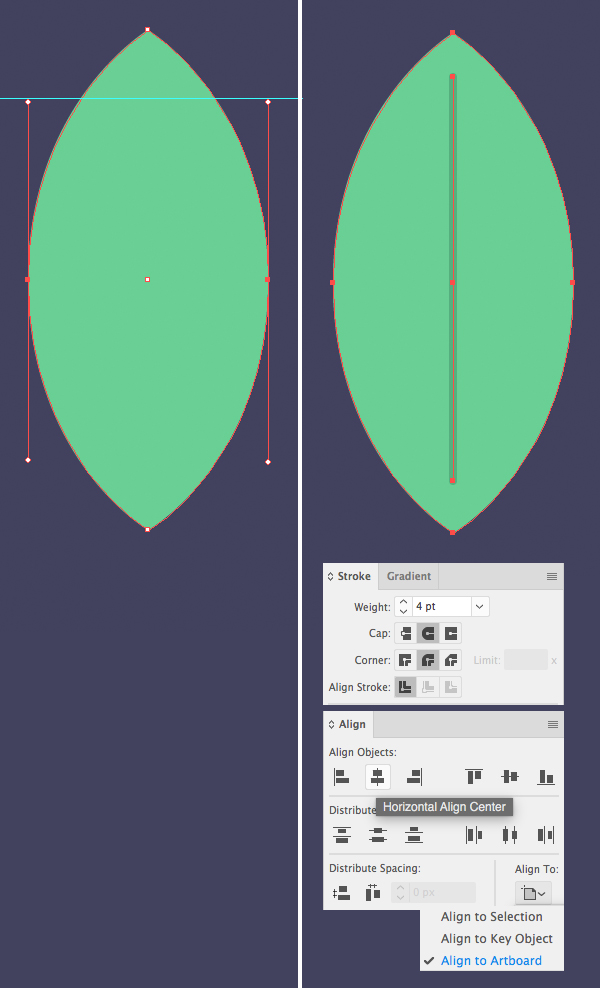
Use the Pen Tool (P) and hold down Shift to add a vertical line across the leave. Open the Stroke panel (Window > Stroke) and set the Weight to 4 pt, Cap to Round Cap.
Let’s make sure that our shapes are perfectly centered. Select both the leaf and the line and open the Align panel (Window > Align). Select Align to Artboard and click Horizontal Align Center to place both elements in the center.
Step 3
Duplicate (Control-C > Control-V) the leaf and keep the copy somewhere aside, we’ll need it for our next leaf.
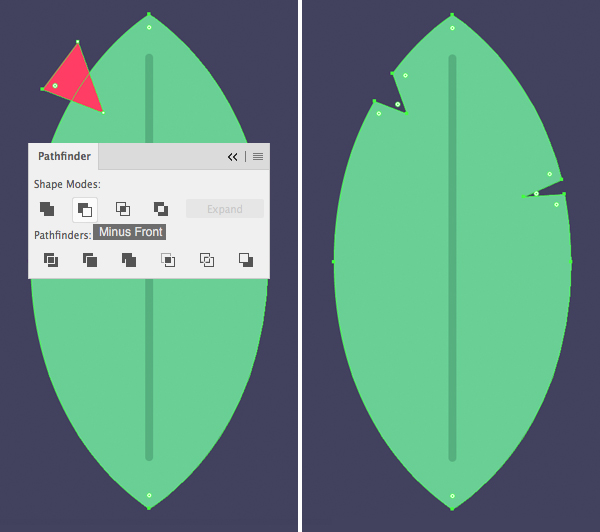
Use a Pen Tool (P) to create a small triangle in the top part of the leaf. Select both the leaf and the triangle and use the Minus Front function of the Pathfinder to cut it out.
Add another cut-out on the opposite side of the leaf.
Our leaf is ready! Let’s make another one!
Step 4
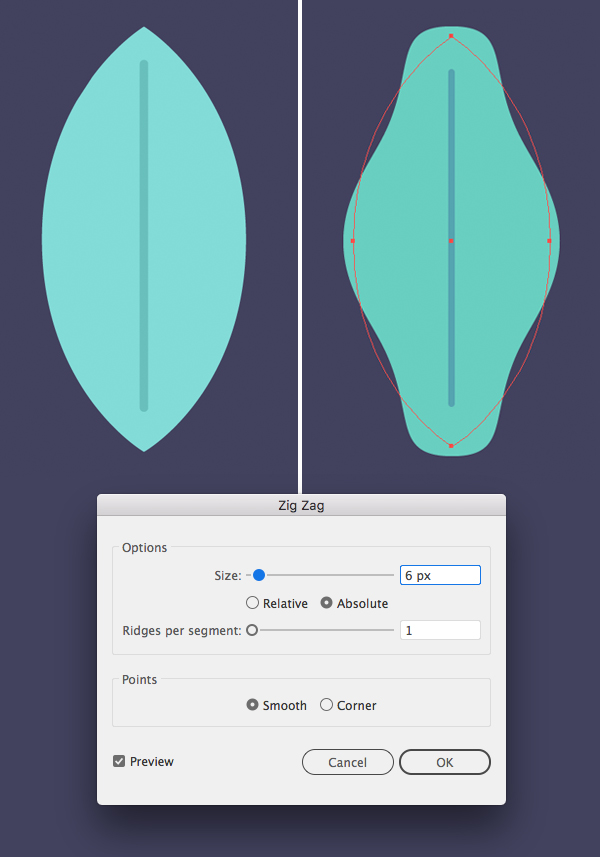
Remember the copy of the leaf that we’ve created in the previous step? Now its time to use it! First of all, let’s change its color to light-blue.
Next, select the leaf and go to Effect > Distort & Transform > Zig Zag. Set the Size to 6 px, Ridges per Segment to 1, Points to Smooth.
Step 5
Go to Object > Expand Appearance to apply the effect and add some notches to the leaf.

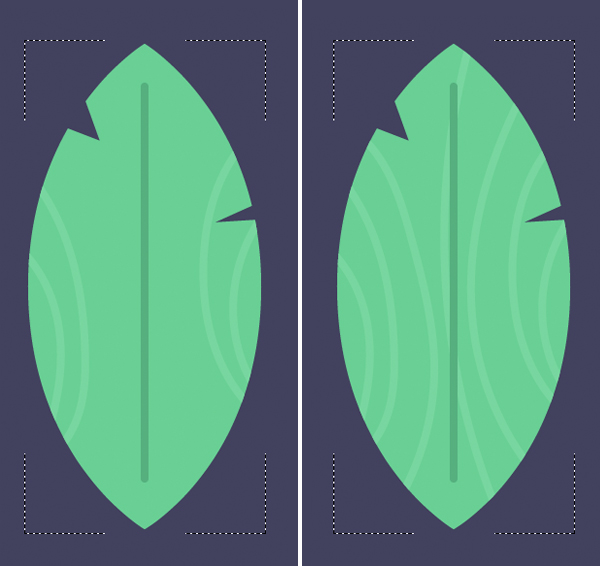
Step 6
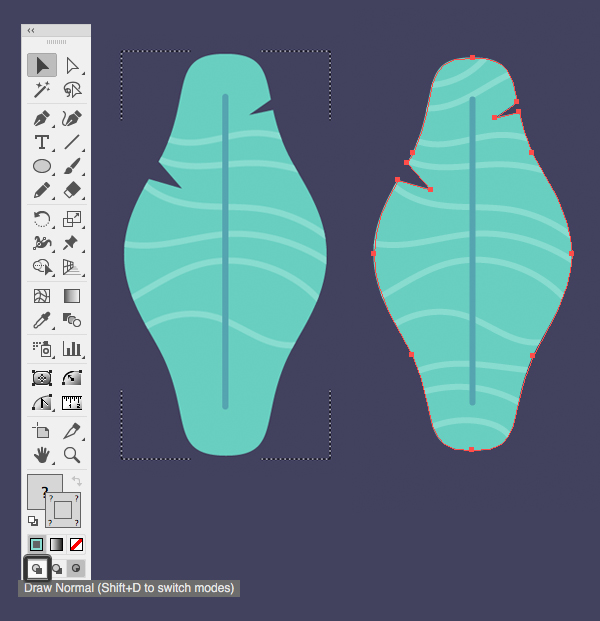
Let’s add some texture to our leaf. Keeping the leaf shape selected, head to the Tool panel and click Draw Inside in the very bottom of the panel (or press Shift-D to switch modes). You will see a dashed frame around the object, indicating that you can draw inside of it.
Take the Pencil Tool (N) and select a light-blue Stroke color in the Color panel. Set the Weight to 4 pt in the Stroke panel and start adding wavy lines to the leaf.

Step 7
Once you’ve added enough lines, switch back to Draw Normal mode by clicking the icon in the bottom of the Tool panel.
Step 8
Use the same technique to add texture to our first leaf. Make the line pattern different, varying the direction of the lines.
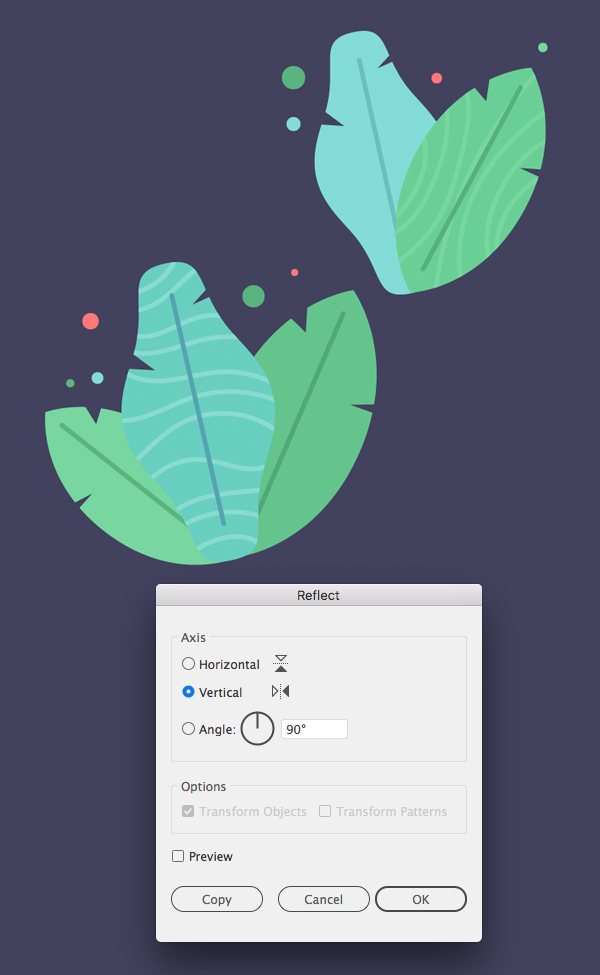
Step 9
Now that our leaves for the leaf composition are ready, we can duplicate (Control-C > Control-V) them and combine the copies, making elegant compositions. Rotate the leaves and change their scale. We can also use the Reflect Tool (O) by double-clicking it to flip some of the leaves vertically, adding variety to our bouquet.
Use the Ellipse Tool (L) while holding Shift to add small circles here and there.
Step 10
Add more details by placing dark copies of the leaf composition beneath the bouquet (Shift-Control-[).

Congratulations! Our Leaf Composition is Finished!
Great work! Now we can use the leaf composition as it is by adding some text to it or make more variations and unite them into an elegant floral set. I hope you’ve found some useful tips and tricks in this tutorial to use in your future designs!
Have fun!


