
Let’s start our day with a nutritious and delicious breakfast by learning how to draw a simple set of two top-down view flat breakfast icons – a cup of black coffee and an egg sandwich. We’ll be using the most handy tools of Adobe Illustrator while working with simple geometric shapes and doing a bit of a freehand drawing with the Pencil Tool. You don’t even need a drawing tablet for this one. Let’s start!
Tutorial Details:
- Program: Adobe Illustrator CS6-CC
- Difficulty: Beginner
- Topics Covered: Shape Building, Pathfinder Panel, Offset Path, Pencil Tool
- Estimated Completion Time: 15 Minutes
Final Image: Breakfast Icons

Step 1
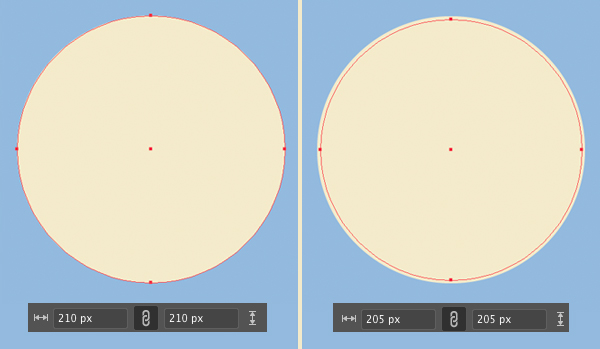
Let’s start with the most simple item and make a saucer. Take the Ellipse Tool (L), hold down Shift and create a 210 x 210 px white circle. I actually try not to make it pure white just because this way we won’t be able to add any highlights, so make it a bit more ivory instead.
Let’s Copy (Control-C) the shape and Paste in Front (Control-F) and make this copy a bit smaller (205 x 205 px). Make the outer circle lighter to create contrast.
Step 2
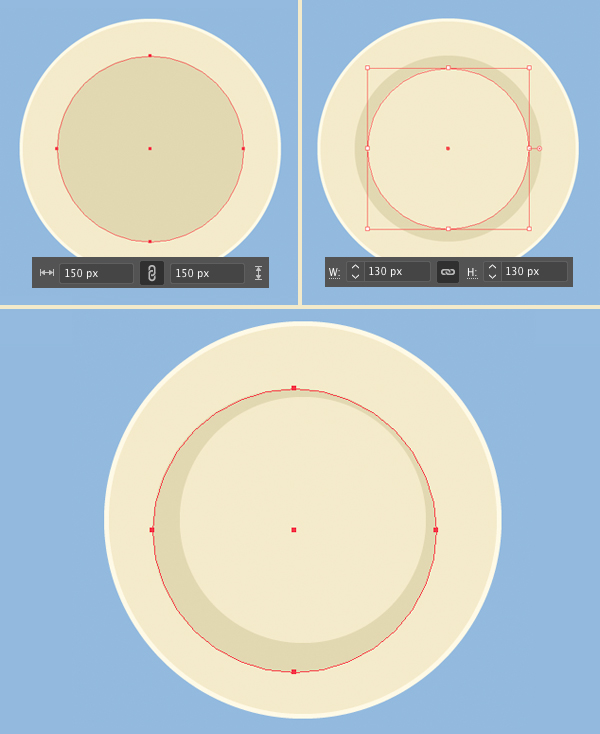
Now add another circle (150 x 150 px) inside and make it darker.
Then add a 130 x 130 px circle on top for the cup. Now we can move the darker circle down a bit, depicting a shadow casted by the coffee cup.
Step 3
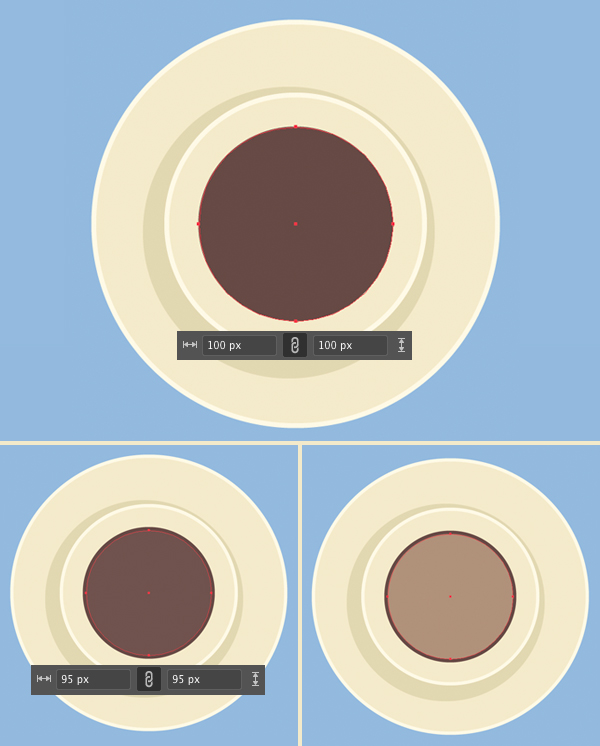
Create a lighter rim around the cup and let’s fill the cup with coffee by creating a 100 x 100 px dark-brown circle.
Add a smaller 95 x 95 px circle on top and make it much lighter. Let’s use this shape to create a highlight.
Step 4
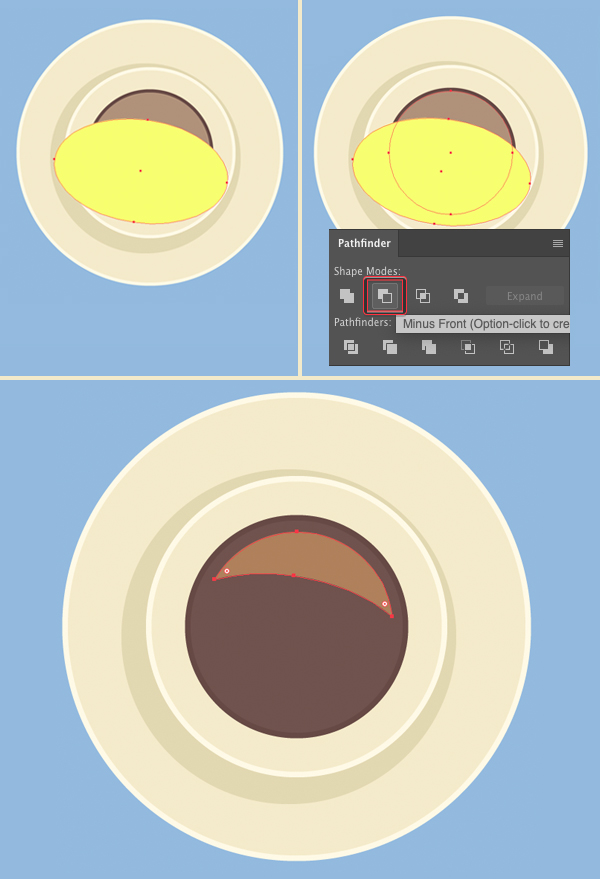
Draw an ellipse and let’s make it overlap the cup as shown in the screenshot below. Now we can select this ellipse together with the light-brown circle and use the Minus Front function of the Pathfinder (Window > Pathfinder) to create a nice highlight on the coffee surface.
Step 5
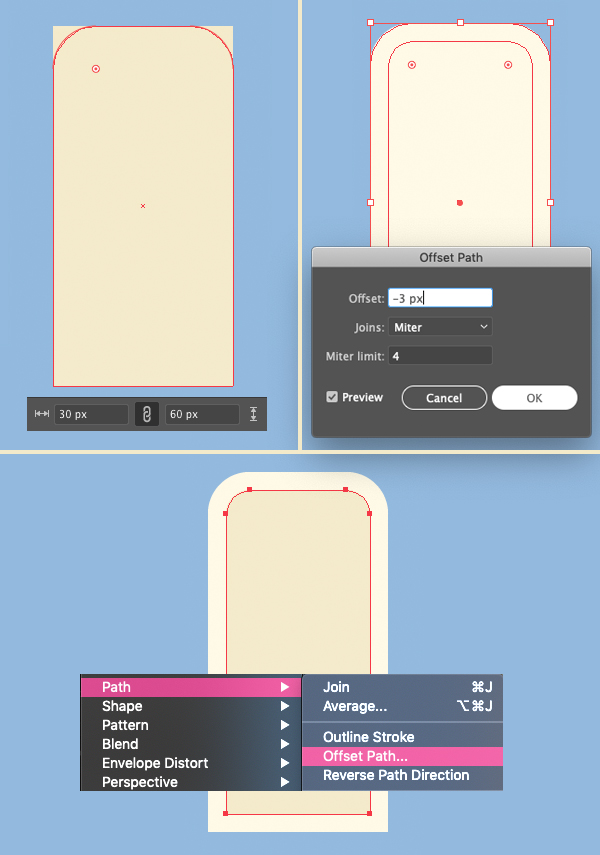
Let’s add a handle to our coffee cup. Start by creating a 30 x 60 px rectangle using the Rectangle Tool (M). Select its top anchor points with the Direct Selection Tool (A) and drag the circle marker of the Live Corners to make the corners slightly rounded. We can also do this from the Corners menu in the control panel on top while any anchor point is selected and the Direct Selection Tool (A) is active.
Next, keeping the shape selected, go to Object > Path > Offset Path and set the Offset value to -3 px, creating a highlight rim around the handle to make it more dimensional.
Step 6
Now we’ll draw a crunchy toast! Use the Rectangle Tool (M) to make a 100 x 110 px dark-brown rectangle for the bread. Create another rectangle in a form of a narrow stripe and place it above the first one as shown in the image below.
Select both shapes and merge them into one single piece by clicking the Unite button in the Pathfinder panel.
Finally, use the Direct Selection Tool (A) to select the anchor points at the edges of the toast and make them slightly rounded with the help of the Live Corners feature.

Step 7
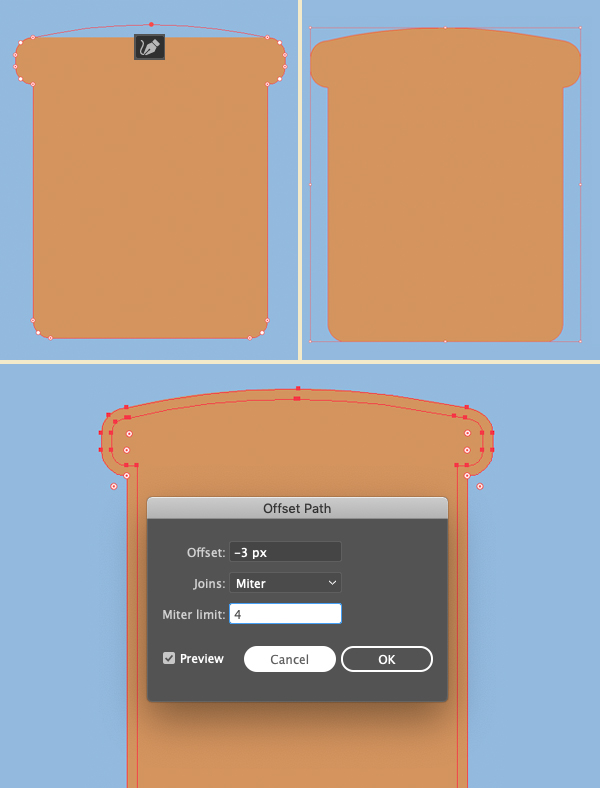
Let’s work a bit more on the toast. Use the Curvature Tool (Shift-`) to bend the top edge of the shape making it slightly arched. Just click in the center of the edge and drag it up holding down the left mouse button.
And let’s add some thickness to the toast by making a rim with the Offset Path function setting the Offset value to -3 px.
Step 8
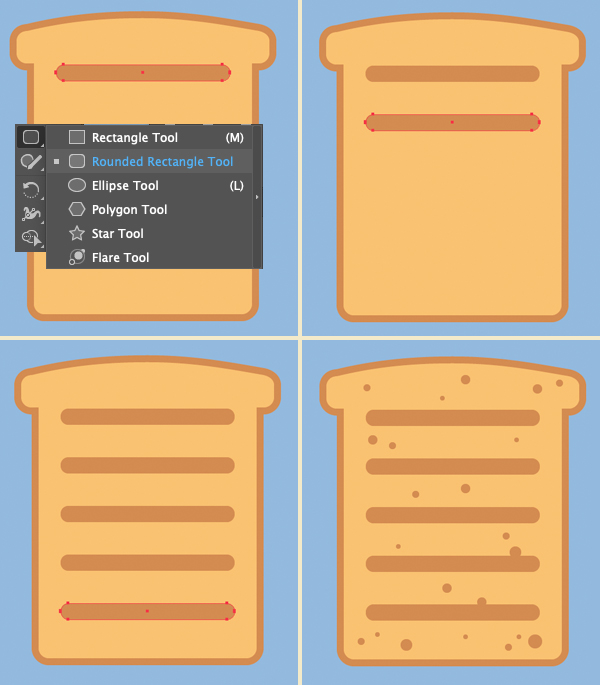
Make the inner part of the toast a bit lighter.
Now grab the Rounded Rectangle Tool and make a horizontal dark-brown stripe. Let’s click this stripe with the Selection Tool (V), hold down Alt-Shift and drag the stripe down, this way creating a copy.
Press Control-D several times to repeat the last action adding more stripes. Great! Now we have our toast grilled and crunchy. Let’s finish up with it by adding some texture to the bread with the help of the Ellipse Tool (L). Hold down Shift and speckle some small dark-brown circles here and there, varying their size and position.
Step 9
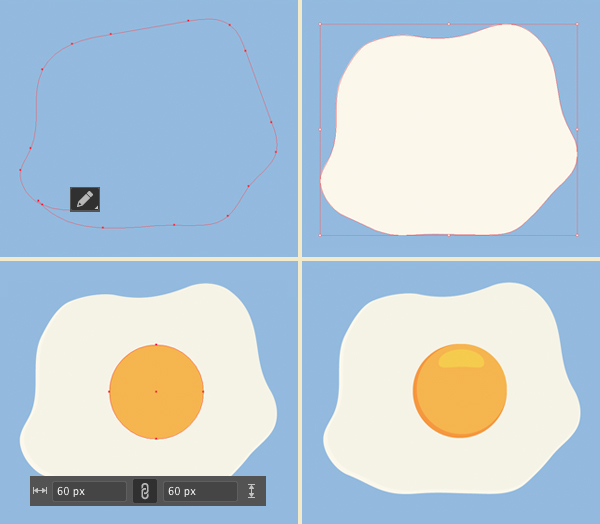
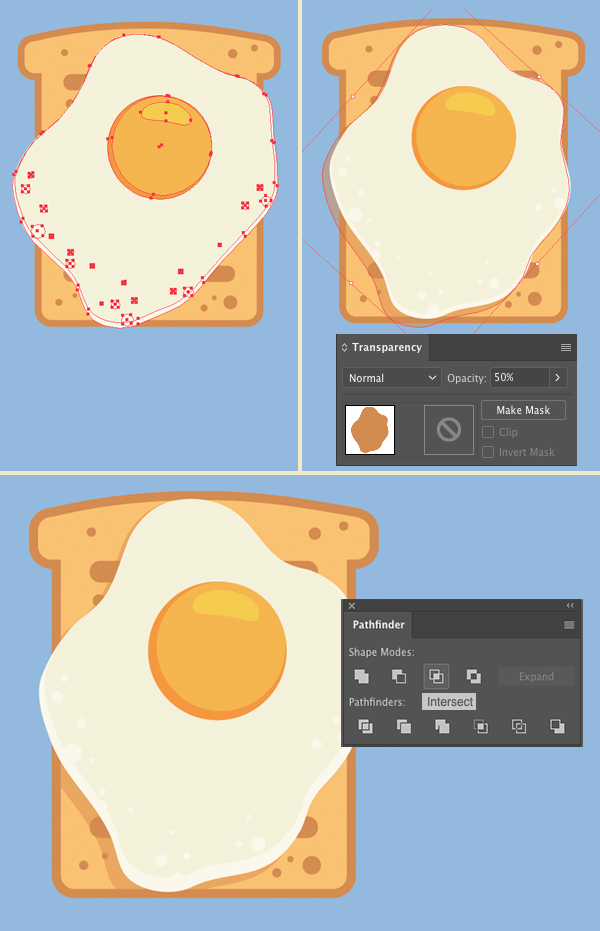
Next we’re going to do some freehand drawing and depict an egg. Grab the Pencil Tool (N) and draw a wavy rounded shape of a form of a fried egg. You can adjust the smoothness of your lines from the Options menu by double-clicking the Pencil Tool (N) icon in the Tools palette.
Fill the created shape with while color and use the Ellipse Tool (L) to add a 60 x 60 px yellow circle on top. Yes, we’re making the sunny-side-up egg!
Finish up with the yolk and the white part of the egg by adding some simple shadows and highlights to it.
Step 10
Now we can put the egg on the crunchy toast. Rotate it and shrink it if needed to make it fit the toast.
Let’s create a semitransparent shadow under the egg. Copy (Control-C) the white shape and Paste in Back (Control-B). Move the shape down and to the left a bit and fill it with the same dark-brown color as we have for the toast. Now we can lower the Opacity by 50% in the Transparency panel (Window > Transparency) and cut off the unneeded parts of the shadow with the help of the Pathfinder.
To do so, Copy (Control-C) the toast shape and Paste in Front twice (Control-F > Control-F). Select one of the copies together with the egg shadow and apply Intersect in the Pathfinder panel. There we have it!
Step 11
We’re almost done! Let’s arrange our breakfast items. I’ve added a simple plate for the toast, the same one as we’ve made for the coffee cup.
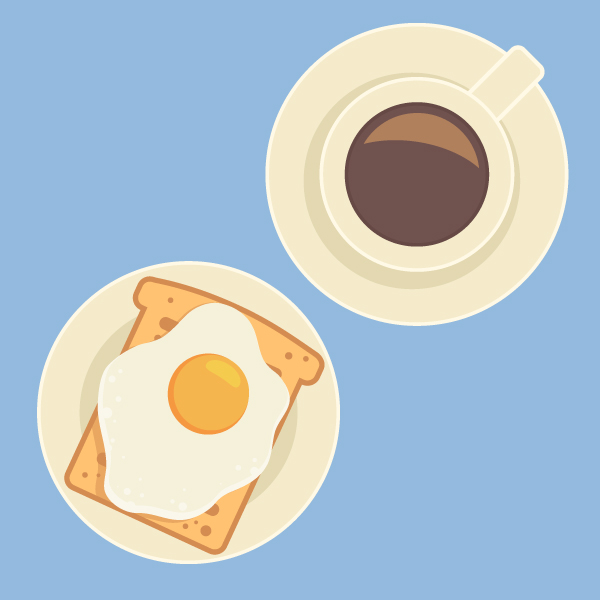
Bon Appetite! Our Breakfast Icons are Ready!
Great work, guys! Now we can either expand our set of breakfast icons by drawing more items or compose a nice postcard by adding text in the empty space using the playful Henny Penny font.
I hope you’ve enjoyed this simple tutorial and discovered some useful tips and tricks for your future projects.
Have fun!
Author: Yulia Sokolova
2D/3D artist and tutorial instructor, focusing on character creation, icons, lettering design, and illustrations.


Really informative, thanks for sharing this!