
 This time we’ll be creating a cute cartoon Back to School character! Let’s use the Pencil Tool and other handy tools of Adobe Illustrator to draw a funny raccoon wearing glasses. This character can be used for making stickers, patterns and designs for stencil and fabric. Let’s do it!
Tutorial Details
- Program: Adobe Illustrator CS6 – CC
- Difficulty: Intermediate
- Topics Covered: Pencil Tool, Stroke Panel, Pathfinder panel, Paintbrush Tool
- Estimated Completion Time: 20 minutes
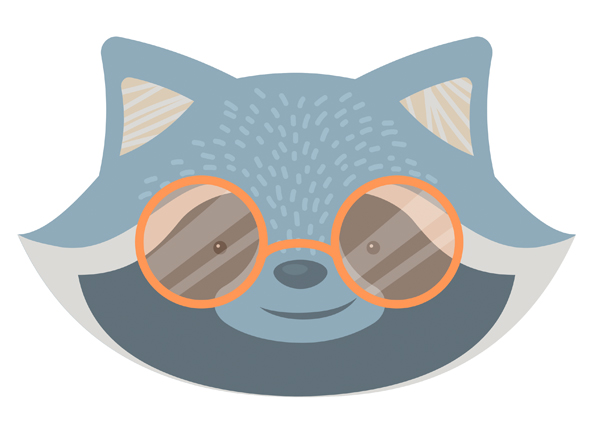
Final Image: Back to School Character

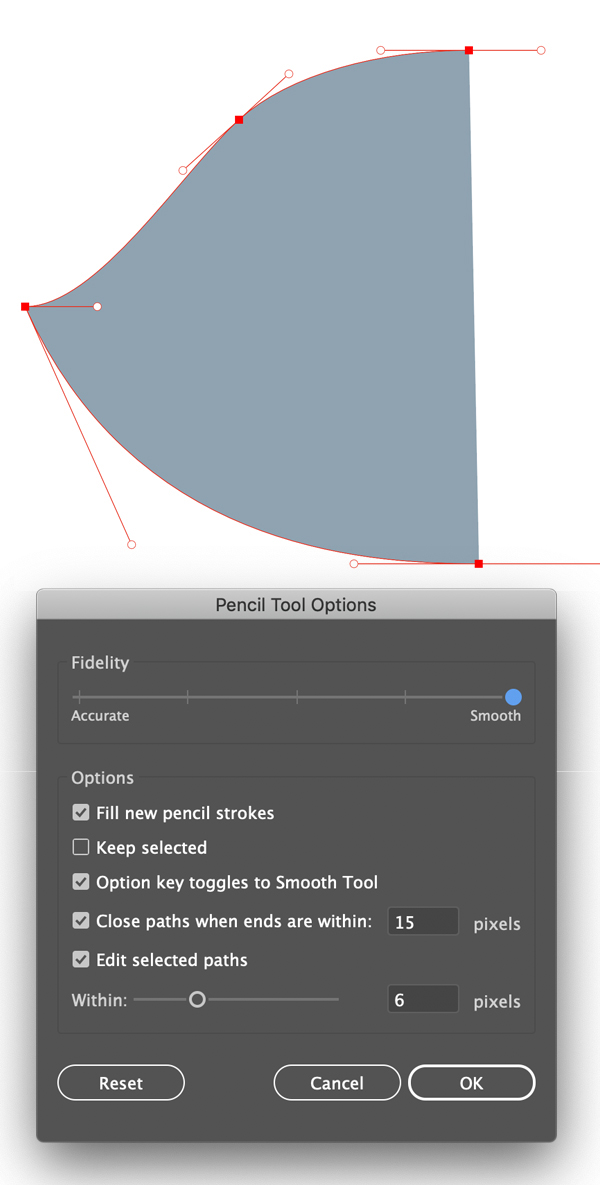
Step 1
Let’s take the Pencil Tool (N) and draw half of the raccoon’s head. I’ve set the Fidelity of my pencil to Smooth (you can open the Options window by double-clicking the tool icon) and I’m using the Direct Selection Tool (A) to fix the position of the anchor points and handles to give the shape a desired silhouette.
Step 2
Now let’s keep our shape selected and double-click the Reflect Tool (O). Set the Axis to Vertical and click Copy to mirror the shape to the other side. Move the shape to its place and Unite both halves of the head in the Pathfinder panel.

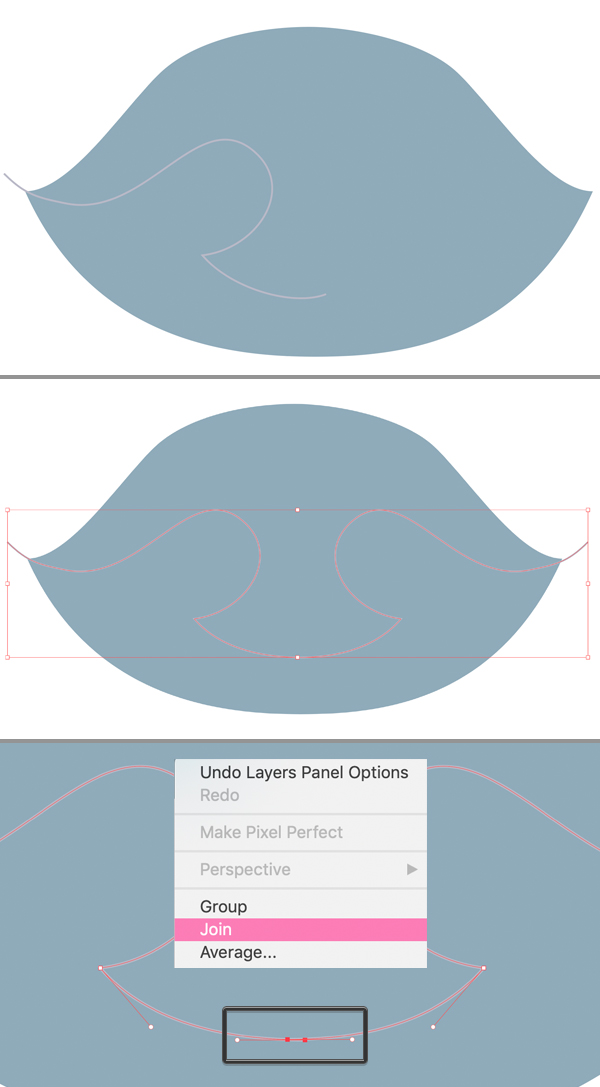
Step 3
Take the Pencil Tool (N) and set the Fill color to None, Stroke color to grey in the Color panel.
Draw half of the shape, as shown in the image below. Then use the Reflect Tool (O) to create a mirrored copy. Use the Direct Selection Tool (A) to select two points that overlap, right mouse click and select Join, this way turning two pieces into one single curve.
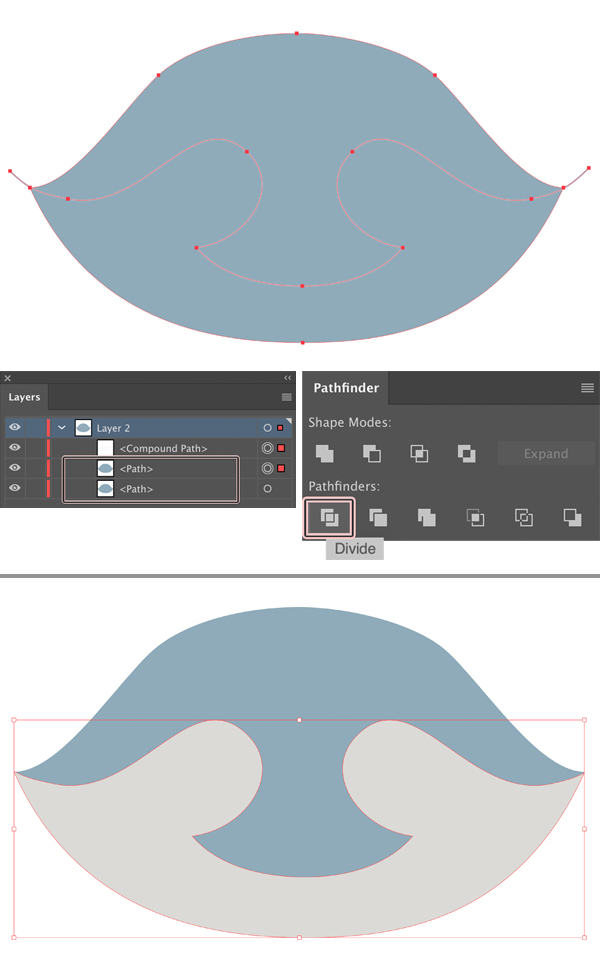
Step 4
Select the head of the school character and Duplicate (Control-C > Control-F) it. Then select the top copy and the created curve and click Divide in the Pathfinder panel to cut the head into two pieces. Recolor the bottom part of the head, filling it with beige color.
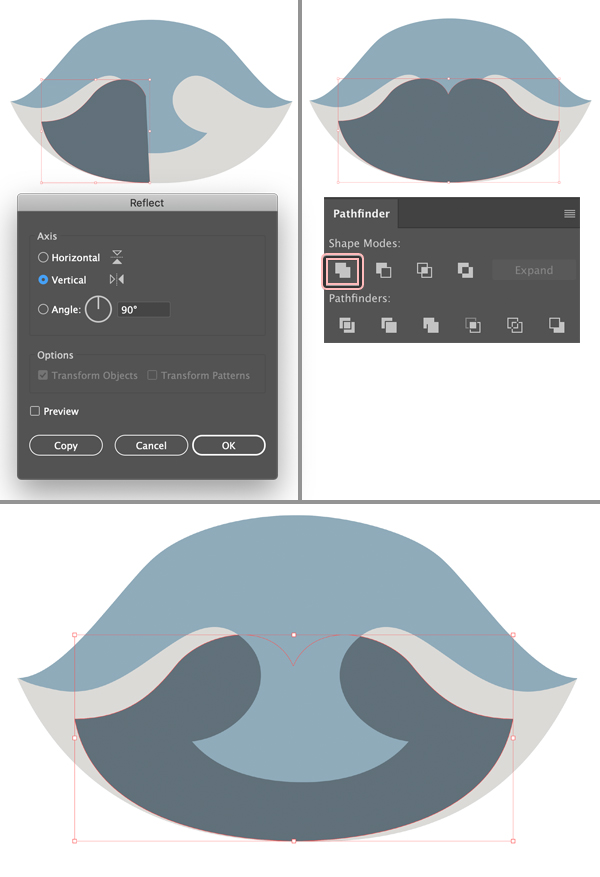
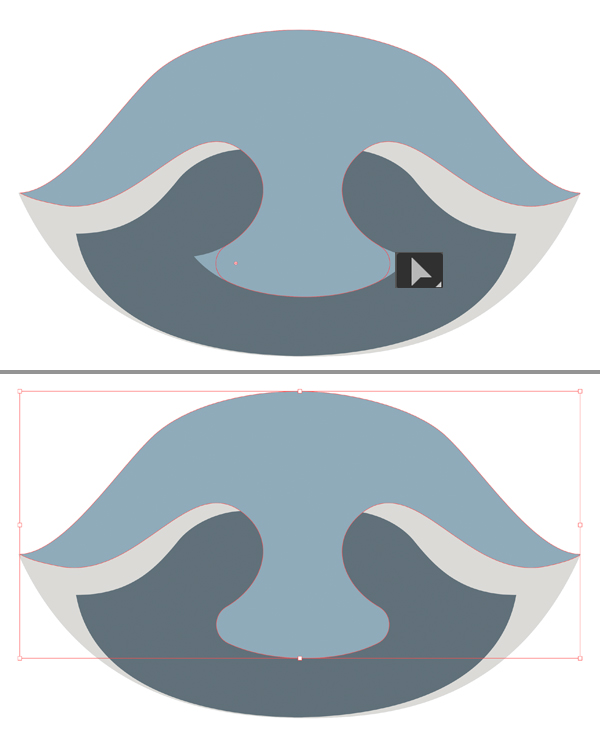
Step 5
Draw another shape with the Pencil Tool (N) and fill it with dark-blue color. Use the Reflect Tool (O) and the Unite function in the Pathfinder panel to flip and merge the shape.
Move the shape under the blue shape, as shown in the image below.
Step 6
I’m using the Direct Selection Tool (A) to select the sharp corners of the muzzle area of the school character and pull the circle markers of the Live Corners, making the shape rounded.
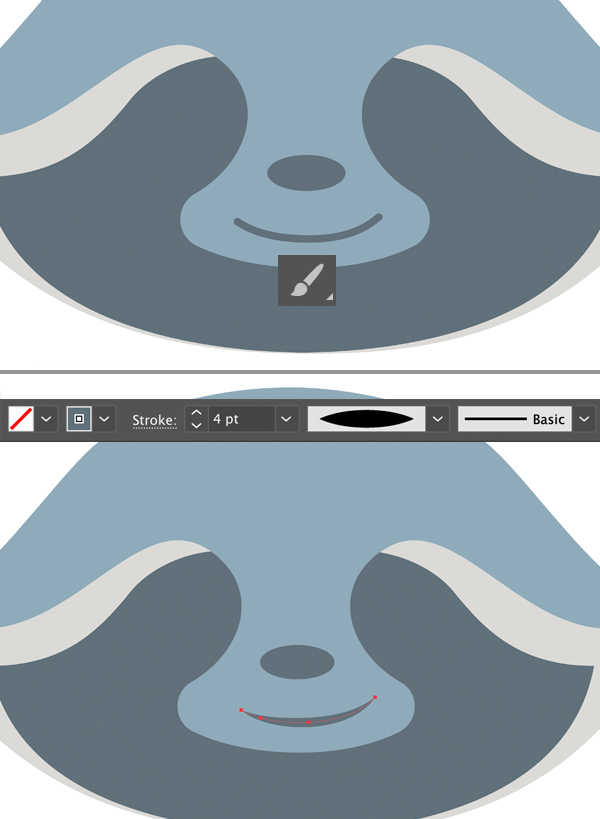
Step 7
Now we’ll use the Ellipse Tool (L) to create an oval for the nose and the Paintbrush Tool (B) to draw an arched line for the mouth.
We can adjust the curve settings in the control panel on top, setting the Stroke weight to 4 pt, Variable Width Profile to Width Profile 1. This way we make the mouth shape more expressive and the corners of the mouth sharp.
Step 8
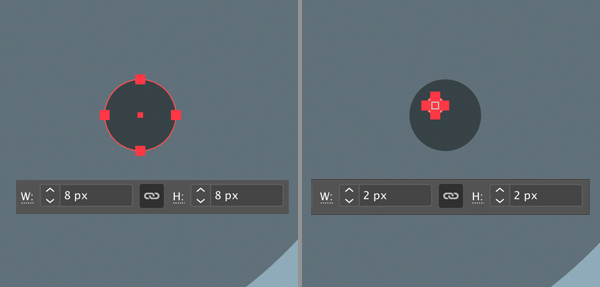
Let’s add the eyes using the Ellipse Tool (L). Hold down Shift and create a small (about 8 x 8 px) circle filled with dark color.
Add a smaller circle on top for the highlight.
Step 9
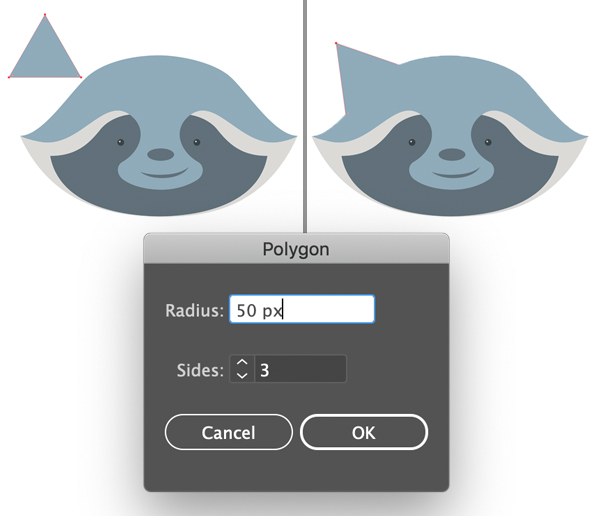
Now we’ll create an ear using the Polygon Tool which is located in the same drop-down menu as the Rectangle Tool (M).
Double-click the Polygon Tool icon and set the Sides value to 3. Scale and rotate the created triangle to make it fit the school character’s head.
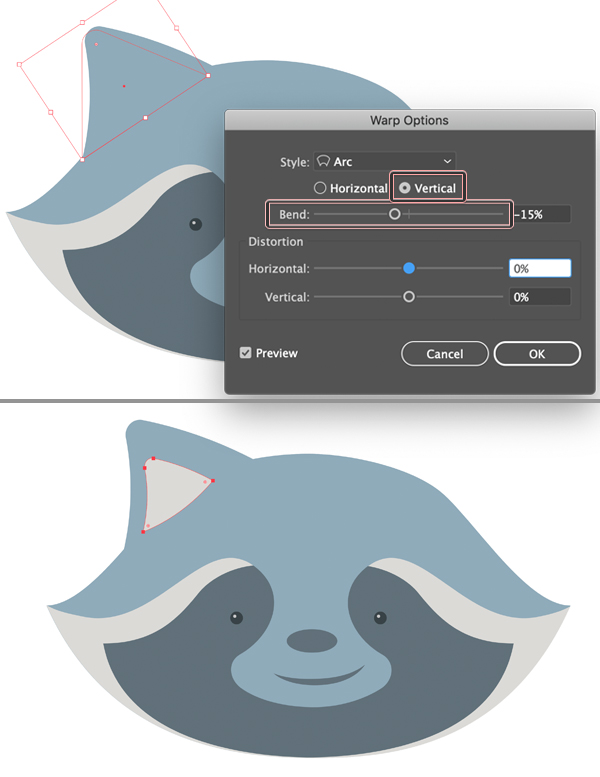
Step 10
Let’s bend the ear of the school character slightly. Go to Effect > Warp > Arc, set the Vertical Bend value to -15% and click OK.
Object > Expand Appearance to apply the effect.
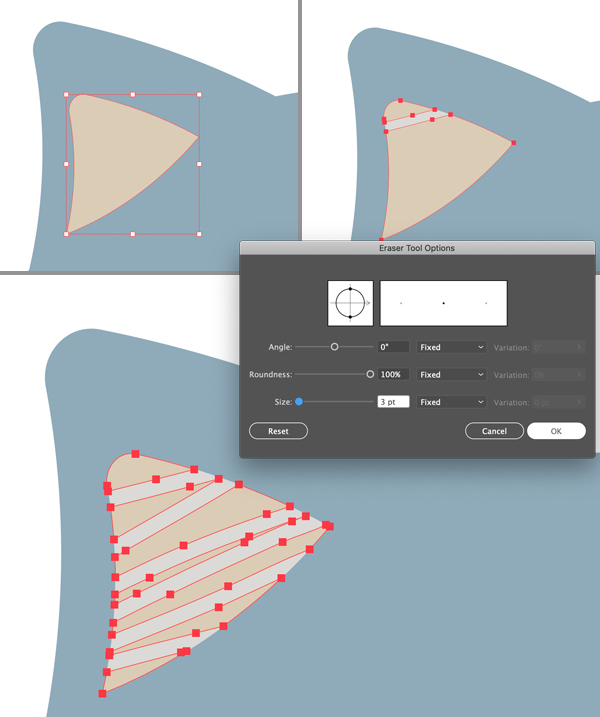
Duplicate (Control-C > Control-F) the shape, make it smaller and change the color to beige, depicting the inner part of the ear.
Step 11
Let’s duplicate the inner shape of the ear and change the color of the copy to a darker beige.
Now take the Eraser Tool (Shift-E), set its size to some small value (double-click to open the Options) and make a few strokes, erasing several parts of the top shape to make it look striped.
Step 12
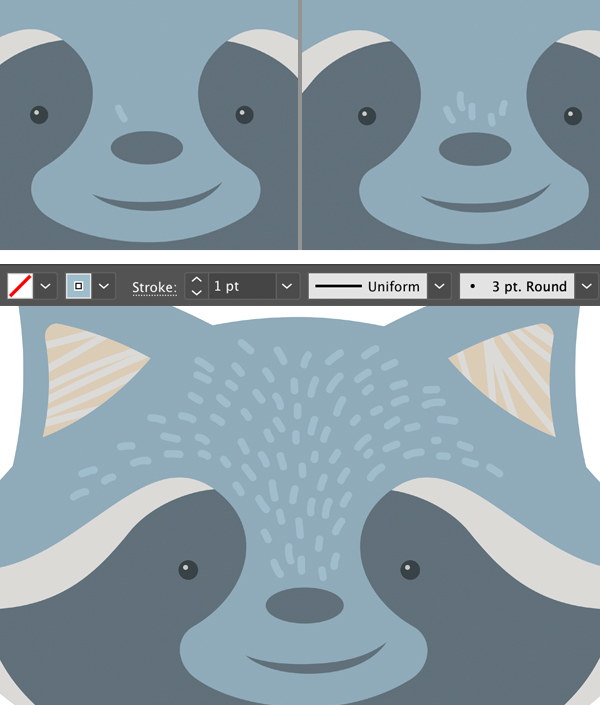
Now we’ll add some more details to the muzzle. Take the Paintbrush Tool (B), set the Stroke color to light-blue and start drawing separate hairs on the nose-bridge, moving up to the forehead.
Step 13
Let’s add some Back to School accessories to our cute raccoon mascot.
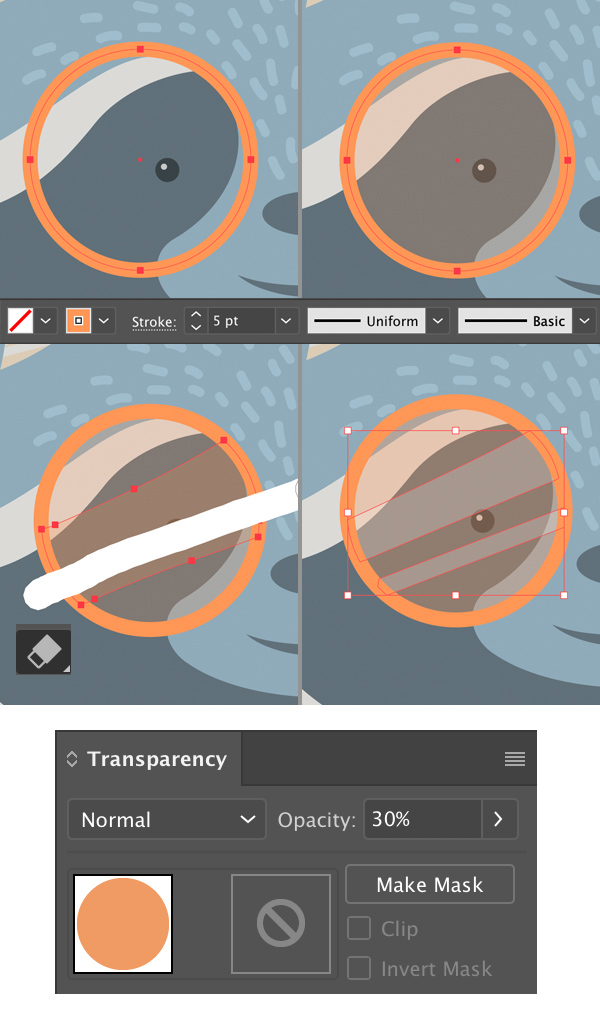
Take the Ellipse Tool (L), hold down Shift and make a large circle for the rim of the glasses. Set the Fill color to None and the Stroke color to bright-orange.
Copy (Control-C) the circle and Paste in Back (Control-B). Change the Fill color of the bottom copy to orange and the Stroke color to None. Set the Opacity to about 30% in the Transparency panel, making the glass semi-transparent.
Duplicate (Control-C > Control-F) the semi-transparent shape once again and use the Eraser Tool (Shift-E) to erase some of its parts, creating a highlight on the glass surface.
Step 14
Group (Control-G) all the elements of the glass, hold down Alt-Shift and drag to the right, creating a copy of the group. This time we’re not using the Reflect Tool (O) because we want the highlights to be tilted in the same direction.
Use the Pencil Tool (N) to draw a central part of the rim, connecting the circles.
Step 15
Now that the school character is ready, we can add a bright background, use a cute Peralta font to add some text and have fun with the Paintbrush Tool (B) to scribble some lines and circles as we do it in school!
Yay! Our Back to School Character Mascot is Finished!
That’s all folks! I hope you guys enjoyed this lesson and found some new tips and tricks that will be useful for your future projects!
Happy designing!
Author: Yulia Sokolova
2D/3D artist and tutorial instructor, focusing on character creation, icons, lettering design, and illustrations.


