 Keep things candy-like and bright with this plastic text effect treatment tutorial! We’ll create a fantastic graphic style and easily transform it into a completed text design.
Tutorial Details: Plastic Text Effect
- Program: Adobe Illustrator C6 – CC 2015
- Difficulty: Intermediate
- Topics Covered: Graphic Styles, Appearance Panel, Text Treatment
- Estimated Completion Time: 30 Minutes
Final Image: Plastic Text Effect

Step 1: Plastic Text Effect
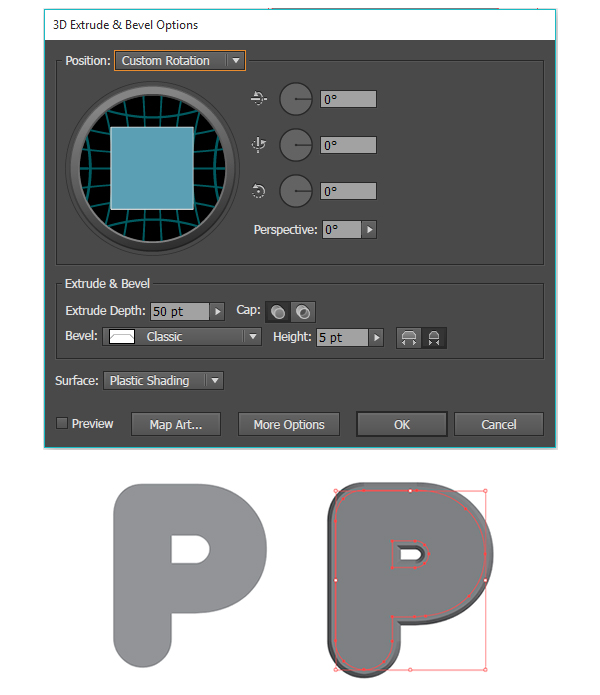
To start this Plastic Text Effect tutorial, create a New Document and the shape of your choice. Since we’ll be working with type, I’ve chosen the letter P, created with the Type Tool and a rounded typeface like Geometry Soft.
Expand the text and in the Appearance panel set the fill color to gray. Go to Effect > 3D > Extrude & Bevel and set each axis to 0° with a 5pt Classic Bevel.
Step 2
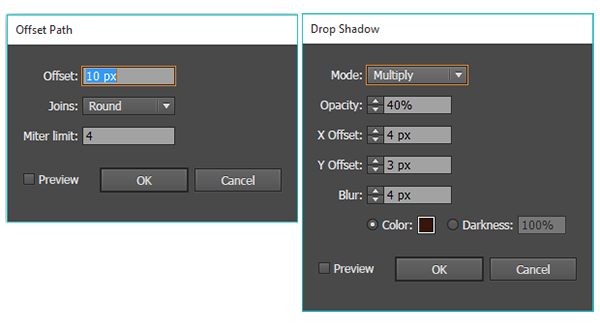
Offset the same fill in the Appearance panel (Effect > Path > Offset Path) by 10 pts. Then, add a Drop Shadow (Effect > Stylize > Drop Shadow) with the following attributes:
- Mode: Multiply
- Opacity: 40%
- X Offset: 4 px
- Y Offset: 3 px
- Blur: 4 px
- Color: Black (or Dark Brown)
Step 3
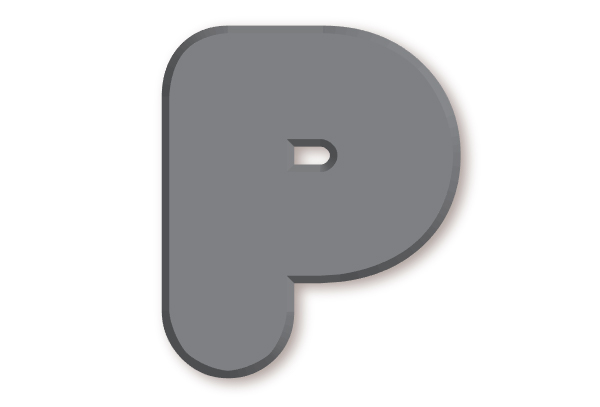
Below you can see each of the effects on the first fill color in the Appearance panel.
Step 4
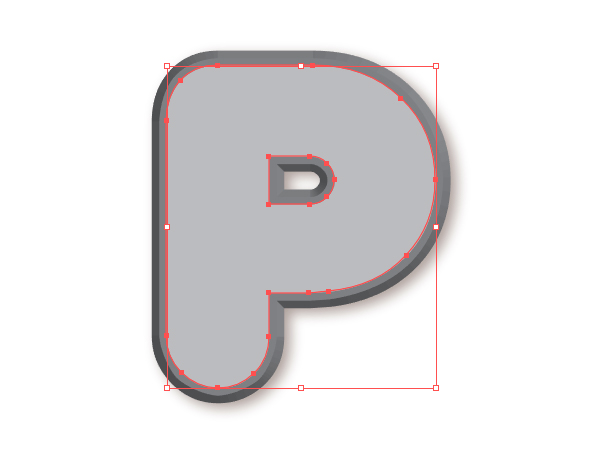
Create a New Fill above the first and set its color to a lighter gray.
Step 5
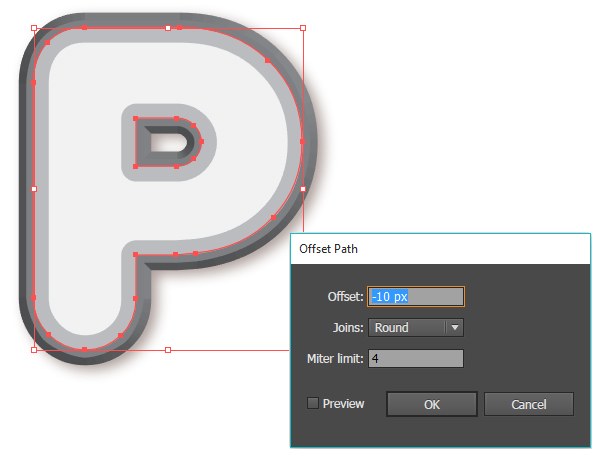
Create a third fill over the other two and set the fill color to a very light gray. Offset the path by -10 px.
Step 6
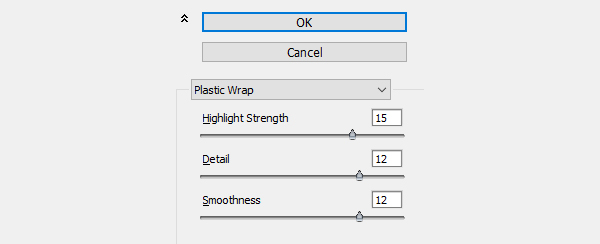
On the same fill as the previous step, apply a Plastic Wrap effect (Effect > Artistic > Plastic Wrap) and apply the following attributes:
- Highlight Strength: 15
- Detail: 12
- Smoothness: 12
Step 7
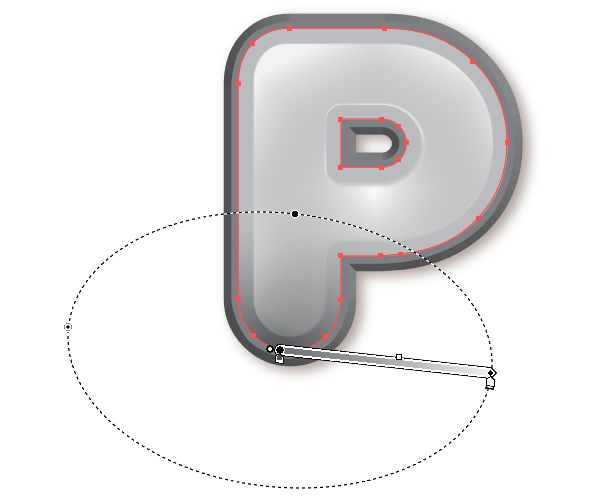
Create a new fill overtop the others and apply a Radial Gradient going from dark gray at 100% Opacity to light gray at 0% Opacity. Adjust the gradient’s radius and placement with the Gradient Tool. I’ve place mine near the bottom of the object.
Step 8
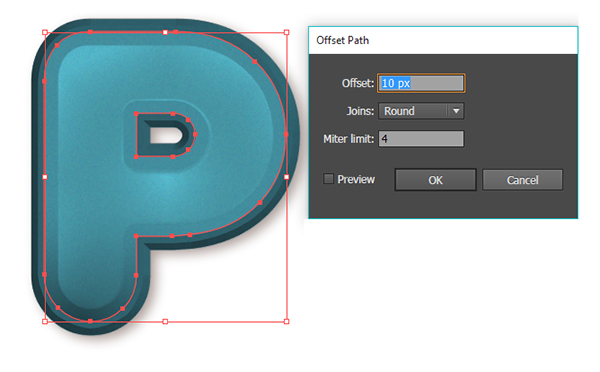
Create another fill overtop the others in the Appearance panel. Offset the path by 10 px and set the fill color to something bright, like turquoise or teal. Set the Blending Mode to Multiply.
Step 9
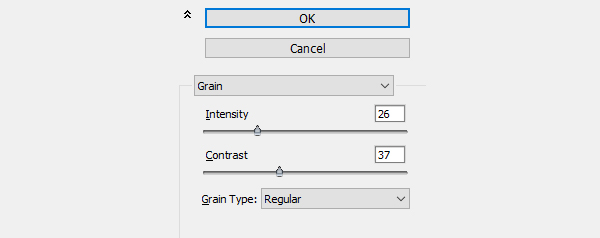
On the same blue fill, apply a Grain effect (Effect > Texture > Grain) with the following attributes:
- Intensity: 26
- Contrast: 37
- Grain Type: Regular
Step 10
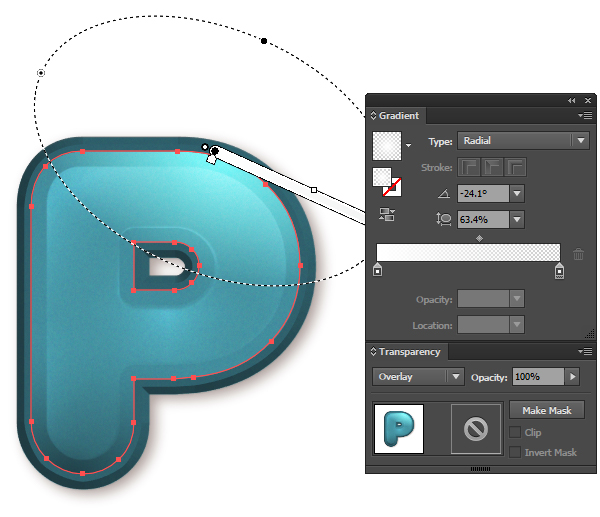
Create a new and final fill over the others. Apply a Radial Gradient going from white at 100% Opacity to 0% Opacity with the Blending Mode set to Overlay. Use the Gradient Tool to adjust the radius and place it in the upper right of the object.
Step 11
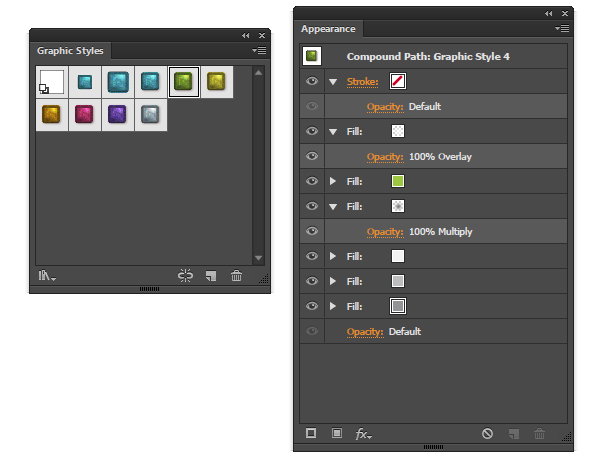
Select your object and create a new Graphic Style in the Graphic Style panel. You can also create alternative color styles by changing the blue fill color to any color you want and adding it ot the Graphic Styles panel.
Apply any of these Graphic Styles to expanded text or simple objects for a quick, candy-like plastic effect.
Step 12
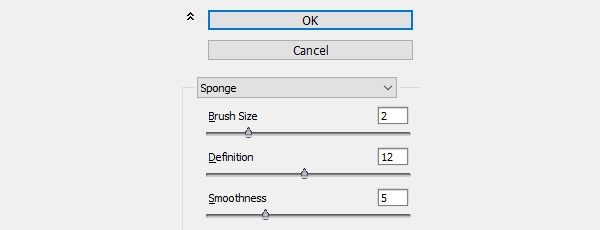
Let’s create a quick background! Draw a large rectangle overlapping your Artboard. Go to Effect > Artistic > Sponge and apply the following attributes:
- Brush Size: 2
- Definition: 12
- Smoothness: 5
Step 13
Then apply a Gaussian Blur (Effect > Blur > Gaussian Blur) of 27.7 pixels, or so. Place the rectangle behind your text or object to complete your illustration!

Conclusion: Plastic Text Effect
Great job! Now you have text perfect for candy packaging, mobile games, and more!
Got an idea or request for a text effect? Let us know below in the comment section and don’t forget to share your tutorial result with it!

Author: Mary Winkler
Mary works under the brand Acrylicana® designing apparel, jewelry, and illustrating for companies like Disney, Jakks Pacific, Envato, and more. Check out Acrylicana.com for more artwork, tutorials, and more.


how do you create a new fill?