
Have you ever been to London? In this tutorial we are going to create a lovely stylised postage stamp with one of the most prominent symbols of the UK, the clock tower known as Big Ben. We’ll be using basic geometric shapes to create a recognizable silhouette with flat-style simplified details. Let’s begin!
Tutorial Details
- Program: Adobe Illustrator CS6 – CC
- Difficulty: Intermediate
- Topics Covered: Shape Building, Pathfinder, Stroke panel, Scale Tool
- Estimated Completion Time: 20 minutes
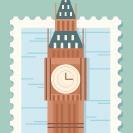
Final Image: Big Ben Postage Stamp
Step 1
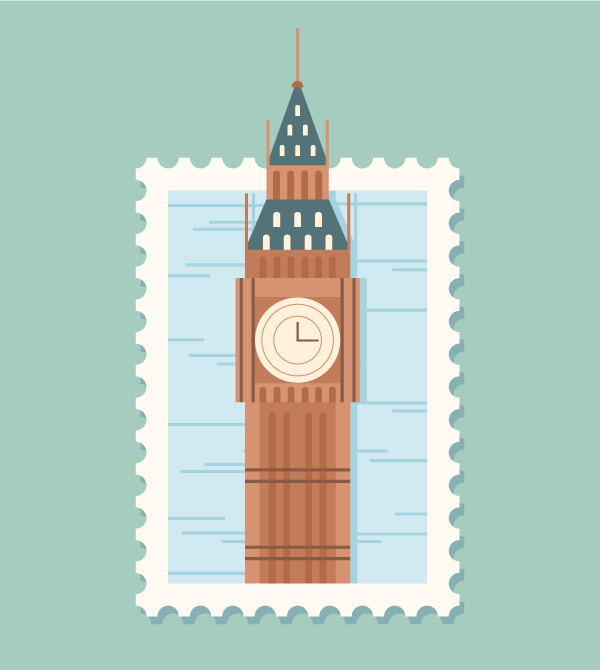
Let’s start with the stamp. Take the Rectangle Tool (M) and create a 300 x 425 px white shape.
Step 2
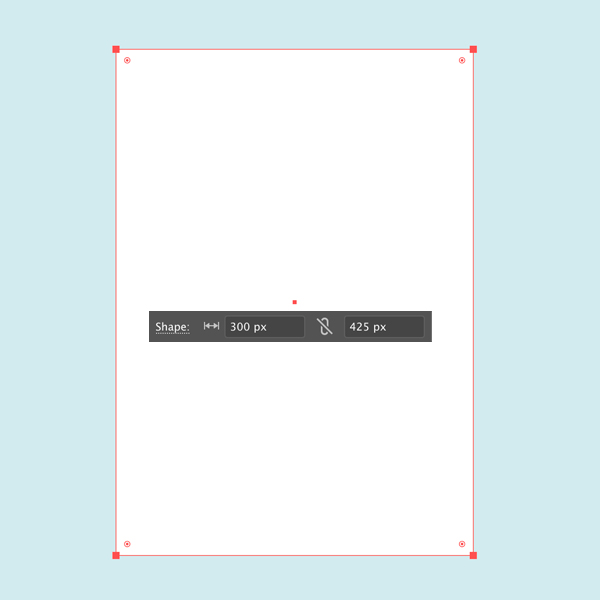
Now we’ll create a perforated edge to make it look like an actual postage stamp. Copy (Control-C) the rectangle and Paste in Front (Control-F). Set its Fill color to None in the Color panel and the Stroke color to white.
Open the Stroke panel (Window > Stroke) and set the Weight to 20 pt. In the bottom of the Stroke panel check the Dashed Line box and set the dash to 0 pt and the gap to 30 pt.
Set the Cap to Round Cap to turn the dashed outline into circles instead of rectangles. Also make sure that you have the following option selected: Aligns dashes to corners and path ends, adjusting lengths to fit.
Now let’s turn the stroke into curve by going to Object > Flattern Transparency. From here, set the balance slider to 100 Vectors and leave all other settings as default.
Great! Now all the circles are editable curves.
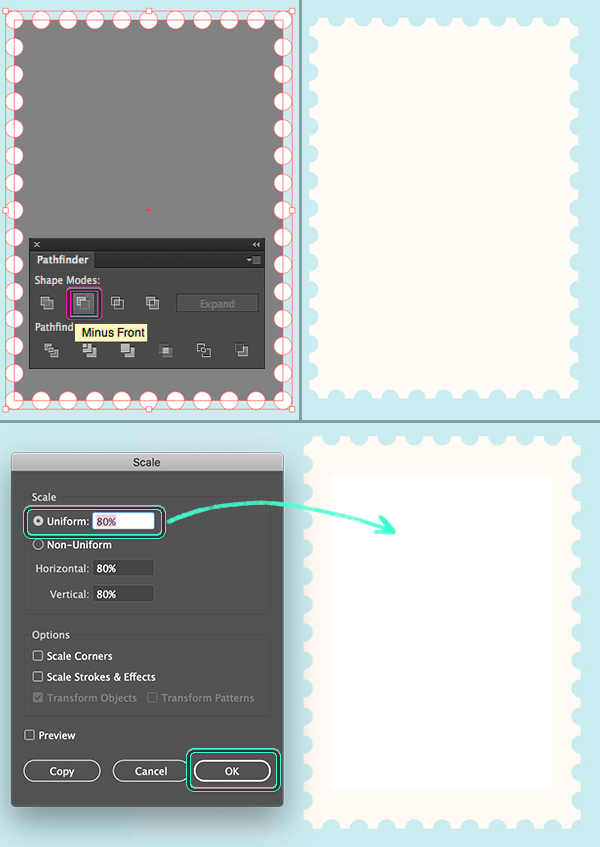
Step 3
Now we have two shapes. Firstly, let’s select the rectangle that we’ve created in Step 1 and Duplicate it (Control-C > Control-F). Keeping the copy selected, double-click the Scale Tool icon in the Tools panel and set the Scale to Uniform: 80%. Now the copy is slightly smaller.
Let’s cut the circles out to make a perforated edge. Select the larger rectangle together with the dots and click Minus Front in the Pathfinder panel. There we have it! Now we can put a smaller copy on top to make it visible. Change the Fill color of the perforated rectangle to a slightly darker beige.
Step 4
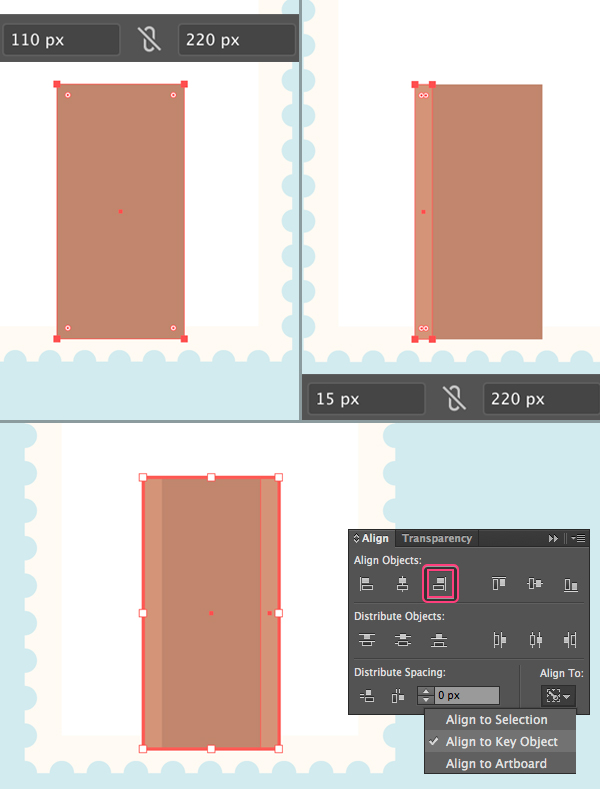
Let’s create the clock tower! Start by making a 110 x 220 px brown rectangle. Don’t worry if it doesn’t fit the stamp yet, we can align it later.
Duplicate the shape and squash it, attaching the copy to the left side and making its color lighter. Now Duplicate (Control-C > Control-F) this narrow shape and let’s align it to the opposite side of the rectangle with the help of the Align panel. Select the narrow shape together with the rectangle and click the rectangle once again to make it a Key Object (you will see a thicker selection around it). Click Horizontal Align Right to stick it to the right edge. Voila!
Step 5
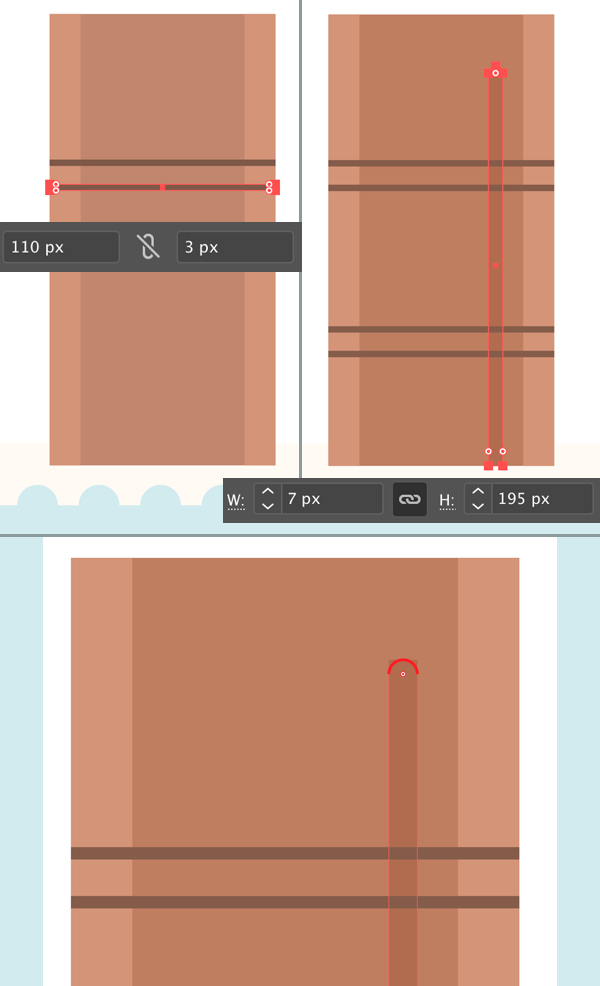
Continue adding decorative elements to the tower. Use the Rectangle Tool (M) to make a 110 x 3 px dark-brown shape. Make it fit the tower by aligning it. Copy the shape by selecting it with the Selection Tool (V) and dragging down while holding Alt-Shift.
Add a couple more dark-brown stripes and position them as shown in the image below.
Now let’s draw some vertical stripes as well. Use the Rectangle Tool (M) to create a 7 x 195 px brown rectangle and place it beneath the dark stripes by rearranging the objects in the Layers panel.
We can make the top of the stripe slightly rounded. Select both top anchor points with the Direct Selection Tool (A) and pull the circle marker of the Live Corners.
Step 6
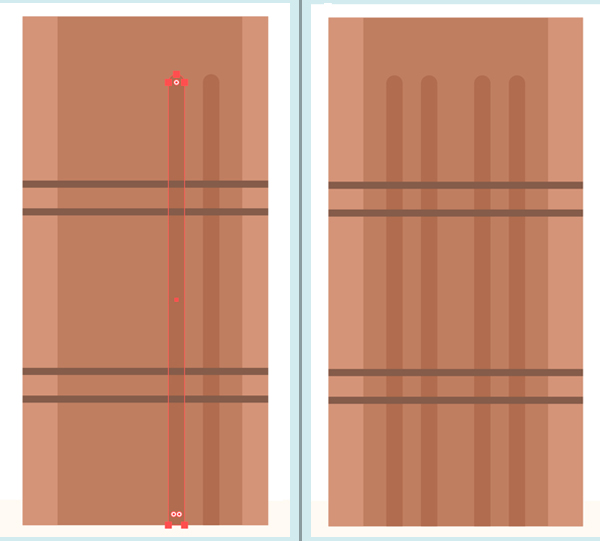
Duplicate the stripe by selecting it with the Selection Tool (V) and dragging to the left while holding Alt-Shift.
Add more copies as shown in the screenshot below.
Step 7
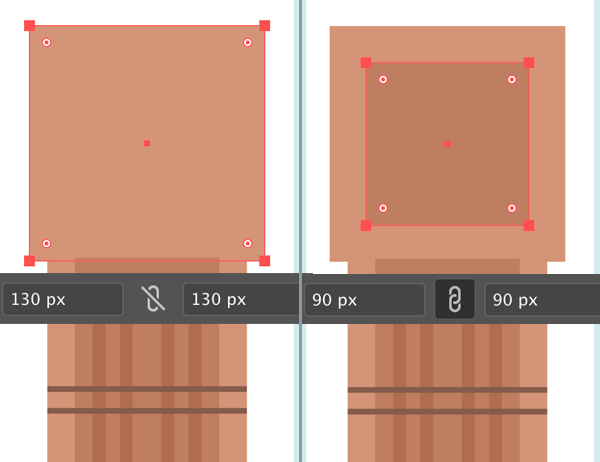
Let’s move on and the create the square part with the clock. Use the Rectangle Tool (M) while holding down Shift to create a 130 x 130 px square. Duplicate the square and make the copy slightly smaller (90×90 px) and darker.
Step 8
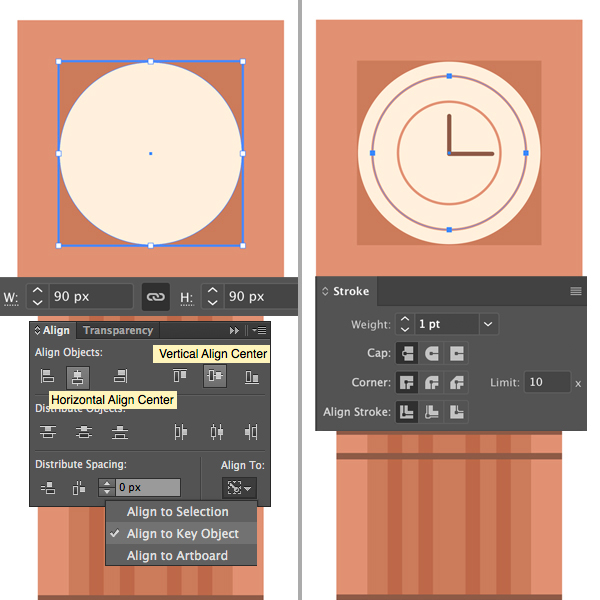
Now we’ll depict the clock face. Use the Ellipse Tool (L) to make a 90 x 90 px circle. We can align it to the square with the help of the Align panel using the square as the Key Object.
Decorate the clock with a couple of circles with thin outlines. Don’t forget to add the hands of the clock using the Line Segment Tool (/) or the Pen Tool (P).
Step 9
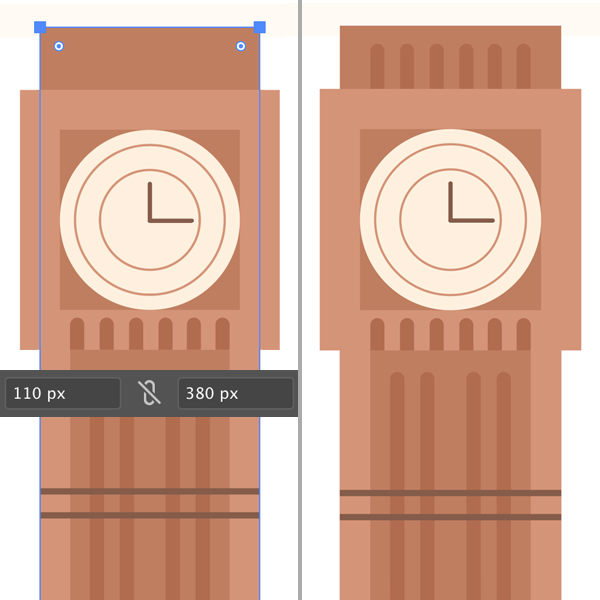
Let’s design the top part of the tower. The easiest way to preserve the right width and keeping things aligned is to duplicate the base of the tower and pull the copy up, above the clock.
Add rectangles with rounded tops for decoration to make our Big Ben more true to life while keeping it simple and elegant.
Step 10
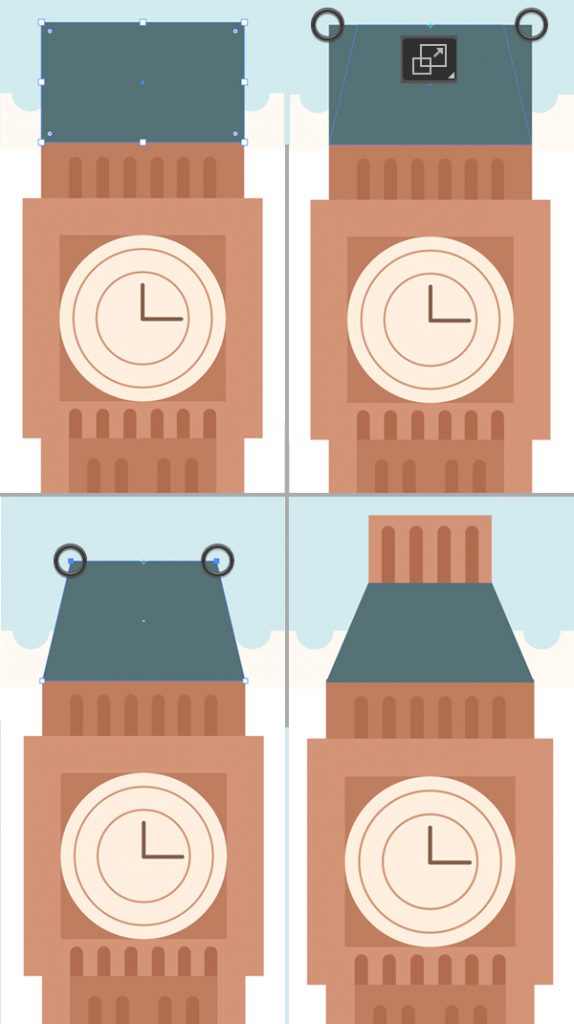
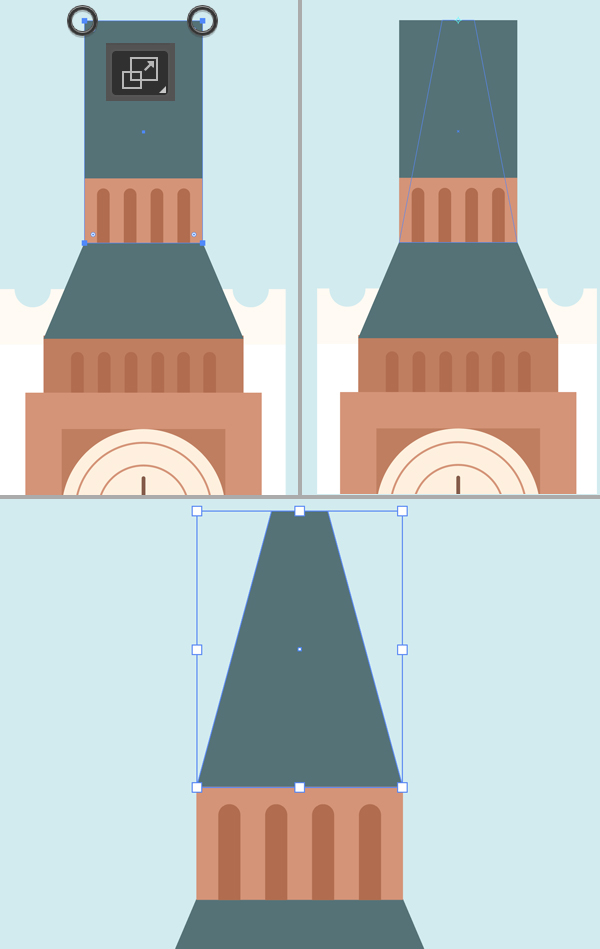
Now we’ll create the roof on top of the tower. Duplicate the top shape and resize it once again so that it fits the width of the tower. Change the Fill color to dark-green.
Let’s make the top of the roof narrower. Select both top anchor points with the Direct Selection Tool (A) and use the Scale Tool (S) to move the points closer to each other.
Add a smaller piece of the tower on top of the roof. Don’t forget to decorate it with rounded rectangles.
Step 11
Let’s finish up with the roof. Place a tall rectangle on top for the tower. This will be the tallest part of the roof with a spire. Select its top anchor points and use the Scale Tool (S) again to make the top edge very narrow.
Step 12
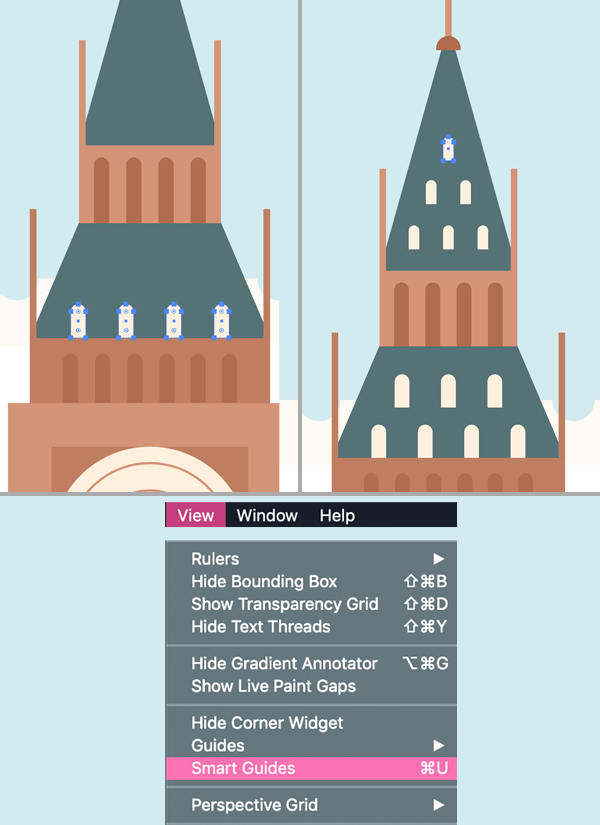
Create some narrow brown rectangles for the spires at the corners of the roofs. You can enable the Smart Guides in the View menu to make it easier to locate the objects.
Use the Rectangle Tool (M) to create a small white rectangle for the roof window. Make its top part rounded with the help of the Direct Selection Tool (A) and Live Corners.
Select the window with the Selection Tool (V), hold down Alt-Shift and drag it to the side to make a copy. Press Control-D a few times to repeat your last action, creating more copies. Arrange the windows as shown in the image below.
Step 13
Our Big Ben is almost ready! Let’s make some final touches. I’ve added a few dark vertical stripes by both sides of the clock face. I’ve also changed the background color and filled the white part of the stamp with blue color.
If you want to make a simple shadow beneath the stamp, just Copy (Control-C) your stamp, Paste in Back (Control-B) and move the copy down and to the right a bit, filling it with a darker color.
Group (Control-G) all the elements of Big Ben and make sure you’ve aligned the bottom part of the tower to the bottom part of the blue part of the stamp with the help of the Align panel.
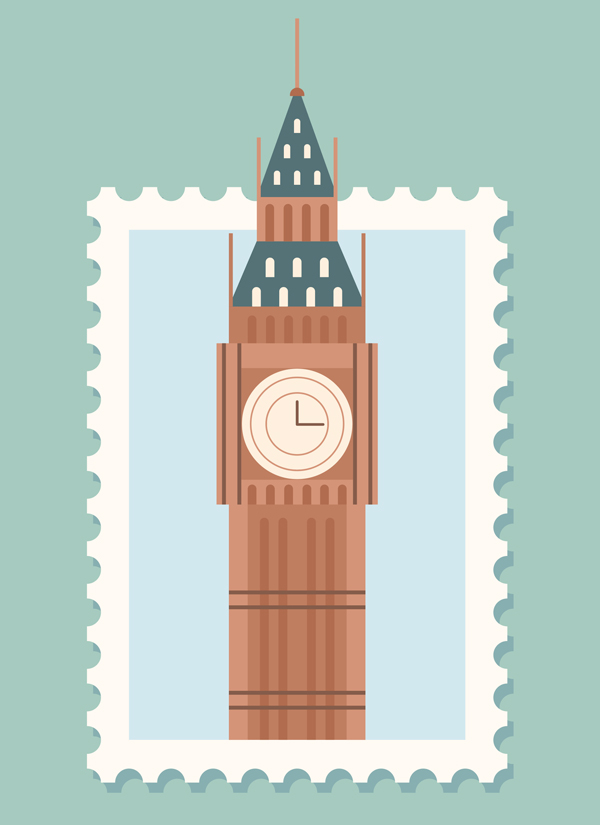
Congratulations! Our Big Ben Postage Stamp is Finished!
Great work! Our Big Ben postage stamp looks almost complete! We can add some thin blue stripes on the background behind the clock tower to make it a bit more detailed or add some other minor details to the composition to your liking.
I hope you’ve enjoyed following the tutorial and learned some new tips and tricks that will be useful for your future projects!
Happy drawing!
Author: Yulia Sokolova
2D/3D artist and tutorial instructor, focusing on character creation, icons, lettering design, and illustrations.


You ave an extremely good layout for your blog i want it to use on my internet site also.