 This time we’ll be using basic geometric shapes and various tools of Adobe Illustrator to create a simple and appealing cartoon character – a green frog! Follow this tutorial and let’s learn drawing cute animals together!
Tutorial Details
- Program: Adobe Illustrator CS6 – CC
- Difficulty: Intermediate
- Topics Covered: Shape Building, Stroke Panel, Offset Path
- Estimated Completion Time: 20 minutes
Final Image: Cute Frog Vector
Step 1
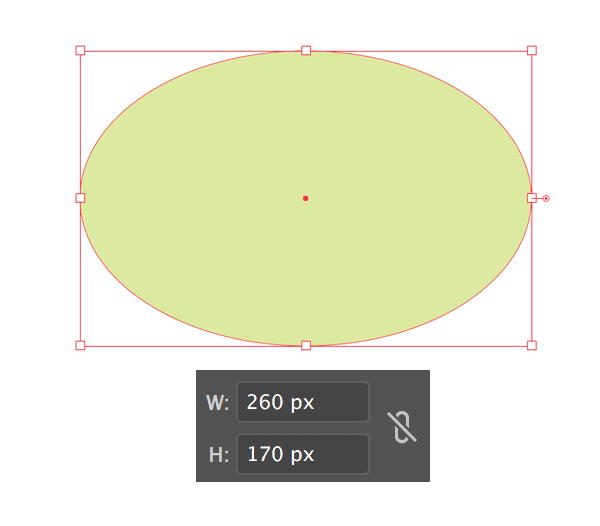
Let’s start from the head of our cute frog vector. Take the Ellipse Tool (L) and make a 260 x 170 px light-green shape.
Step 2
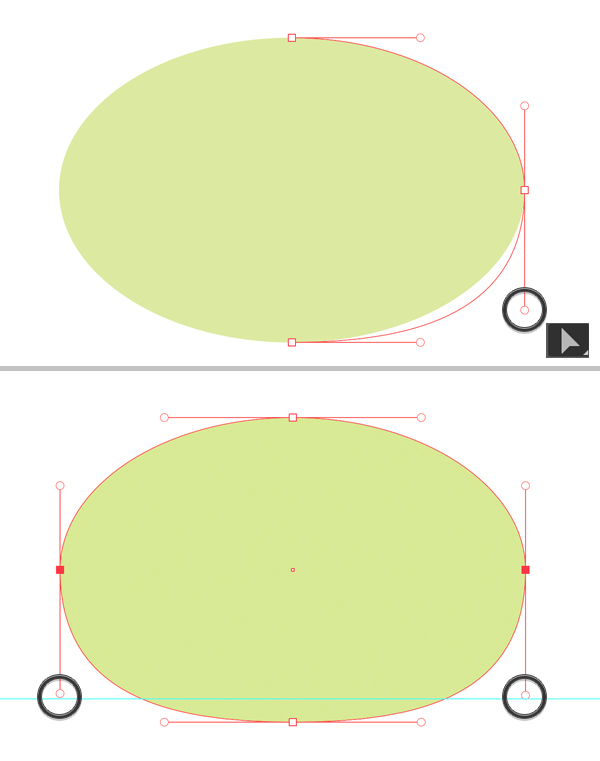
Take the Direct Selection Tool (A) and select the anchor point on the right. Click the bottom handle and let’s drag it down a bit, making the shape more squared and flat in the bottom. Repeat the same for the opposite side of the ellipse.
Use the Guides (Control-R and drag the horizontal line on the canvas) to make it easier to align the handles.
Step 3
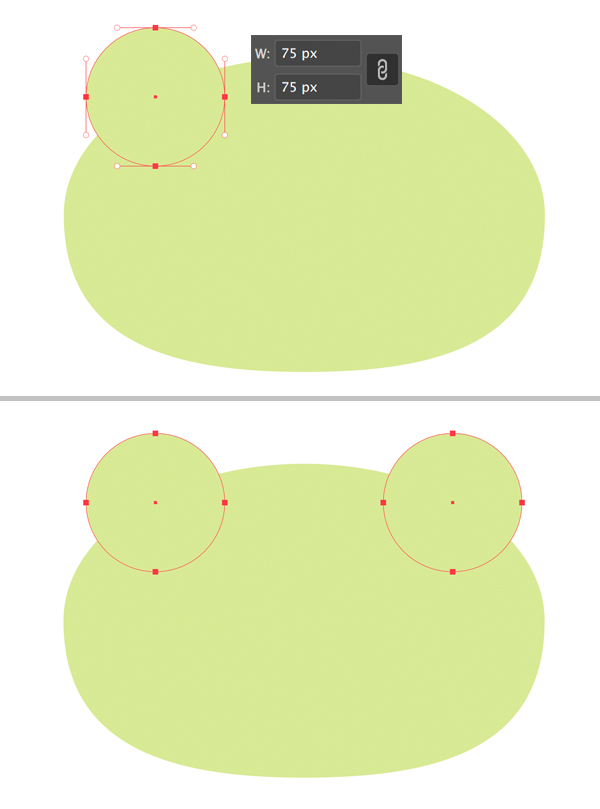
Let’s add the eyes using the Ellipse Tool (L). Create a 75 x 75 px circle and place it on top of the head.
Duplicate the circle (Shift-Alt and drag) to create the second eye.
Step 4
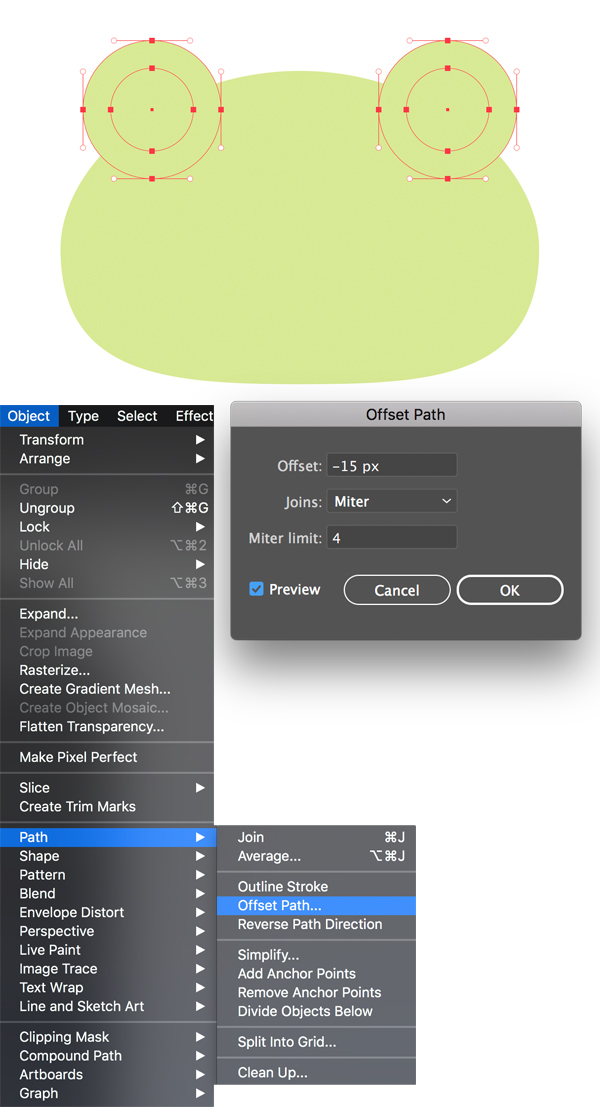
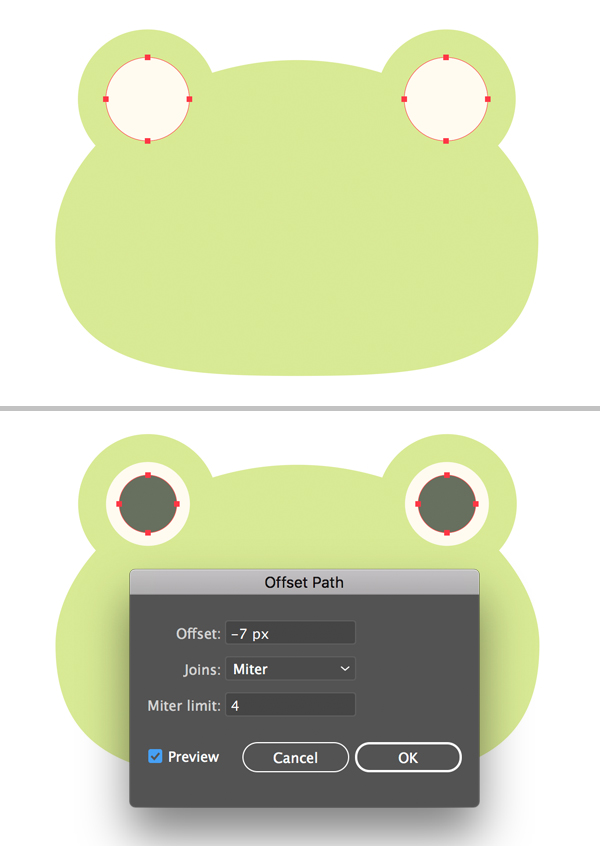
Select both circles and go to Object > Path > Offset Path. Set the Offset value to -15 px to create new circles inside the eyes.
Step 5
Fill the created circles with white color, depicting the eyeballs.
Select the white circles and go to Offset Path again. This time set the offset value to -7 px. Fill the created shapes with dark color for the iris.
Step 6
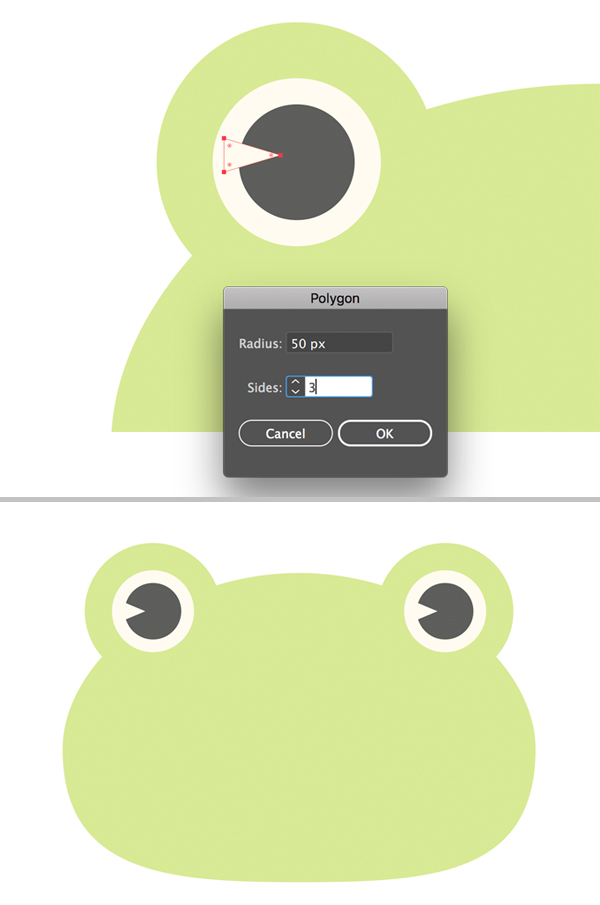
Let’s add a triangular highlight in the eye. First of all, switch to the Polygon Tool (you can find it in the same drop-down menu as the Rectangle Tool). Double-click the Polygon Tool in the Tools panel and set the Sides value to 3. Create a small white triangle and place it on top of the eye as shown in the image.
Group (Control-G) all elements of the eye and place the copy (Shift-Alt and drag) on the opposite side of the head.
Step 7
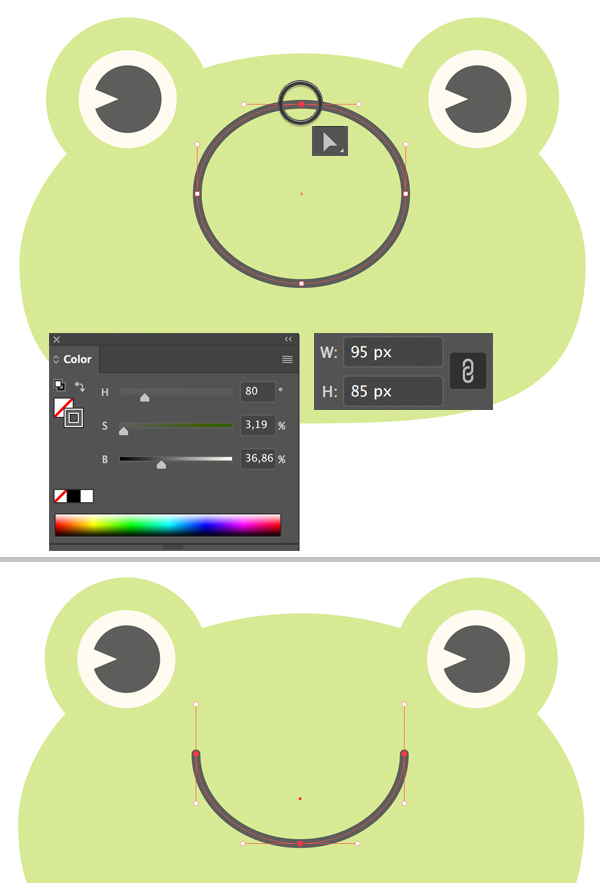
Now we’ll create a mouth. Make a 95 x 85 px ellipse and set the Stroke color to dark-grey in the Color panel. Set the Fill color to None.
Select the top anchor point with the Direct Selection Tool (A) and delete it. Now we have only the bottom half of the ellipse that forms a smile.
Step 8
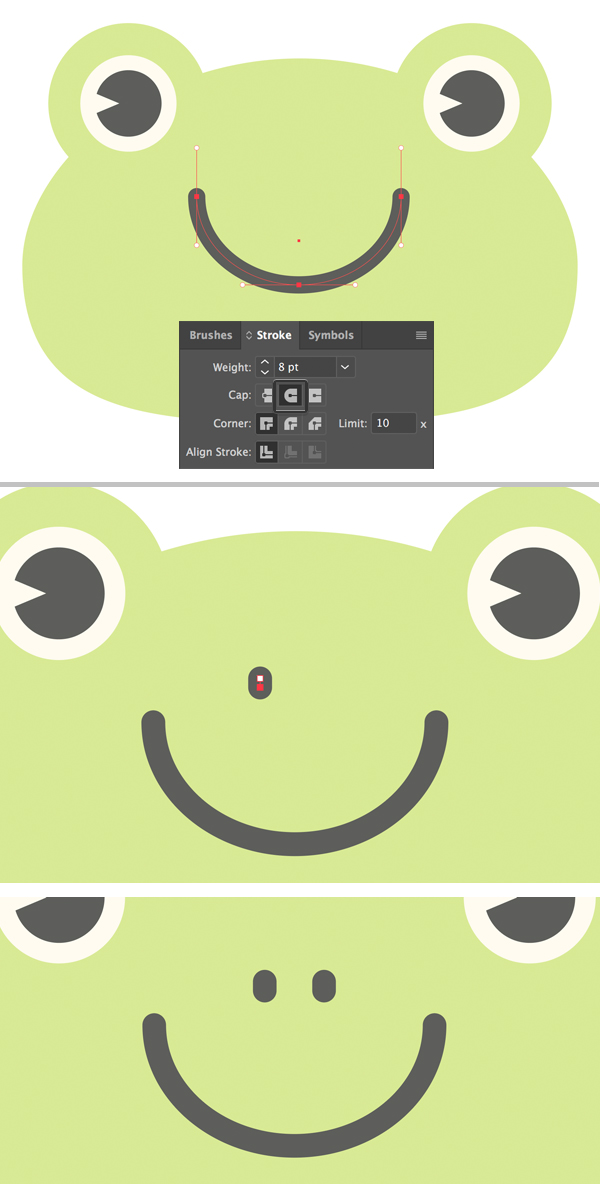
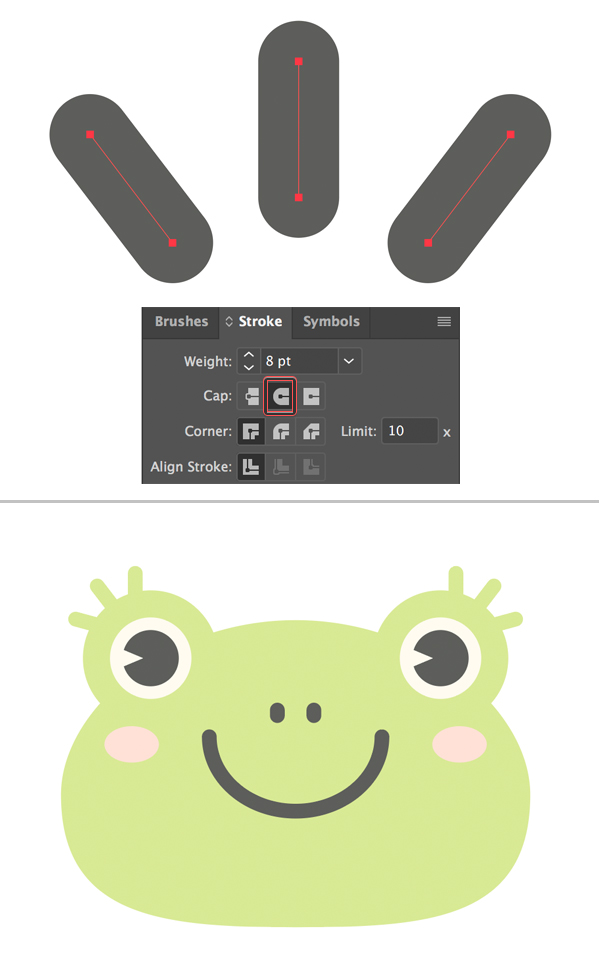
Keeping the mouth shape selected, open the Stroke panel (Window > Stroke) and set the Weight to 8 pt, Cap to Round Cap. This way we make the stroke thicker.
Use the Pen Tool (P) or the Line Segment Tool (\) to make a short stroke with rounded caps for the nostril.
Add a second nostril as well.
Step 9
Use the Ellipse Tool (L) to make a couple of pink shapes for the blush on the cheeks. This element always helps to make cartoon characters cuter.
Step 10
Let’s add a final stroke to our character, making it more detailed. Use the Pen Tool (P) or the Line Segment Tool (\) to draw a straight line. Set the Weight to 8 pt and Cap to Round Cap in the Stroke panel. Copy the line twice and rotate the copies in opposite directions to create stylised eyelashes.
Set the Stroke color to the same light-green as we have for the head and attach the eyelashes to the top of the eyes.
Yay! Our Cute Frog Vector is Finished!
Awesome work, guys, we’ve finished our character! I hope you’ve enjoyed following this tutorial and discovered some new tips and tricks for your future works.
Have fun!
Author: Yulia Sokolova
2D/3D artist and tutorial instructor, focusing on character creation, icons, lettering design, and illustrations.





Interesting read , I am going to spend more time learning about this subject
I wish to show my admiration for your kind-heartedness in support of women who actually need assistance with the idea. Your special dedication to getting the message all around appears to be wonderfully productive and has permitted some individuals much like me to reach their ambitions. Your personal important key points entails a great deal a person like me and much more to my colleagues. Warm regards; from all of us.
Hey! I simply want to give an enormous thumbs up for the good info you’ve right here on this post. I shall be coming again to your blog for extra soon.