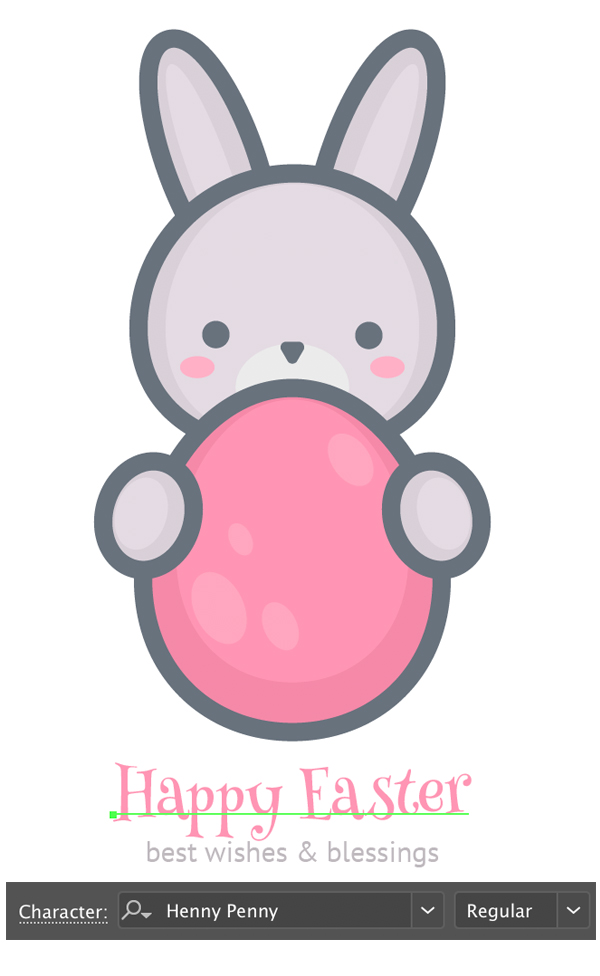
 In this tutorial we’ll be creating a cute Easter bunny, holding a colorful egg. In ten easy steps, you will learn to work with geometric shapes, adjust Stroke settings, how to add details to a flat outlined image and how to turn an isolated icon into a finished composition by adding text. Let’s get started and make an Easter card!
Tutorial Details:
- Program: Adobe Illustrator CS6-CC
- Difficulty: Beginner
- Topics Covered: Shape Building, Align Panel, Stroke panel, Type Tool
- Estimated Completion Time: 15 Minutes
Final Image: Cute Easter Bunny
Step 1
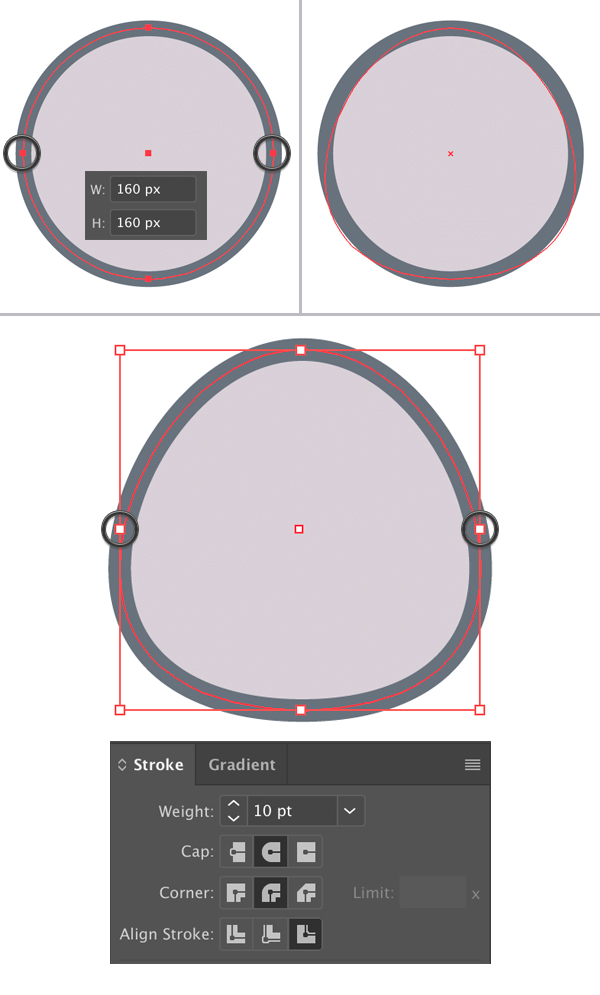
Let’s start from the head of our Easter bunny. Take the Ellipse Tool (L), hold Shift and make a 160 x 160 px circle.
Switch to the Direct Selection Tool (A) and select both left and right anchor points by holding Shift and clicking each of them. Drag the points a few pixels down to make the head more egg-like.
Set its Fill color to light-grey and its Stroke color to dark-grey in the Color panel.
Open the Stroke panel (Window > Stroke) and set the Weight to 10 pt, Align Stroke to Outside.
Step 2
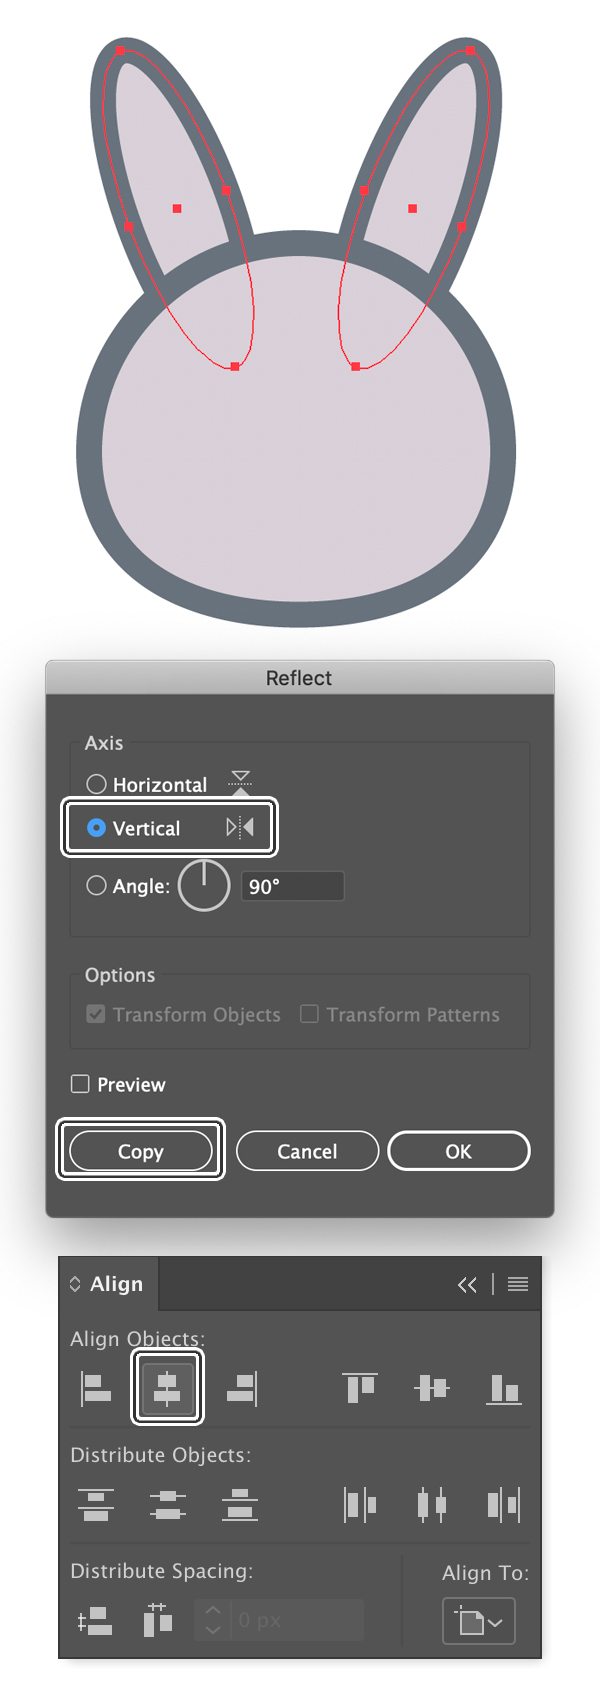
Now we’ll add the ears by using the Ellipse Tool (L). Make a 40 x 130 px ellipse, applying the same Stroke and Fill settings as we had for the head.
Rotate the ear 20 degrees and place it behind the head by pressing Shift-Control-[ to Send to Back.
Step 3
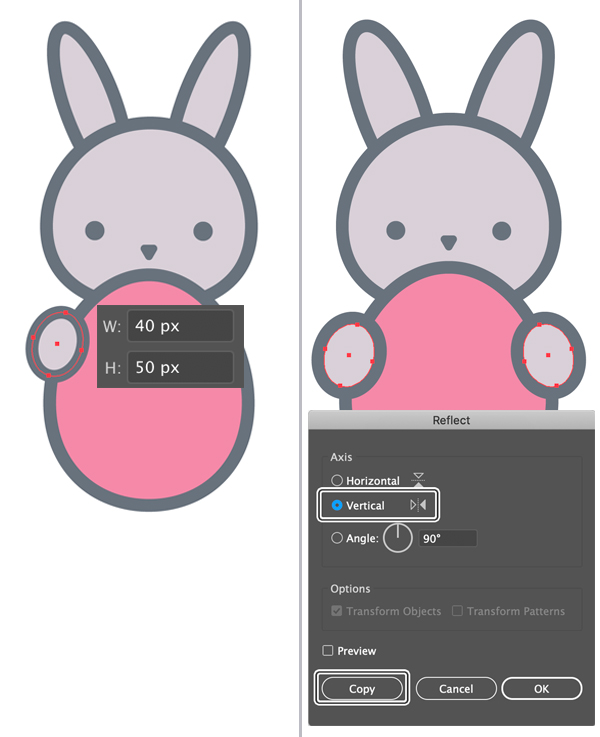
Let’s use the Reflect Tool (O) to create a second ear. Double click the tool icon while the first ear is selected, set the Axis to Vertical and click Copy to create a mirrored ear.
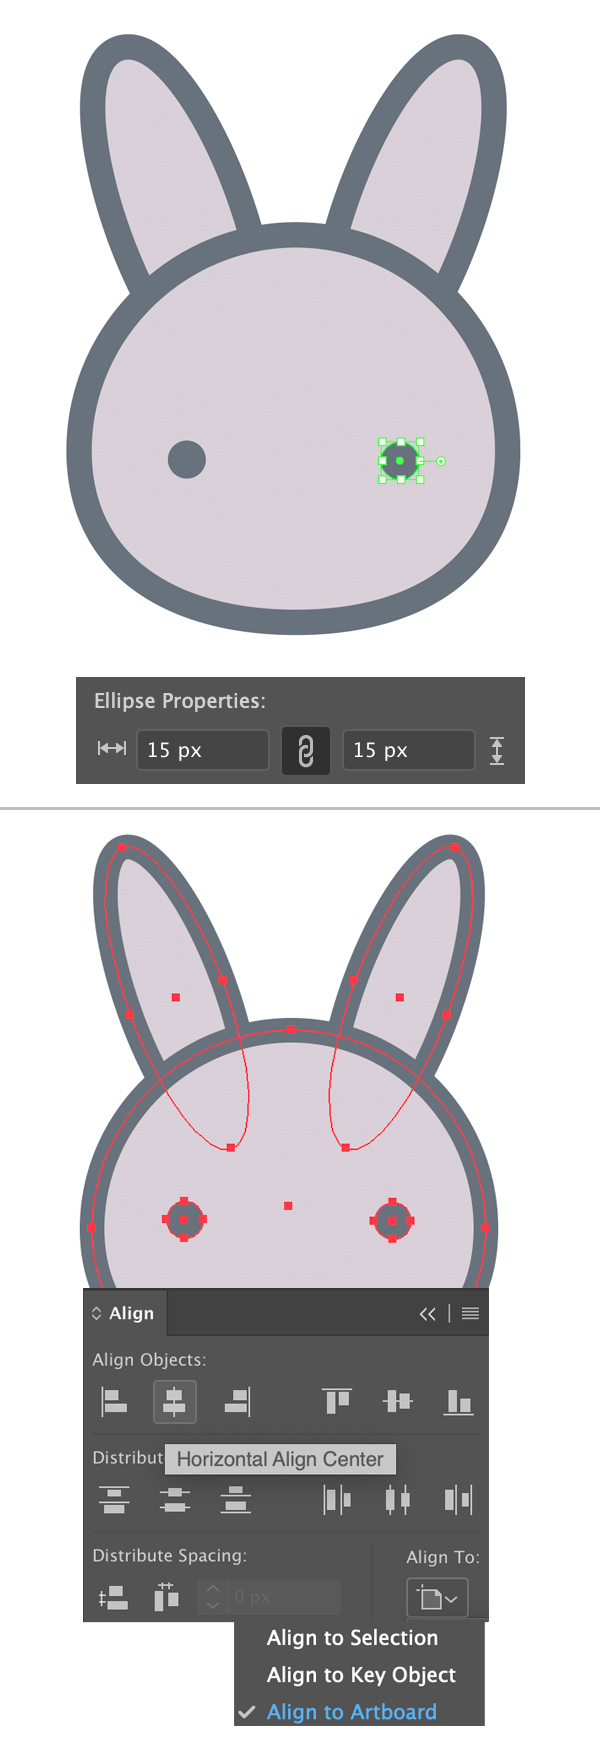
Group (Control-G) both ears and make sure that everything is perfectly centered by selecting all the objects and clicking Horizontal Align Center in the Align panel (Window > Align).
Step 4
Create another circle of 15 x 15 px size for the eye. Add a second eye and Group them.
Center everything using the Align to Artboard option.
Step 5
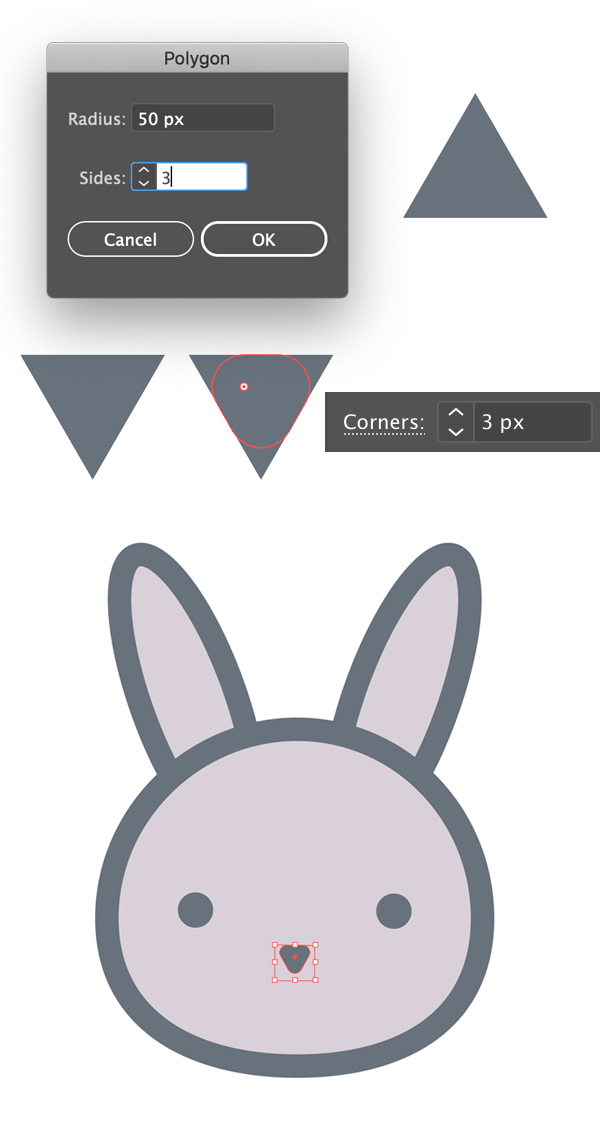
Let’s make a nose from a triangle. Find the Polygon Tool in the Tools panel and double-click it to create a 3-sided shape.
Turn your triangle upside down and use the Direct Selection Tool (A) to make the corners slightly rounded by pulling the circle marker of the Live Corners or setting the value manually in the control panel on top. I set the Corners value to 3 px.
Adjust the size of the nose to make it fit the face.
Step 6
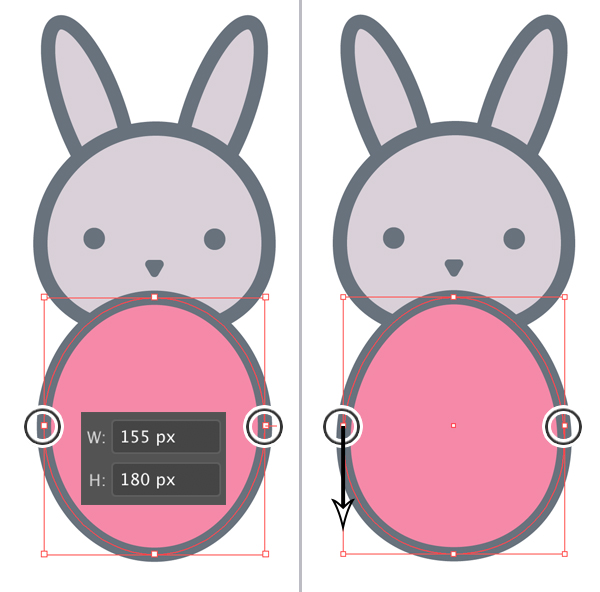
Now let’s make an Easter egg! Use the Ellipse Tool (L) again to create a 155 x 180 px oval. Apply the same Stroke settings as we had before but this time set the Fill color to pink.
Move the side anchor points down a bit using the Direct Selection Tool (A) to give the egg its proper shape.
Step 7
Draw a 40 x 50 px grey oval for the paw and place it above the egg, as shown in the image below. Rotate the paw slightly.
Use the Reflect Tool (O) to flip the paw to the other side, creating a copy.
Step 8
Now we’ll add some simple details to our bunny, depicting highlights.
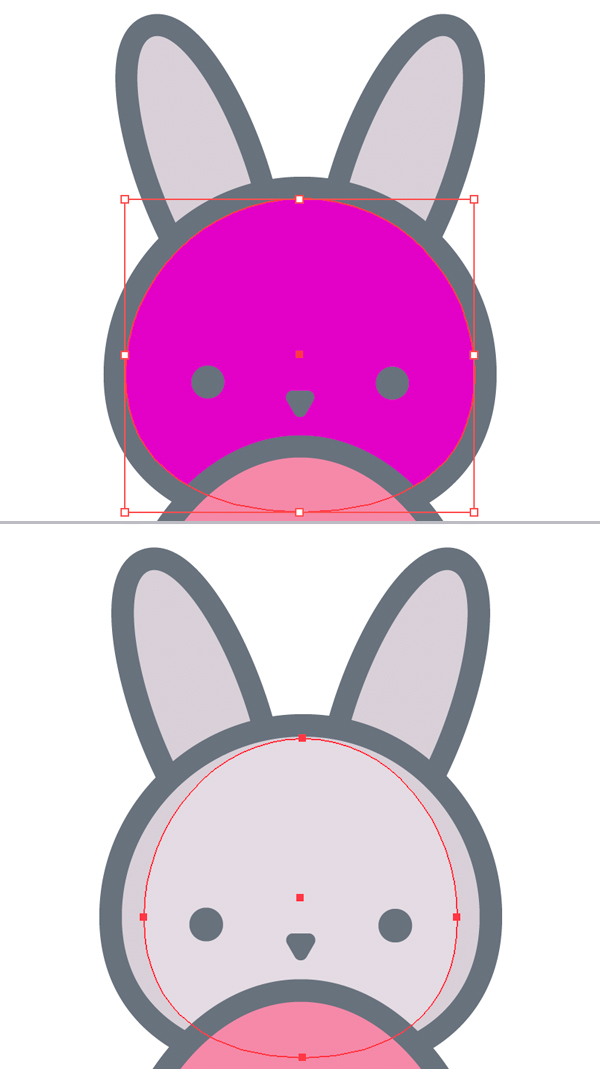
Copy (Control-C) the head and Paste in Front (Control-F). Set the Stroke to None in the Color panel. This way we have only the Fill (I’ve shown the copy in magenta color to make it more clear).
Squash the copy a bit to make it narrower and make its Fill color a bit lighter grey.
Step 9
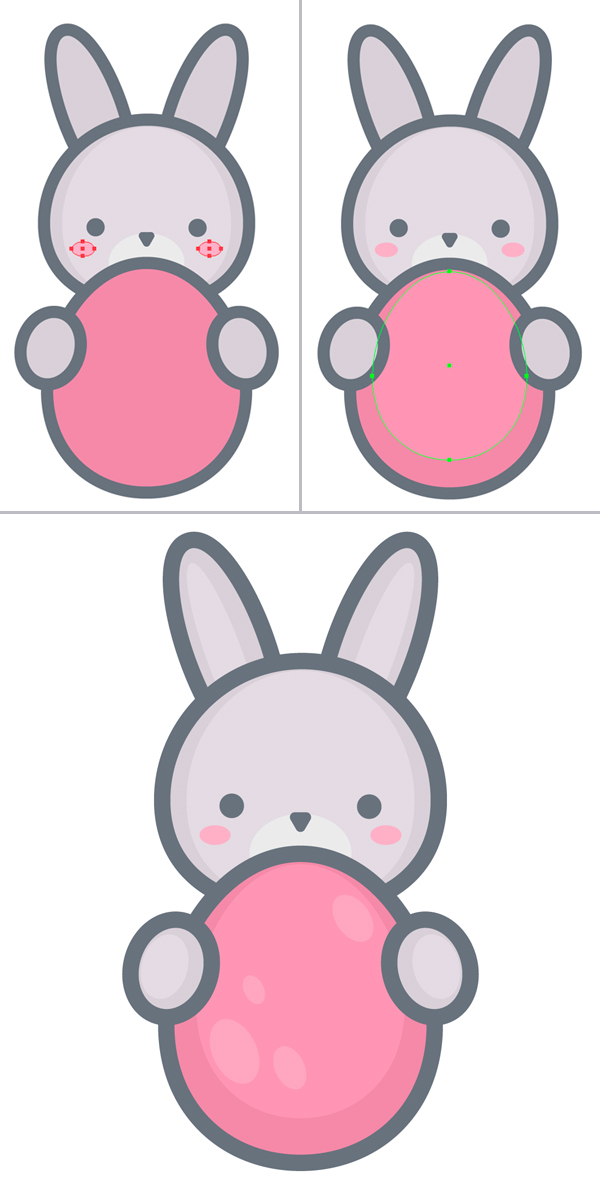
Add more details to all the elements of the bunny: pink ovals on the cheeks for the blush, lighter ovals on the egg, ears and paws for the highlights and bright-pink spots on the egg to make it look more intricate.
Step 10
Let’s finish up with the composition by adding a simple text in the bottom by using the Type Tool (T). Here I’m using a free Henny Penny font for a playful look.
Congratulations! Our Cute Easter Bunny Card is Finished!
And there we have it! You can continue adding minor details such as leaves or flowers, but try not to overload the card and not to make it look too noisy. I decided to finish up by just adding a plain background of a light-green color, reminding of a fresh spring grass.
I hope you’ve found this tutorial useful and discovered some new tips and tricks for yourself.
Have fun and Happy Easter!
Author: Yulia Sokolova
2D/3D artist and tutorial instructor, focusing on character creation, icons, lettering design and illustrations.

