 I use multiple Artboards on my Illustrator documents consistently and don’t know how I could work without them. I use them for versioning, multiple concepts, logo variations and more. If you’re like me, sometimes navigating multiple Artboards on a document can get cumbersome. Luckily, there is a keyboard shortcut!
Vector Freebies! 14 Exclusive Floral Vector Stamps

Asmaa Murad, from Aivault, has created an awesome set of floral stamps for Vectips! I quickly got lost in creating scatter brushes, patterns, and more with the 14 Floral Vector Stamps. Download the set and see what you can come up with! Post links in the comments to your creations!
Create a Grimy Text Treatment with a Pen Tablet

In this tutorial I will show you how to create a grimy text treatment utilizing Illustrator’s Blog brush, Live Paint, and a pen tablet. You can easily apply these techniques to other illustrates, type treatments and logos.
Change Default Fonts for New Documents
 Looking through some of my past work, I noticed I used the font Myriad a lot. At first I wondered why, then I came to the realization, it might be because Myriad is the default font in Illustrator. After that, I changed my default font for new documents. It is really easy to do, so read on to find out how.
How to Create A Wood Grain Texture in Adobe Illustrator
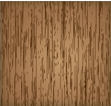
Last up for Vectip’s Texture Week is wood grain. The steps for this technique are very similar to the previous Brushed Metal Texture tutorial. It uses the same Graphic Pen effect but stretched a little more. It also uses the Warp Tool and Twirl Tool. Also like the other texture tutorials, this technique is easy and applicable in logos, icons, interfaces or pretty much anything.
How to Turn Your Sketches Into Vectors with Adobe Illustrator

In this tutorial I will show you how to turn your doodles and sketches into vectors! This tutorial uses custom brushes, the Paintbrush tool, Pen tool, and the Live Paint Bucket tool. Even if your not a huge fan of the cuteness, you can use these techniques for other illustrations, logos, and vector elements.
How to Create a Halftone Pattern in Adobe Illustrator
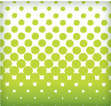
It used to be a time consuming process to create a halftone pattern. First, I would open a picture in Photoshop, convert it to grayscale, apply a halftone pattern effect, open it up in illustrator, trace it, and if didn’t get messed up somewhere in the process, I would use the halftone pattern in Illustrator. In Illustrator CS3 it is quite a bit easier to create halftone patterns without leaving Illustrator.
