 Autumn is by far the most beautiful season of the year! Golden foliage, a blue sky and warm sweaters can’t help but inspire us to create something cozy and atmospheric. In this autumn composition tutorial, we’ll be using the Effects and Brushes of Adobe Illustrator to create a simple yet charming autumn forest scene with a mushroom, leaves and berries. Let’s begin!
Tutorial Details
- Program: Adobe Illustrator CS6 – CC
- Difficulty: Intermediate
- Topics Covered: Shape Building, Paintbrush Tool, Brushes panel, Warp Effects
- Estimated Completion Time: 20 minutes
Final Image: Cozy Autumn Composition
Step 1
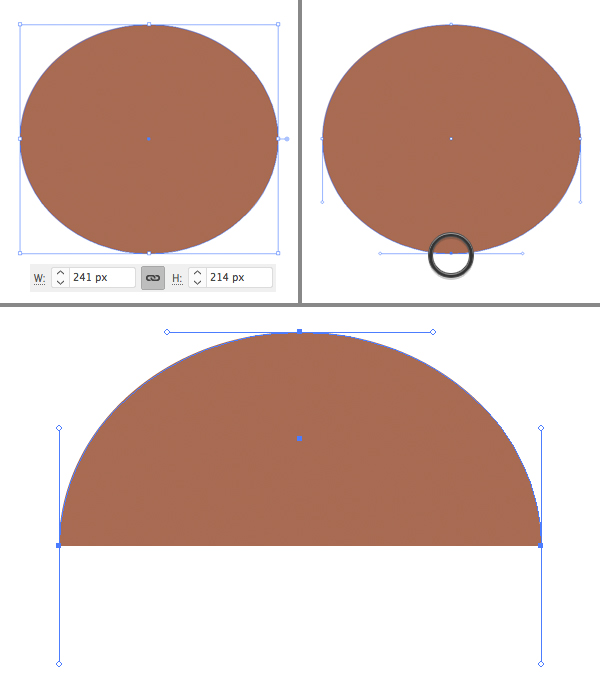
Let’s start our autumn composition illustration by making the cap of our mushroom. Take the Ellipse Tool (L) and create a 241 x 214 px brown shape. Switch to the Direct Selection Tool (A) and click the bottom anchor point of the ellipse. Press the Delete key (Backspace on Mac) to delete the point and the bottom half of the shape.
Step 2
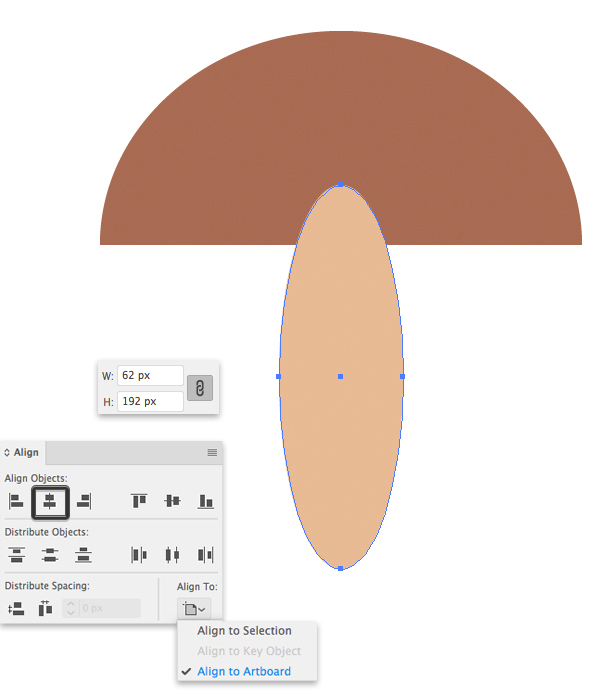
Now let’s create a 62 x 192 px beige ellipse for the stem. Let’s make sure that everything is perfectly centered. Select both shapes and head to the Align panel. Select Align to Artboard and click Horizontal Align Center.
Step 3
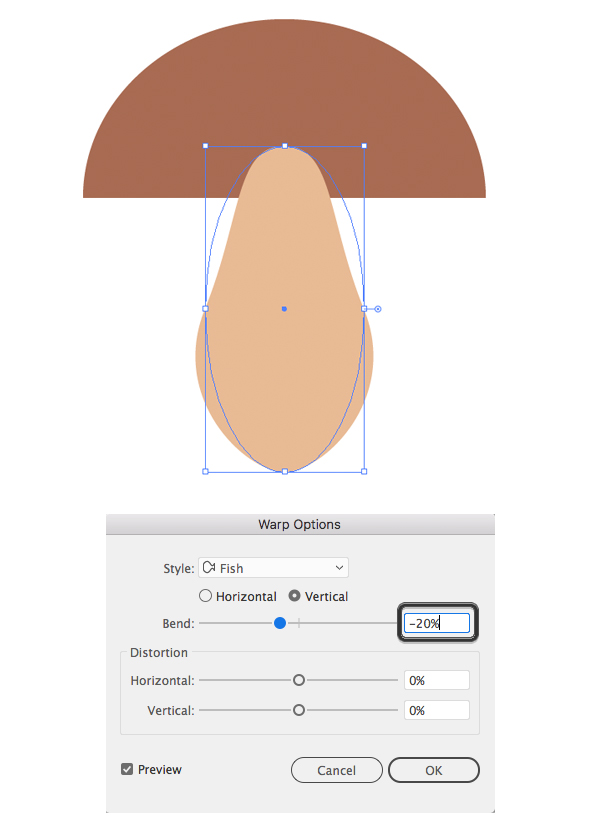
Let’s make the stem more bulged at the bottom. Select it and go to Effect > Warp > Fish. Set the Vertical Bend value to -20% and click OK.
Step 4
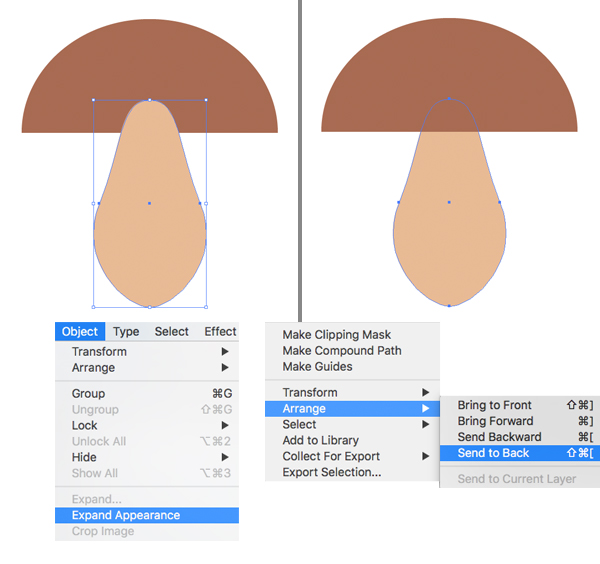
Now go to Object > Expand Appearance to apply the effect. Then right mouse click > Arrange > Send to Back, placing the stem beneath the cap of the mushroom.
Step 5
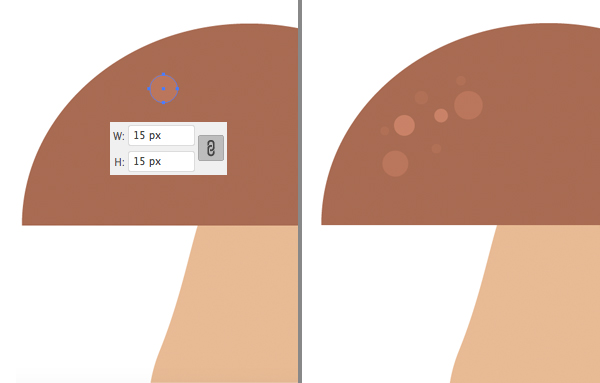
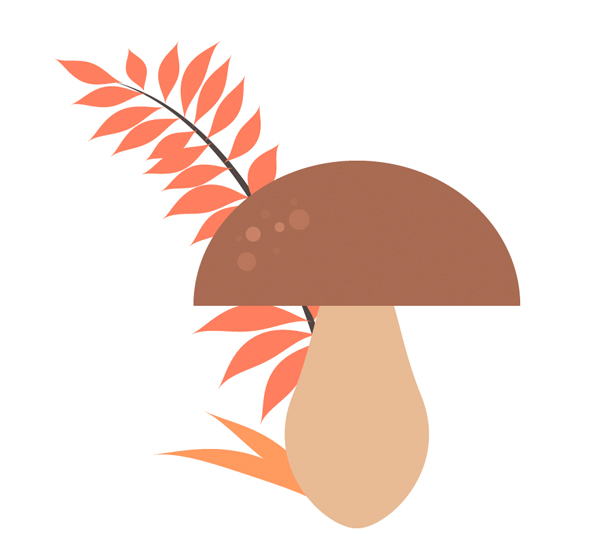
Let’s add subtle details to the mushroom. Use the Ellipse Tool (L) while holding down Shift to make a 15 x 15 px circle. Place it on top of the hat, making the spot slightly lighter by changing the Fill in the Color panel.
Add more spots, changing their color and size.
Step 6
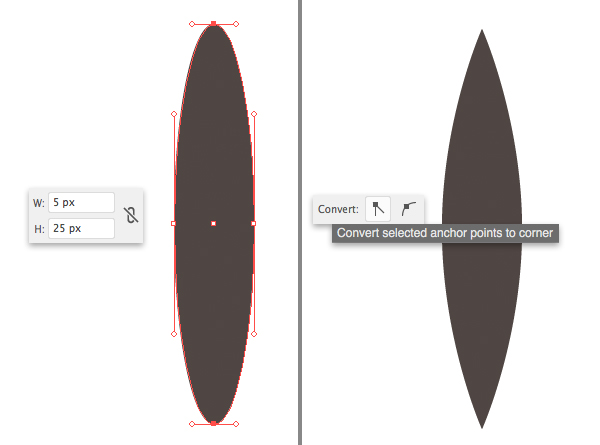
Now let’s create our own brush for the foliage! Start by creating a 5 x 25 px dark-grey ellipse. Select its top and bottom points with the Direct Selection Tool (A) and Convert Selected anchor points to corner. You can find the Convert function in the control panel on top, while the Direct Selection Tool (A) is active and the points are selected.
Step 7
Open the Brushes panel (Window > Brushes) and drag and drop the created shape there. Select Art Brush in the pop-up New Brush window.
Step 8
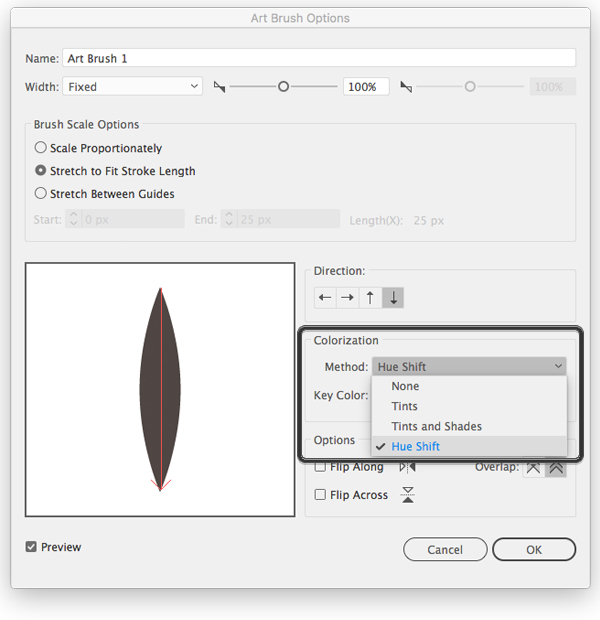
In the Art Brush Options window, leave all the options as default except the Colorization Method: set it to Hue Shift. That will allow us to select any color for our brush strokes.
We can access the Art Brush Options any time by double-clicking our brush in the Brushes panel.
Step 9
No autumn composition is complete without some colorful leaves! Let’s create a New Layer in the Layers panel and try our brush. Take the Paintbrush Tool (B) and make a stroke for the leaf stem.
Step 10
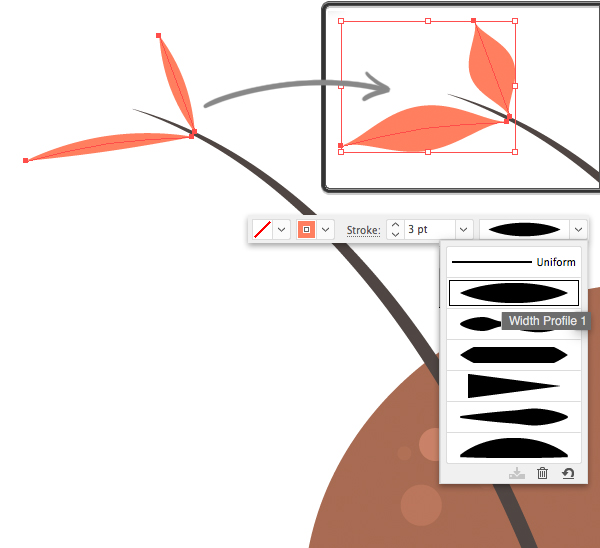
Use the same brush to make a couple of leaves at the tip of the stem. Change the stroke color to bright orange in the Color panel. We can change the Stroke size and the Width Profile in the control panel on top, this way changing the shape and size of our stroke.
Apart from that, we can select every stroke with the Selection Tool (V) and move/rotate it as any other shape. Last but not least, we can move and edit the anchor points with the Direct Selection Tool (A).
Step 11
Add more leaves and a pair of grass feathers in the bottom. Move the foliage layer beneath the mushroom layer in the Layers panel by clicking and dragging it. Now we can use these to layers to add new objects in the foreground and in the background.
Step 12
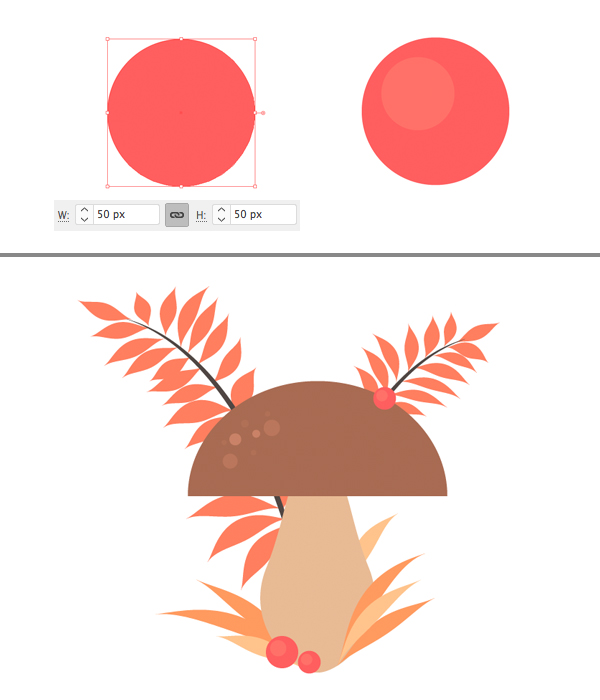
Use the Ellipse Tool (L) to create an even 50 x 50 px red circle for the berry. Place a smaller circle on top for the highlight.
Decorate our scene with berries and add more leaves and grass.
Congratulations! Our Cozy Autumn Composition is Finished!
Great result! I hope you’ve enjoyed following this tutorial and got inspired with the cozy autumn atmosphere.
Stay tuned and keep creating beautiful art!


