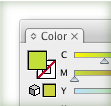
This trick is similar to the Compliment Color trick, but I use it so much, I had to share it. I use specific color modes for different projects, and found myself more comfortable mixing certain colors in certain color profiles. A quick way to switch between profiles in the Color Panel is to press Shift and Click on the Color Ramp. You can easily swap between CMYK, RGB, HSB, Grayscale and Web Safe RGB.
Category Archives: Tips and Tricks
Follow Vectips on Twitter
There are a great deal of vector tutorials, freebies, tricks, and tips out there on the web today. I would love to share some of the sites that I come across, but think a single post would be overkill. So I decided to create a Twitter account for Vectips. Follow Vectips to get some quick links of vectors around the web. You can also follow my Rype Arts account if you want.
Extract Paths From Mesh Shapes
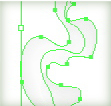
I love the results you can get when working with meshes, but sometimes I don’t love trying to edit them. When a path is converted to a Mesh Object, it is no longer a Path. This can get frustrating if you want the original path for other purposes. To extract the original Path, select the Mesh Object, go Object > Path > Offset Path and enter 0. Now you have a copy!
Site Changes
I’ve made some changes to the site. Probably most noticeable, is the advertising. I have started using BuySellAds.com, check them out for more info on purchasing ad space. I really want to keep the advertising to a minimum, but still need some revenue to keep the site running. I have also added Email Subscriptions to the feed and added Related Posts for better browsing.
Set Object’s Actual Size
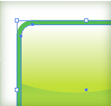
If you are ever needed an object with a stroke to have exact dimensions, you probably got frustrated very quick. By default, Illustrator doesn’t take into account the dimensions of a stroke. You can easily change this by going Illustrator > Preferences > General and check the Use Preview Bound box. Now, Illustrator will take into account the dimensions of strokes, brushes, effects, and so on.
Reverse Brush Strokes
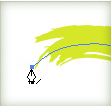
I love using the Brush Tool (b), but hate trying to change the direction of them. Finally I found a quick way to change the direction of a single brush stroke without affecting other strokes associated with the same brush. First, select the path and then click on a endpoint with the Pen Tool (p), creating a new direction toward that point. Sadly, this trick only works on open paths.
Hide Layers
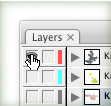
Here is another quick, but usefully tip. To isolate a layer in a complicated file, Option-click (Alt-click) the Visibility Icon on a certain layer to hide all other layers. Option-click (Alt-click) the Visibility Icon again to reveal all the layers. You can also Option-click (Alt-click) and drag across multiple layers to isolate more than one layer at a time.