 In today’s tutorial, we’re going to take a close look behind the process of creating a cowboy badge icon and see how we can create one of our own using nothing more than some basic geometric shapes that we will adjust here and there.
So, assuming you already have Illustrator running in the background, bring it up and let’s get started! Continue reading


 In the following tutorial, you will learn how to create a grungy web badge in Adobe Illustrator. For starters you will learn how to setup a simple grid and how to easily center the starting shapes using the Align panel. Next, taking full advantage of the Appearance panel and using some basic masking and vector shape building techniques, you will learn how to create the two main shapes. Moving on, using a built-in art brush and some new masking techniques, you will learn how to add a that grungy effect. Using some Type tools along with several Drop Shadow effects, you will learn how to add the text. Finally, you can learn how to easily recolor your entire web badge.
 In today’s tutorial, we’re going retro and learning how to create a floppy disk icon, using some of the basic shapes and tools you already work with on a daily basis.
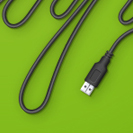 In the following tutorial, you will learn how to create a wire pattern brush and how to use it to create a nice USB vector text effect in Adobe Illustrator. For starters, you will learn how to set up a simple grid and how to create a bunch of pixel perfect shapes using basic tools and effects. Using basic blending and vector shape building techniques along with some simple Transform effects, you will learn how to create the usb connector. Finally, you will learn how to turn all these shapes into a simple pattern brush and how to create the USB vector text effect.